








INTRODUCTION
THE PLAY:
The Head Coach Playbook provides the tools, processes, and resources needed to successfully lead a Rally House store. As a Head Coach, you are responsible for driving results across all areas of the business while developing Team Members, creating memorable Guest experiences, and maintaining operational excellence. This playbook serves as a guide for the leadership responsibilities that support daily execution, long-term growth, and overall store success.
The responsibilities outlined throughout this playbook extend beyond completing tasks. They focus on business ownership, decision making, planning, accountability, and leadership. Whether reviewing store performance, conducting store visits, managing resources, supporting community events, fulfilling bulk orders, or executing operational processes, Head Coaches are expected to understand the business, identify opportunities, solve problems, and lead their team with confidence.
Strong Head Coaches use these tools and processes to proactively manage their store, support their Team Members, strengthen community connections, and ensure Rally House remains the destination for hometown pride and fan experiences.
IMPACT:
Effective leadership creates consistency, accountability, and results. When Head Coaches understand their business, utilize available resources, and execute processes effectively, stores operate more efficiently, Team Members are more engaged, Guests receive a better experience, and opportunities for growth increase.
The processes within this playbook support the four Foundations by helping leaders make informed decisions, maintain operational standards, strengthen community relationships, manage financial responsibilities, and develop future leaders. Consistent execution creates a stronger business, a stronger team, and a stronger Rally House brand.
Most importantly, great Head Coaches create an environment where Team Members can succeed, Guests feel welcomed, and the store is positioned to deliver both short-term results and long-term success.
ON FIELD TERMINOLOGY
- Head Coach: The Store Manager responsible for leading the overall business, developing Team Members, and driving results.
- Assistant Coach: The Assistant Store Manager responsible for supporting store leadership, execution, and Team Member development.
- Team Captain: A leader responsible for supporting daily execution, coaching Team Members, and maintaining standards.
- Team Member: Any Rally House employee who contributes to the Guest experience and store operations.
- Field Leader: District Managers and Regional Directors who provide support, coaching, accountability, and business direction.
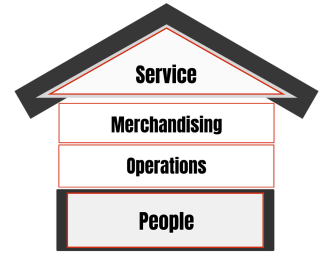
- 4 Foundations: The four key business functions used to evaluate store performance: People, Operations, Merchandising, and Service.
- W.O.P.: Wins, Opportunities, and Priorities used to assess performance, identify focus areas, and establish action plans.
- Root Cause: The underlying reason a problem or opportunity exists, used to develop effective solutions and long-term improvements.
- FAN: A service approach focused on learning about the Guest’s needs, identifying opportunities, and providing solutions.
- Rally House Party: The complete Guest experience created through energy, service, product knowledge, and execution.
- Business Ownership: Taking responsibility for store performance, decisions, execution, and Team Member development while proactively identifying opportunities and solving challenges.
NETSUITE
THE PLAY:
NetSuite serves as the primary command center for managing store operations, monitoring business performance, maintaining accountability, and supporting leadership decision-making. Head Coaches are expected to utilize NetSuite daily to review operational priorities, monitor store performance, investigate issues, communicate business needs, and maintain accurate records that support the overall health of the business.
The tools and reports within NetSuite provide visibility into key areas of store execution including financial accountability, operational compliance, incident documentation, store performance, sales trends, and leadership opportunities. Head Coaches should routinely review dashboard reminders, resolve exceptions, investigate discrepancies, analyze business trends, and ensure required reporting is completed accurately and on time.
Successful leaders do more than review reports. They use the information available to identify opportunities, diagnose root causes, prioritize actions, and make informed decisions that improve store performance. Whether researching an over/short, documenting an incident, reviewing camera footage, adjusting store hours, or analyzing team sales trends, Head Coaches are responsible for ensuring information is accurate, actions are completed, and follow-up occurs when needed.
NetSuite is not simply a system used to complete tasks. It is a leadership tool that helps Head Coaches understand their business, communicate effectively with Field Leaders and Corporate partners, and proactively manage opportunities and challenges within the store.
IMPACT:
Consistent utilization of NetSuite creates greater visibility, stronger accountability, and more informed decision-making throughout the business. By leveraging reports, dashboards, and operational tools, Head Coaches can identify issues sooner, monitor performance more effectively, and take action before challenges negatively impact Team Members, Guests, or business results.
Accurate reporting and timely follow-up help protect company assets, support financial integrity, maintain operational compliance, and ensure important business information is communicated appropriately. Processes such as over/short investigations, incident reporting, camera reviews, and store hour management help reduce risk while creating a safer and more accountable environment for Team Members and Guests.
NetSuite also provides valuable business insights that support strategic leadership. Reviewing team sales performance, operational metrics, and dashboard reports allows Head Coaches to make better decisions regarding staffing, merchandising, task prioritization, and resource allocation. These insights help leaders align daily execution with business needs and local market opportunities.
Ultimately, strong NetSuite execution supports all four Foundations. It strengthens People through accountability and coaching, supports Operations through visibility and compliance, improves Merchandising through data-driven decision making, and enhances Service by helping leaders focus resources where they will have the greatest impact. Head Coaches who consistently leverage NetSuite as a business tool are better equipped to lead their store, develop their team, and drive long-term success.
GAME PLAN
NetSuite Dashboard Overview
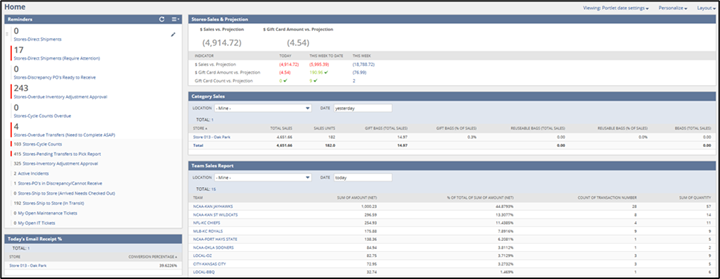
The NetSuite Dashboard is tool for the stores to increase efficiency and help with day to day planning. This tool will continue to evolve as processes are improved and created. The Dashboard is comprised of a series of portlets (the blue boxes on the screen). Each of these have a specific role. To refresh the NetSuite Dashboard, click on the refresh icon in each portlet to update the information that is displayed.
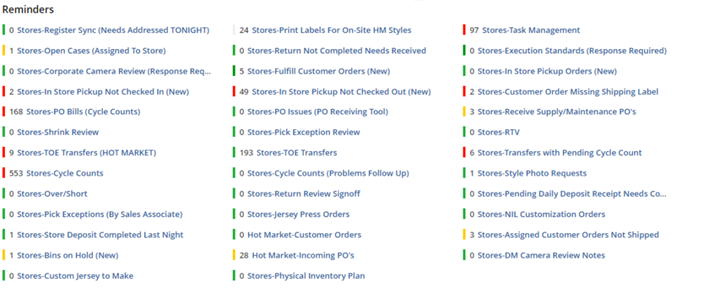
Reminders
These reports are specific to the store that is logged in. If a report has no information to report or has been completed then show as green or show with “0” on the report. Items that show yellow are becoming overdue. Items that show red are overdue or ready to be completed.
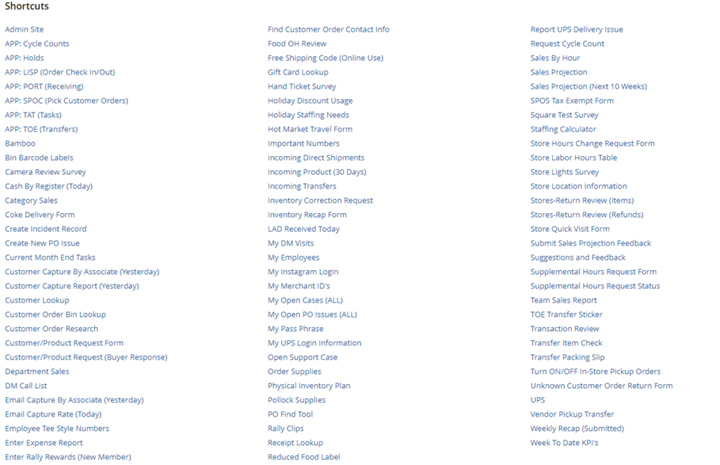
Shortcuts
The Shortcuts portlet allows quick access to tools, forms, or other websites that stores frequent.
Customer Capture
The store will need to select their market on the Customer Capture WTD portlet. This allows the store to see the overall customer capture percentage and how they rank compared to the market.
Store Sales this Week
This portlet allows the store to see the gross sales, count of transactions, sum of discount, and net sales.
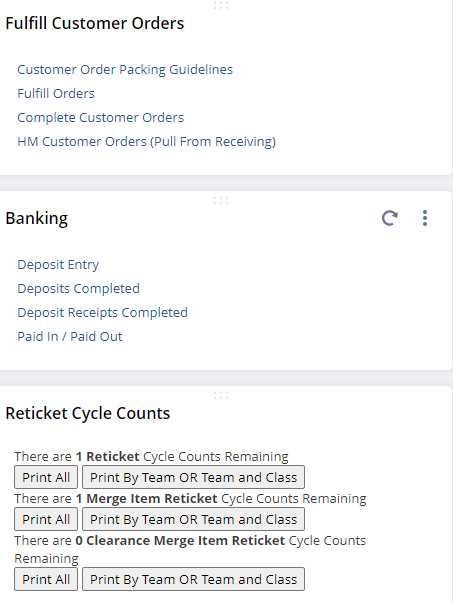
Other Portlets
There are other portlets that are on the NetSuite Dashboard. These portlets coincide with another operational task such as customer orders, cycle counts, or closing the registers.
Over/Shorts
When a deposit does not match the expected deposit or there is an overage or shortage from the registers less than -$10.00 or greater than $10.00 it creates an over/short. These discrepancies require research and explanations or resolution on a daily basis. The Stores-Over/Short report on the dashboard will act as a communication tool to clarify these differences.
Process
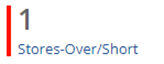
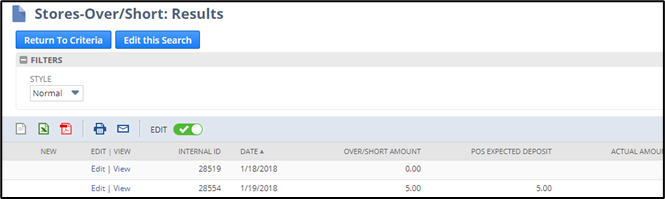
1. Click on the “Stores-Over/Short” link in the “Reminders” portlet on the dashboard.
- The report will be highlighted in red if there are over/shorts that require attention.
- This will prompt the “Stores-Over/Short” report.
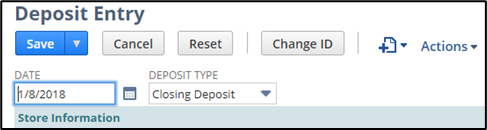
2. Click “Edit” for each over/short.
- This will prompt the “Deposit Entry” page.
3. Confirm the deposited amount is correct in the “Enter The Amount You Are Depositing In The Bank” box under the “Deposit Bag Information” section of the form.
4. Confirm the till counts are accurate in the “Actual Till Counts Receipts” section of the form.
5. Confirm the “Tender Loan Amount” is correct in the “Tender Loan Amount” section of the form.
6. The “Calculated Deposit Information” section will display all deposit information.
- These are calculations and are for review only, no data needs to be input in this section.
- “NetSuite Expected Deposit” = the expected amount that NetSuite has calculated should be deposited.
- “POS Expected Deposit” = the expected amount that the deposit should be based on what was counted at the end of the night on each register.
- “Midday Deposits” = the total amount of midday deposit created.
- “Paid In/Out” = the total amount of paid in/outs that were created.
- “Remaining Expected Cash” = the expected deposit from NetSuite.
- “Deposit Amount Discrepancy” = the difference between the amount that was deposited vs the “POS Expected Deposit”.
- “NetSuite Over/Short” = the over/short calculated from NetSuite.
- “POS Over/Short” = the over/short that was calculated from counting the registers.
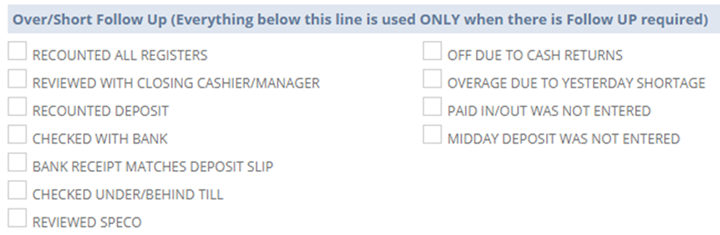
7. Check the checkboxes for each of the steps taken to resolve the over/short in the “Over/Short Follow Up” section of the form.
- This is only required when an over/short has been created and is not needed when completing the end of the night deposit.
- The checkboxes on the left are for actions that have been taken to resolve the over/short.
- The checkboxes on the right are for reasons to why the over/short occurred.
8. Enter the reason for the over/short in the “Over/Short Reason” box.
9. Enter any follow up notes in the “Store Notes” box.
- This will be used to respond when the District Manager or Corporate has entered a question in the “DM/Corporate Notes” section.
- These notes will be on the report as well as on the form in the “DM/Corporate Information” section of the form.
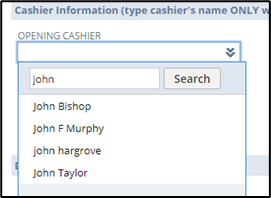
10. Enter each of the cashiers that rang for the day in the “Cashier Information” section of the form.
- There are 10 boxes for staff members.
- If the store had more than 10 cashiers for the day, then add those to the “Store Notes” box.
- Enter the associate full name and the box will allow a selection from a drop-down menu.
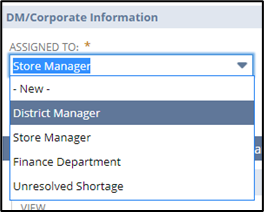
11. Change the “Assigned To:” box in the “DM/Corporate Information” section of the form to “District Manager” once all information has been filled out.
- This will remove the over/short from the report on the dashboard.
12. Click “Save”.
Incident Reporting
The Incident Reporting Form on the store’s NetSuite Dashboard in the Shortcuts Menu. An incident is any event that hinders sales, creates a loss, informing about the store or center. This can be an incident/injury, theft, property damage, parking lot / road work, construction, tenant vacancy / additions, external distraction from sales and many other items. In some cases, a Support Case will also need to be opened when an Incident Report is filled out (example: chip card readers aren’t working). When filling out the form, include as much known information as possible to assist in understanding the incident, prosecution, termination, or insurance claims.
Click here Report an Incident
Injury in the Workplace
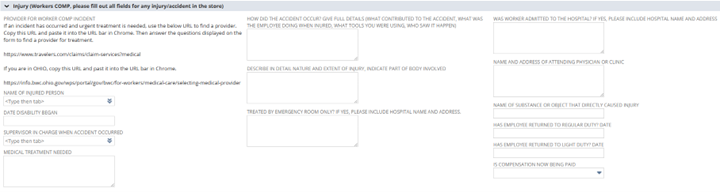
Under “Injury (Worker COMP, please fill out all fields for any injury/accident in the store” the Store Manager should fill out the following information when an employee seeks medical care from a workplace injury. If medical services are needed, the provider options can be found at: https://www.goperspecta.com/VPD/GenPlusWCMPN/public/ProviderSearch/Main
- The hospital name and address.
- The doctor’s name and address.
- All bills related to the accident.
- All other medical care documentation regarding the injury.
1. The Store Manager’s Incident Report must be sent to Human Resources within 24-48 hours after its completion in order for HR to submit a claim to the Workers Compensation Insurance Carrier.
2. The injured employee needs to complete the Employee Accident Report no later than one business day after the accident.
- It is the responsibility of the Store Manager to ensure that this report is completed.
- Both the injured employee and Store Manager need to sign and date the Employee Accident Report.
- The Store Manager should send the completed Employee Accident Report to Human Resources no later than two business days after the incident occurs.
Adjusting Store Hours
Permanent Store Operating Hours
- Adjustments to the store’s operating hours need to be approved by the District Manager.
- Operating hours = the hours the store is open daily
- Once approved, open an Immediate NetSuite support case to Operations to have the store’s operating hours adjusted in Legion, with alarm company, and on rallyhouse.com and all social media platforms.
Single Day Adjustment
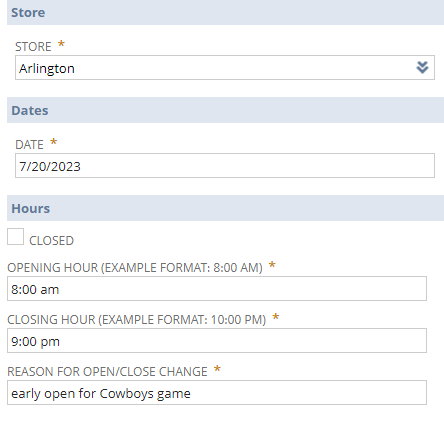
- There are instances that a store will need to adjust their hours for a single day. The most common instance of this is for a game day where the store needs to open early or close late to accommodate traffic and the game time.
- Single day entries are to be entered by the store team two weeks in advance of the date that it is occurring in NetSuite.
- Any store hours changes completed 5 days or less prior to the date in NetSuite, may not be processed in time for social to be updated.
- Entering a Single Day Adjustment will not change your daily operating hours and will only change the hours for the date inputted on the form.
- On the NetSuite dashboard, navigate to Shortcuts.
- Select “Store Hours Change Request Form”.
- Enter the following information:
- Store
- Date
- Opening Hour
- Closing Hours
- Brief Reason for Open/Close Change
- Click “Save”.
Camera Review
Camera Reviews are a weekly Store Manager and District Manager task that are to be completed using the NetSuite Camera Review form located in NetSuite Shortcuts.
Process:
1. Select the store number from the “Store Number” drop down menu.
2. Type your name into the “Name of Person Completing Survey” field and key “tab” on the keyboard.
3. The form has five observation auditing areas, begin with the first observation audit.
- Enter the timeframe that was being observed, date, and time into question 1.
- Example: Opening shift, 3/18/21, 9:45 AM
- Timeframes that should be reviewed are:
- Opening and closing shifts.
- Customer Engagement.
- Timeframes when the Store Manager is not in the building.
- Clock ins and clock outs.
- Trash exiting the building.
- Theft issues.
- List the associates and leaders that were clocked in during this time.
- Example: John Doe, Suzy Lou
- List the wins and opportunities that were observed during this review.
- Items to observed during review that can be noted are the following:
- In regards to Customer Engagement/Productivity
- Was there a Party Host in place?
- Were there multiple people working behind the cash wrap?
- Were associates working near a customer?
- Were associated engaging with a customer?
- Do associates have a visible checklist or Zebra in hand?
- Are there associates working on a register or a workstation?
- Is shipment being received of processed?
- Are tasks on the What’s Next List being assigned and completed?
- At the Cashwrap, is there one person ringing/assisting guests or multiple people behind the cash register?
- In regards to the lack of Customer Engagement/Productivity
- Are there associates standing behind the Cashwrap being unproductive?
- Are there associates leaning and/or sitting?
- Are there associates eating on the clock?
- Are there associates with excessive phone use?
- Are there personal visitors in the store?
- Review for Policy Completion or Violation
- Trash exits the building during the day, not at night.
- Theft
- Lunch bags are checked by the MOD when they are brought in and exited from the building.
- Other bags are not allowed in the building such as backpacks and purses.
- Backdoor sign off sheet is being signed off on each night.
- Registers are not being closed until the store is closed.
- Store is open on time.
- Associates are in dress code.
- Store Condition
- Trash is being taken out and not building up in the store.
- Store is recovered.
- Store is clean.
- Store is well merchandised, and signage is placed correctly.
- The backroom is organized.
- Exits are not blocked.
- List associates who will be coached or rewarded based on the observations.
- Example photo: John Doe, Suzy Lou
4. If screenshots of a great or not so great experience are needed, pause the camera video and pull up snipping tool on the desktop. Then save the photo as needed to the store’s computer.
5. Repeat steps 4-5 for Observations 2-5.
6. Click “Save”.
Providing Feedback and/or Coaching
Some scenarios that are viewed on camera may need to be addressed with the associate(s) and either praise, feedback, or coaching should be given. Listed below are some scenarios that a manager may encounter during Camera Reviews.
- Excessive phone use such as an associate is folding one table and sends 5 text messages while doing so.
- This is excessive phone use and does not fall within Rally House policy. Feedback and coaching need to be given during the associates next shift. A verbal warning may also need to be given to this employee.
- Associate is working in local, and a guest enters the building. Associate breaks away from tasking to greet the new guest. The associate then goes back to tasking while still engaging with the guest.
- In this scenario, the associate did a great job of being customer focused while still tasking – this associate should be praised in the review.
- Associate is observed sitting on the Cashwrap while the store is open.
- If you see this scenario occur in your store, partner with your District Manager. This may need to be written corrective action or termination.
- Associates at the Cashwrap were MOD and a new hire working on POS training while there are no guests in the building.
- In this scenario, since they are working on POS training it is ok that two people were at the Cashwrap when there were no guests.
- There were no associates at the front of the store for 10 minutes. During this time a guest entered the Party and was not greeted and a guest stood in the Register Lane for five minutes.
- If you see this scenario while reviewing cameras, coaching needs to occur with all associates who were clocked in. Each guest should receive a “Welcome to Rally House” and guests should not have to wait in our register lane.
- Associate clocks in for work and then puts on their apron. Apron should be put on before clocking in for work. Be ready for work!
- During the associates next shift, coaching should occur about when to clock in for work and why it is important to be in dress code before clocking in.
- One associate is working in the back of the store on Monday afternoon remerchandising small teams. The other associate is working at the Party Host station processing shipment.
- Since this scenario occurred on a Monday it is ok that an associate was merchandising in the back of the store. During peak times we likely need to be on the floor to help guests. These employees should be praised for keeping busy during a slow day.
How to Review AXIS Camera System Footage
1. To view live footage in AXIS use the following steps:
- Sign into AXIS Companion on a computer or a mobile device using your MyAxis account.
- Enter the site that contains your cameras.
- Go to “Live View” (top left).
- Select which camera you want to view.
- For 360 Cameras use the mouse wheel to zoom in and D-warp the camera. Then click the location you want the camera to move to.
- You can keep clicking on a person who is moving to track them through the store.
- On the mobile apps you will use your finger to pinch to Zoom and then swipe to move the cameras. 360 cameras record every direction all the time. You are not actually moving the camera. It uses digital Pan Tilt and Zoom.
2. To view recorded footage in AXIS use the following steps:
- Go to “Recordings”
- Use the timeline and calendar to find the recording.
- Select the camera in the timeline and move the playback marker to the desired time.
- When you move the playback marker, the video image is updated continuously. This makes it easy for you to find a specific moment in the recording.
- Click Play.
- To save the recorded footage:
- Go to “Recordings” in the top left. Then click on the “floppy disk” icon.
- Select start and end times for a camera recording.
- Select which cameras to save recordings from.
- To save to a USB drive on an AXIS S3008 Recorder, select the Save to recorder USB checkbox.
- Save the recording.
How to Review SPECO Footage
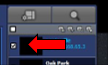
1. Select the store you are reviewing from the right pane and checkmark the box.
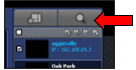
2. Select the magnifying glass.
3. Multi-Client will move to the next window where a calendar and timeline will appear.
4. Adjust the date and time to the day and timeframe you would like to review.
5. Select the EZ Copy Start button on the right-hand side until it highlights blue.
6. Once the EZ Copy Start button is blue select the starting point.
7. After starting point is selected, select the end point by highlighting the EZ Copy End point button (The button immediately to the right-hand side of the previous button) until it illuminates blue.
8. To know that this was done correctly the EZ Copy time search section will have a green line that starts at the selected start time and ends at the selected end time.
9. Once the time is selected properly and both the start and end time for the recording is selected press the EZ Copy Backup button until it turns blue.
10. A pop-up screen will occur.
11. Here you can fine tune your selected start/end times and which cameras you wish to view/download.
Exporting SPECO Footage
1. If SPECO footage is needed for an incident or for coaching/feedback, follow the steps above and then continue with the steps below.
2. Create a folder in your store’s OneDrive and name it “SPECO Footage”.
3. Select the three dots next to the File Path Section and select the folder that you created in the store’s OneDrive folder.
4. Select the File format as AVI.
5. Then select “OK” the footage will then extract and be downloaded to the chosen file path.
Verkada Camera Review
Accessing Verkada
- Select the “Command” Verkada Mobile App found on the store’s iPad.
- Login: Stores will receive an invite from the site administrator under the store email account.
- HC/DM/RD will receive an individual invitation. (Field Leaders will set up on cell phone)
Review Options
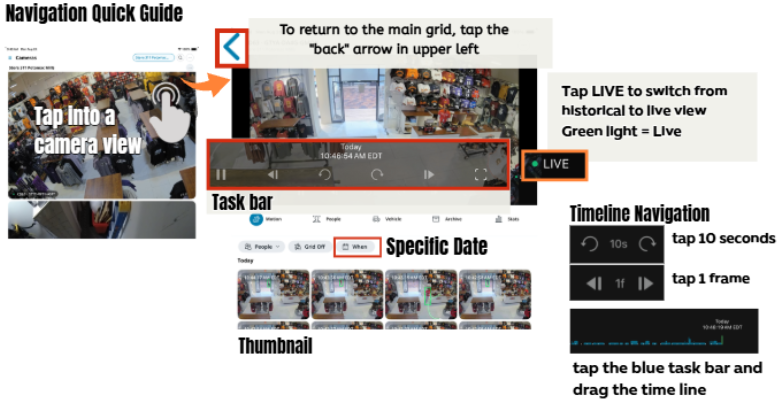
- Tap a camera thumbnail to view Live View.
- Use the back arrow to return to the main grid.
- Tap the camera screen to show the task bar.
- Tap the Expand icon for full view.
- Pinch in or out on the camera view to zoom in or out.
- Tap and drag the blue timeline bar or select navigation icons to view different times.
Reviewing Historical Footage
- Tap and drag the blue timeline bar to view different times.
- For historical footage or a specific date:
- Tap the task bar to display the date.
- Use the When icon to select the date.
- Swipe left or right on the camera view to move forward or backward through footage.
- Tap LIVE to switch from historical footage back to the live camera feed.
Troubleshooting
- If a camera shows Offline, open a NetSuite Support Case to Loss Prevention.
- If the app has issues, restart or reinstall the app.
- If issues continue after troubleshooting, open a NetSuite Support Case to Loss Prevention.
Important
- Verkada access is for monitoring purposes only.
- Store users do not have permission to change camera settings.
- Site Viewers cannot download or share footage.
- For crimes or serious incidents, follow the Loss Prevention Process.
Team Sales Report
Understanding how well each team sells during a specific period is important information for the store to know. This allows visibility into which teams will need employees zoned to the team section and which may require more tasks to be assigned. It’s called the Team Sales Report.
Process
1. Open the NetSuite ERP.
2. Click on the “Team Sales Report” in the “Shortcuts” portlet on the dashboard.
- This will prompt the “Team Sales Report: Results” screen.
3. Click on the “Filters” icon .
4. This will expand and show options to narrow the results.
5. Select the store from the “Location” drop down menu.
6. Do not enter anything into the “Date” box.
7. To get a specific date range select the starting date from the “From” box by clicking on the calendar icon next to the box
8. To select the ending date click on the calendar icon next to the “To” box.
9. Once these date ranges and store location have been selected the results should populate.
10. This report will show:
- The team sales for the date range from the most sales to the least sales.
- Total sales for the team.
- Percent of the total sales for the team.
- Total transactions for the team.
- Total quantity of units sold for the team.
STORE VISIT
THE PLAY:
Store Visits are working sessions designed to evaluate the overall health of the business through the 4 Foundations: People, Operations, Merchandising, and Service. Head Coaches are expected to own their results, speak to their decisions, and lead productive conversations around performance, priorities, and opportunities. A successful visit is not simply a review of scorecards or observations. It is an opportunity to identify root causes, celebrate wins, align on priorities, and create actionable plans that improve store performance.
Head Coaches should prepare for each visit by reviewing scorecard performance, previous visit action plans, sales trends, merchandising opportunities, local events, and operational metrics. During the visit, the Head Coach should confidently present the business by discussing Wins, Opportunities, and Priorities (W.O.P.), reviewing progress since the previous visit, highlighting areas of success, and identifying support needed to achieve future goals.
Throughout the visit, the focus should remain on understanding the “why” behind results. Strong Head Coaches use observations, data, and business knowledge to diagnose root causes rather than simply treating symptoms. Whether an opportunity exists in Service, Merchandising, Operations, or People, the goal is to identify the behaviors, processes, leadership actions, tools, or environmental factors that are impacting performance and develop solutions that drive long-term improvement.
Store Visits should result in clear alignment between the Head Coach and District Manager, with agreed upon priorities, defined action items, and a focused plan that supports both immediate execution and long-term development of the store, team, and business.
IMPACT:
Consistent and effective Store Visits create accountability, improve leadership capability, and strengthen execution across all four business functions. By evaluating People, Operations, Merchandising, and Service through both behavioral and tactical expectations, leaders gain a complete picture of store performance and the factors influencing results.
When Head Coaches actively participate in the visit process, they develop stronger business acumen, improve decision-making skills, and build confidence in leading their store. Regular discussions around hiring, development, engagement, operational execution, merchandising relevance, service behaviors, and leadership effectiveness help create a culture of continuous improvement rather than reactive problem solving.
Store Visits also ensure priorities remain aligned between the store and District Manager. Through root cause analysis, coaching conversations, and follow-up planning, leaders can focus efforts on the actions that will have the greatest impact on the business. This results in stronger Team Member development, improved operational execution, more effective merchandising, better Guest experiences, and ultimately stronger sales and profitability.
Most importantly, Store Visits reinforce ownership. Head Coaches who consistently prepare, lead discussions, understand their business, and execute agreed upon action plans create stores that are more adaptable, more accountable, and better positioned to deliver results while developing future leaders within Rally House.
GAME PLAN
Store Visit Guide
Visit Types
Store visit types define the intent of each visit so time, focus, and expectations are clear, and the stores gain specific support to improve. District Managers should determine the visit type during the planning phase.
How to Use Visit Types
- Every store visit has a defined type and objective.
- The visit type determines what you focus on and how often it occurs.
- Not all visits are equal. Select the visit type before scheduling to set clear expectations for yourself and the store.
- Any time a District Manager stops by a store, a minimum of one of the 3 visit types below needs to occur.
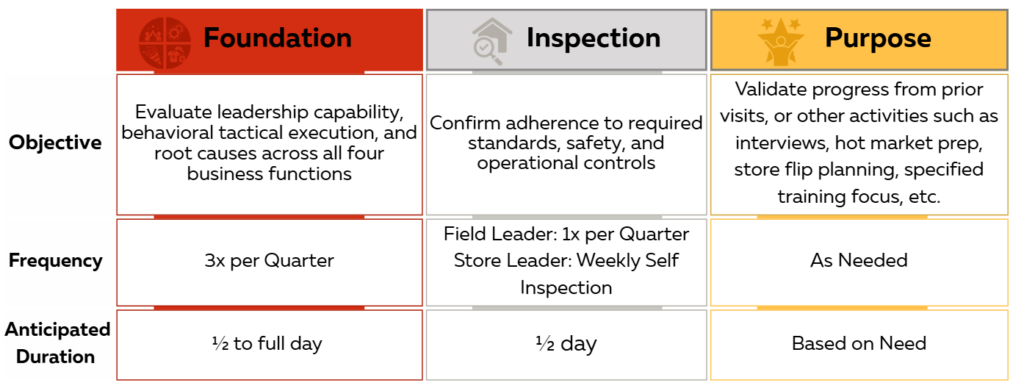
Foundation Visit
This guide defines how District Managers execute store visits with Head Coachs using the 4 Foundations and rootcause-driven actions. The goal of each visit is to accurately assess store health, wins and opportunities, and create an action plan that improves results.

- Store Visit Standard
- The flow and order of the visit may flex based on the store’s needs. District Managers observe and assess before determining ratings. Actions are created after opportunities and root cause are identified. The visit produces a clear direction and follow-up.
- Store Foundation Visit Model
- The store is evaluated using the 4 Foundations. Each Foundation represents a business function and is assessed using defined questions and observable standards.
- 4 Foundations = the four business functions
- Each Foundation includes four – five objectives.
- Each objective includes measurable behavorial and tactical expectations.
- Tactical = Established and expected actions or SOPs
- Behavioral = How leaders think, decide, and coach
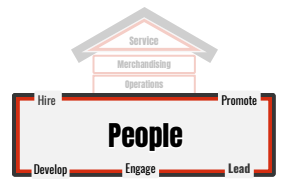
- People Objectives
- Hire: Hiring decisions, training and onboarding result in a team that meets role expectations and reflects the local community.
- Develop: Team demonstrates growth and improvement through consistent training, coaching,and development practices.
- Engage: Team is engaged through positive interaction, initiative, and a demonstrated
connection to the store mission and team culture. - Lead: The store consistently executes company priorities, adapts to change, responds to
challenges, and drives results through clear direction, timely decisions, and follow-through. - Promote: The store builds internal talent, shown by team members taking on added
responsibility and stepping into key roles when needed.
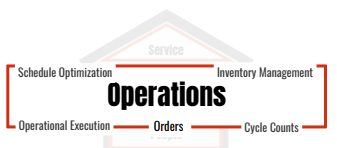
- Operations Objectives
- Schedule Optimization: Labor is being used effectively to support service, tasks, coverage, and operational priorities.
- Inventory Management: The store is operating with accuracy in processing, transfers, reflecting strong attention to detail and integrity.
- Operational Execution: Demonstrates consistent adherence to SOPs ensuring
organization and operational efficiency. - Orders Objective: Executes in-store customer orders by managing order staging, pick exceptions, and timely ISPU picking.
- Cycle Counts Objective: Ensures timely, SOP-compliant cycle counts by monitoring
dashboards and coaching teams to maintain inventory accuracy.
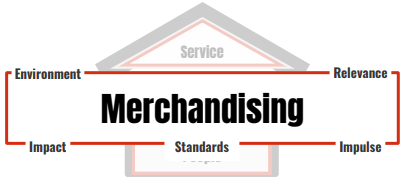
- Merchandising Objectives
- Environment: The store is effectively using brand marketing, signage, and branded communication to support product storytelling, guest navigation, and conversion.
- Impact: The store is merchandised to enhance the guest experience, drive business opportunities, and amplify the Rally House brand.
- Standards: The team is consistently maintaining required visual standards including correct tools, spacing, signage, sizing, and fixture care.
- Impulse: The register lane is set to the current dominant team, correct signage, full clip strips, and unique product facings that support impulse conversion.
- Relevance: The store is merchandised to reflect the current season, events, and guest demand, with appropriate team footprint layout and visual priorities
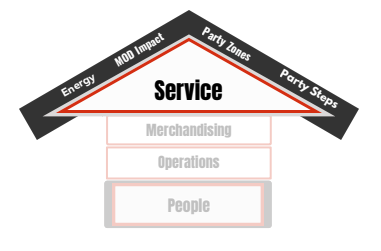
- Service Objectives
- Energy: Team Members create an inviting, energetic, and brand aligned atmosphere that sets the tone for guest engagement and team performance.
- MOD Impact: Leaders consistently model and coach service expectations and build service capability, maintaining a continuous awareness of the floor and effectively directing the service experience or output.
- The Zones: Party Zones are executed consistently at entry and exit by the Party Host and Cashiers, with energy, awareness, accuracy, and clear role ownership to create a complete Rally House Party experience.
- The 3 Steps: Team Members are consistently using the 3 Steps of Service to create meaningful connections, understand guest needs, and recommend solutions.
Foundation Visit Play-by-Play
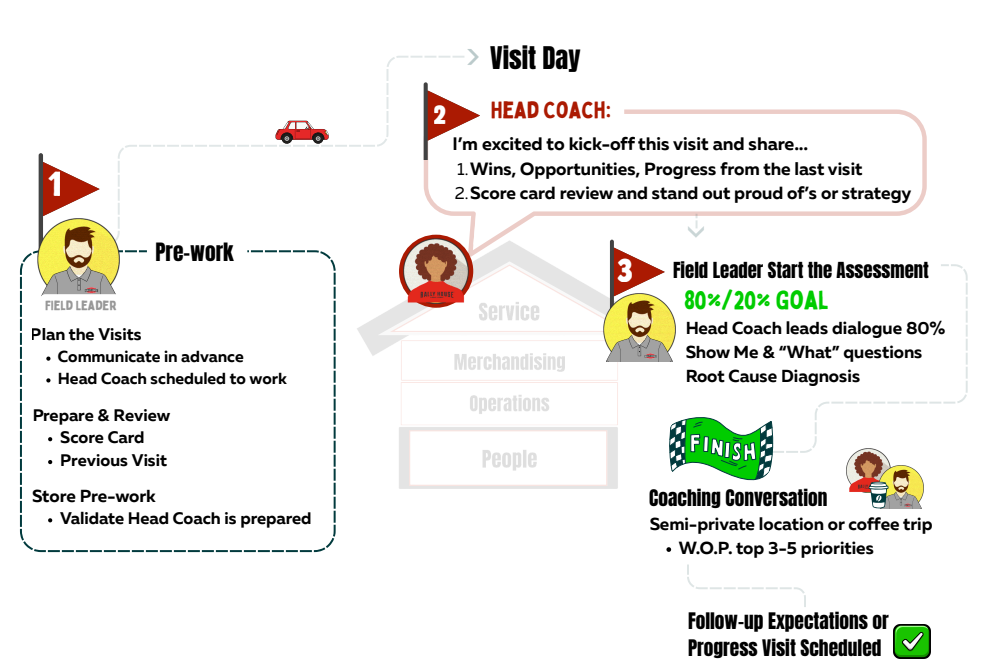
Head Coach Action: Foundation Visit
This is your time to speak to your decisions and results. Be prepared to lead conversation, show Head Coachs own their business and results. Foundation Visits occur with your District Manager. These are working sessions to review performance, set priorities, and agree on next actions
- Bring these materials to the visit:
- Store Merch Report (when available)
- Team Sales Report — Last 365 Days
- Team Sales Report — Last 30 Days
- Team Sales Report — Next 60 Days (Last Year)
- Local event schedule — next 30 days
- Scorecard
- Foundation Visit — Head Coach Ownership
- The Head Coach opens the visit by clearly presenting the business:
- Recap last visit actions and progress.
- Share what you are most proud of since the last visit.
- Review scorecard results.
- Call out Wins, Opportunities, and Priorities (W.O.P.).
- Clearly state support or resources needed.
- The Head Coach opens the visit by clearly presenting the business:
- By the End of the Visit
- Priorities are clear.
- Tasks are created.
- Alignment is confirmed for Wins, Opportunities, and the top 3-5 Priorities.
- Use the visit to ask questions, gain clarity, and leave with a focused plan.
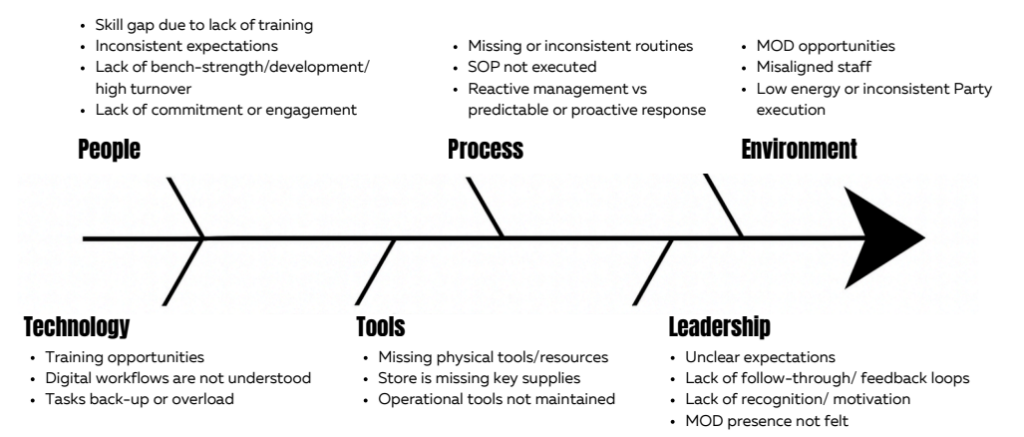
Root Cause Resource
Consider these categories when assessing root causes:
- Identify Key Areas: Break down the issues into manageable sections.
- Analyze Contributing Factors: Look into various elements that may influence the problem.
- Evaluate Outcomes: Reflect on the consequences of each potential root cause.
SUPPLY ORDERING
THE PLAY:
Supply ordering and expense reporting are essential leadership responsibilities that ensure the store has the resources needed to operate effectively while maintaining financial accountability. Head Coaches are responsible for proactively managing store supplies, equipment, shipping materials, and operational resources through established ordering processes while also ensuring team member expenses are submitted accurately, documented properly, and processed within required timelines.
Effective execution begins with planning ahead. Head Coaches should regularly review supply inventory levels, anticipate future business needs, and place orders according to established schedules to support service, merchandising, operations, and inventory management. Leaders should also ensure Team Members understand how to identify low supply levels and communicate needs before shortages impact the business.
In addition to managing physical resources, Head Coaches are responsible for maintaining accurate financial documentation through expense reporting. This includes ensuring receipts are retained, expenses are categorized correctly, mileage and travel expenses follow company guidelines, and submissions are completed timely with appropriate supporting documentation. Strong leaders understand that both supply ordering and expense reporting are operational processes that require attention to detail, consistency, and accountability.
Managing store resources effectively means balancing operational readiness with financial responsibility. Head Coaches should use available tools, reports, and processes to ensure the store has what it needs to execute while maintaining compliance with company standards and financial controls.
IMPACT:
Effective supply ordering and expense reporting help create an organized, efficient, and financially responsible operation. When stores maintain appropriate inventory levels of supplies and equipment, Team Members can focus on serving Guests, completing operational tasks, processing shipments, and fulfilling customer orders without disruption. Proactive planning reduces emergency requests, unnecessary expenses, delayed execution, and avoidable operational challenges.
Accurate expense reporting protects both Team Members and the company by ensuring expenses are documented, approved, and reimbursed appropriately. Timely submissions, proper receipt management, and adherence to company policies help maintain accurate financial records and support responsible business practices.
Together, these processes strengthen operational execution, financial accountability, and leadership ownership. Stores that effectively manage resources are better equipped to support the 4 Foundations, maintain operational consistency, control expenses, and focus on driving business results. By proactively managing both supplies and expenses, Head Coaches create a more predictable, prepared, and efficient environment for Team Members and Guests while protecting company resources and supporting long-term store success.
GAME PLAN
Sitoo Supply Ordering
Use Sitoo POS to order store supplies, store equipment, and store marketing or signage.
Supply Ordering Rules:
- Complete the Store Supply Inventory Sheet to identify needed items
- Equipment and store marketing/signage will not be on this inventory sheet. These items are ordered as needed or directed by your Field Leader.
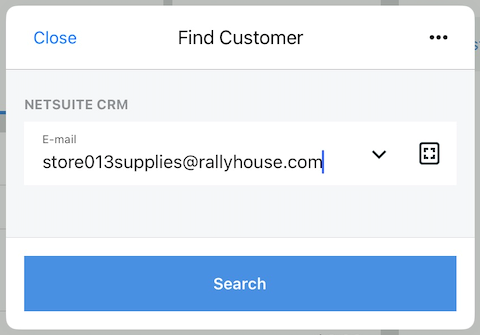
- Add the customer to the transaction: Ex: store266supplies@rallyhouse.com
- Minimum order: $175 (Shorr orders only)
- Place orders: Sunday/Monday of your order week
- Huddle Messages will notify you to place the order
Sitoo Supply Ordering Process:
1. Log into Sitoo on the POS.
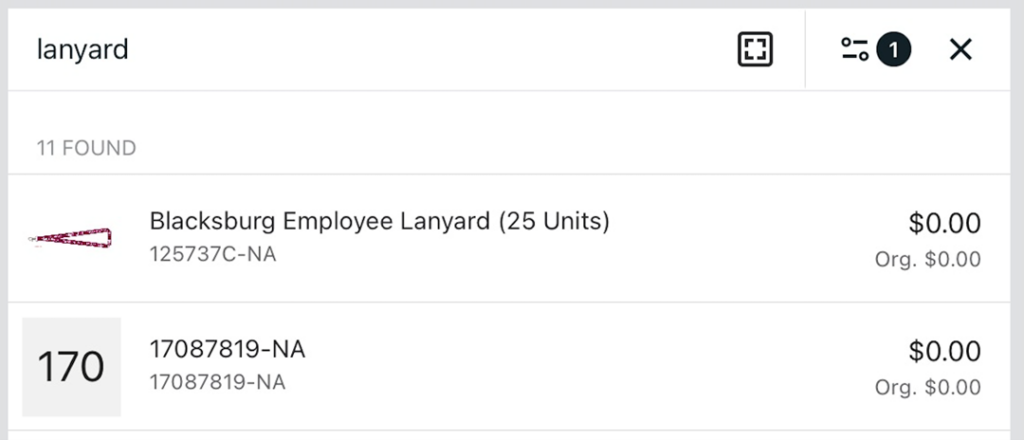
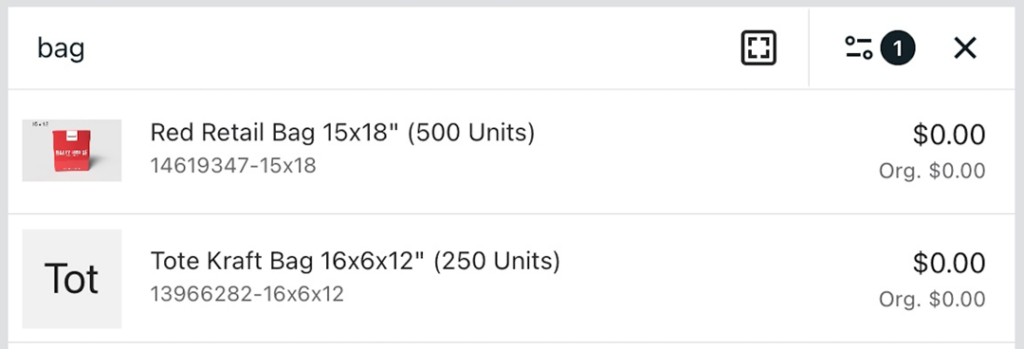
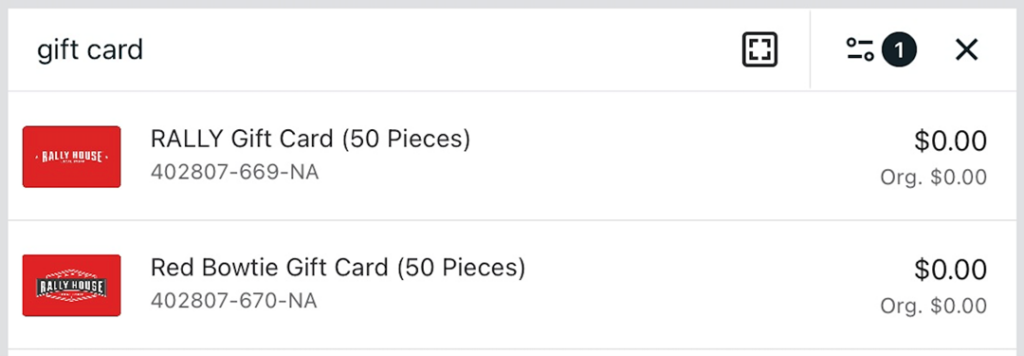
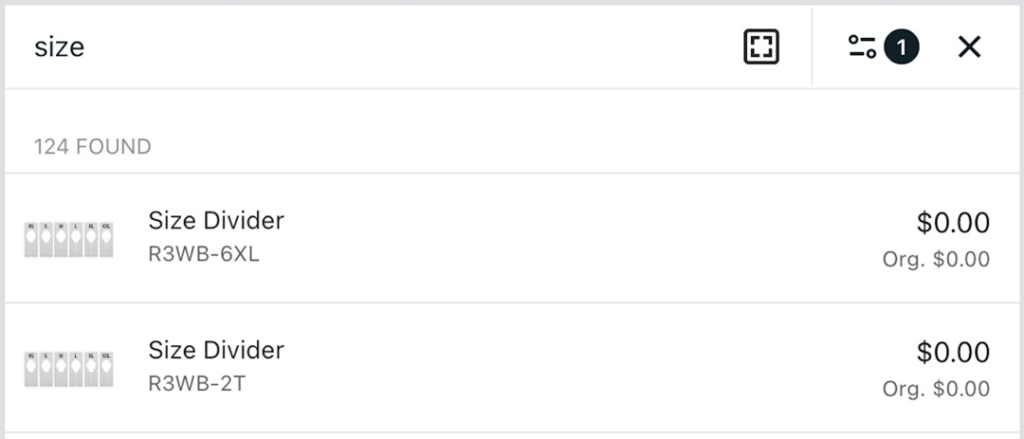
2. Tap the magnifying glass icon to search.
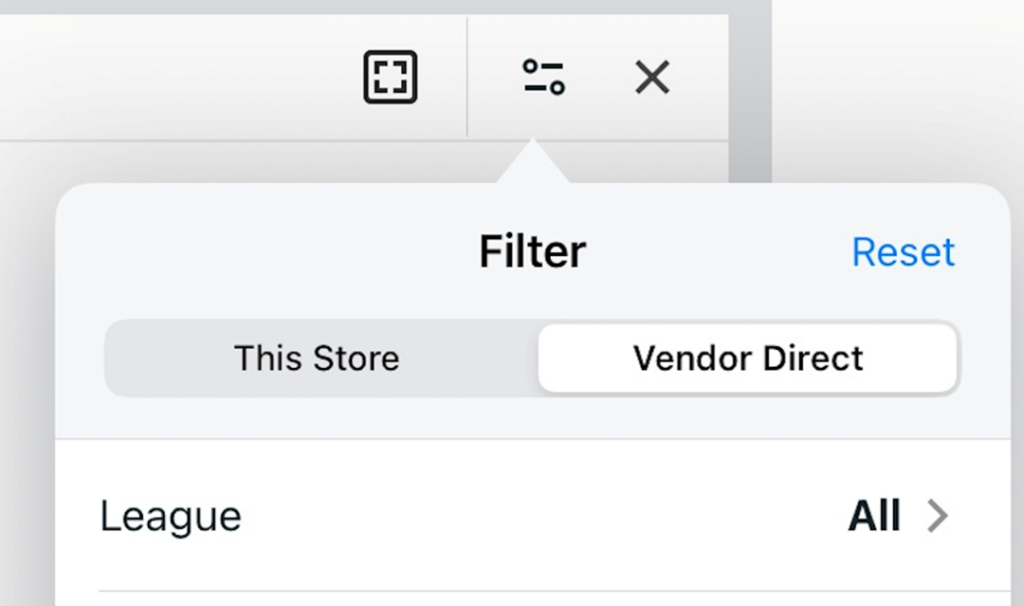
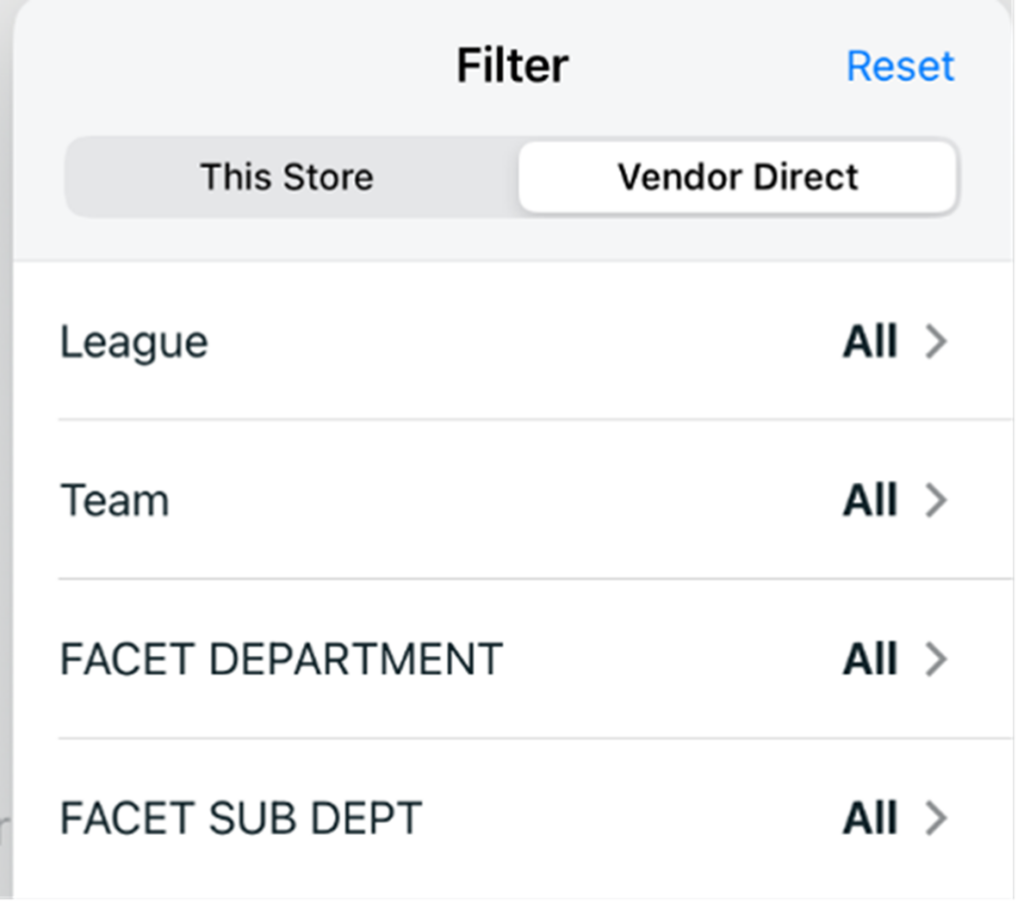
- Tap the filter icon > select Vendor Direct.
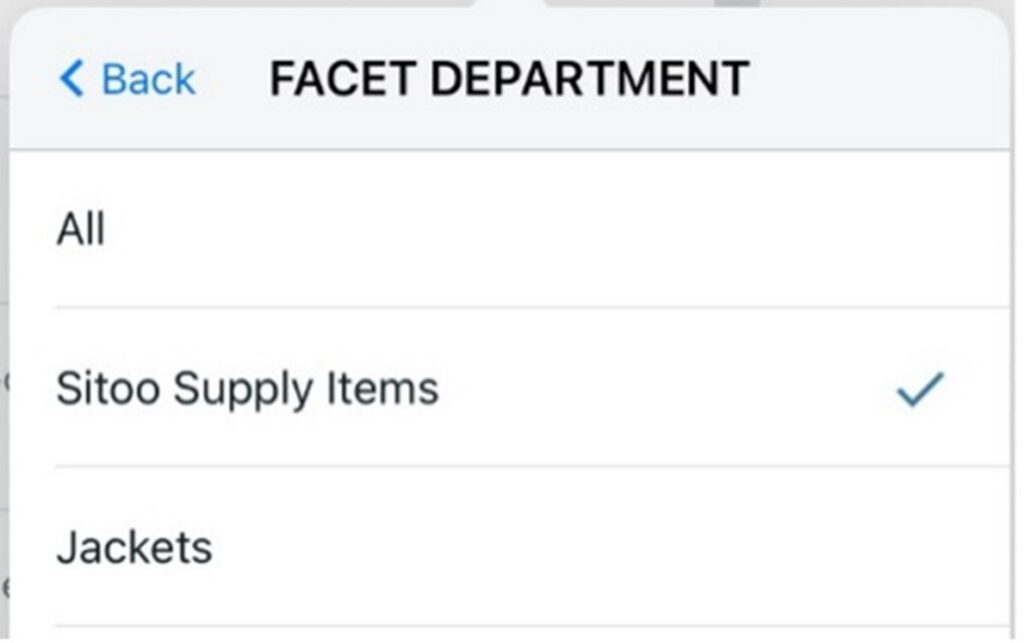
- Tap FACET DEPARTMENT, select Sitoo Supply Items > tap Back.
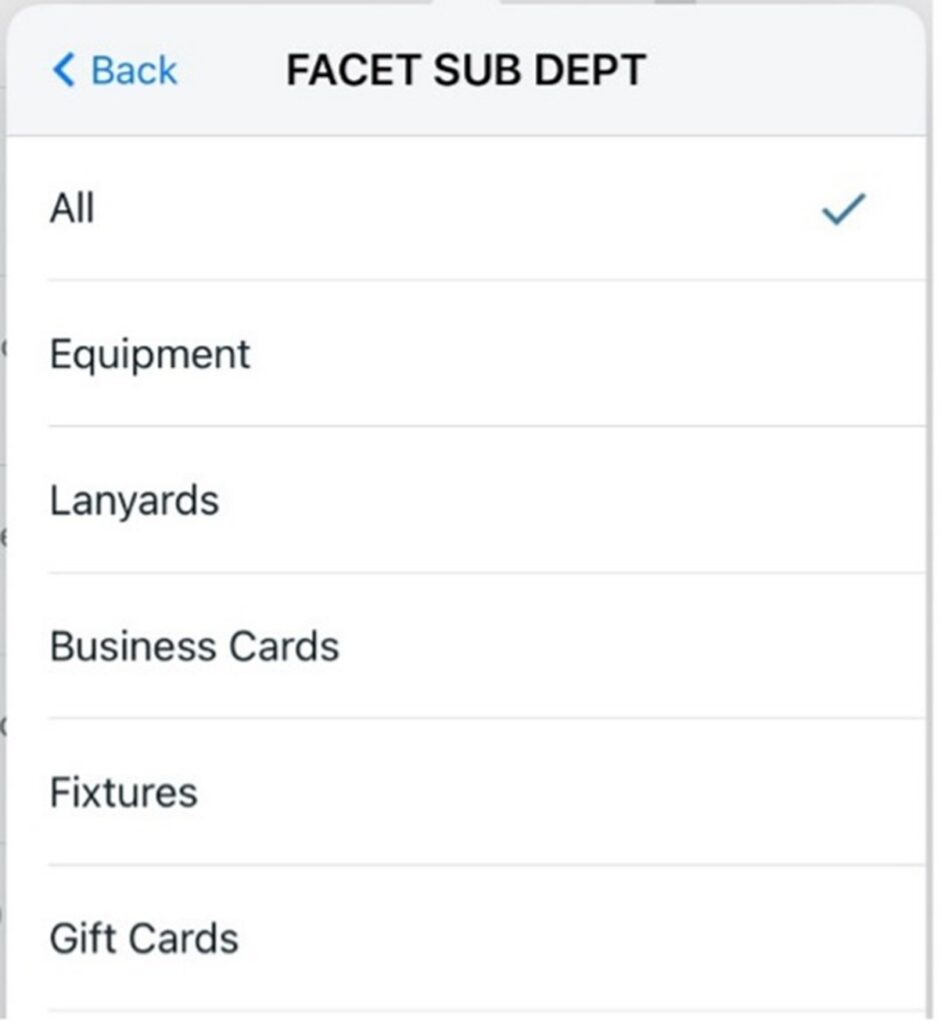
- Tap FACET SUB DEPT, select the supply type.
- Search by item name or style number.
3. Tap the item to add it to the transaction.
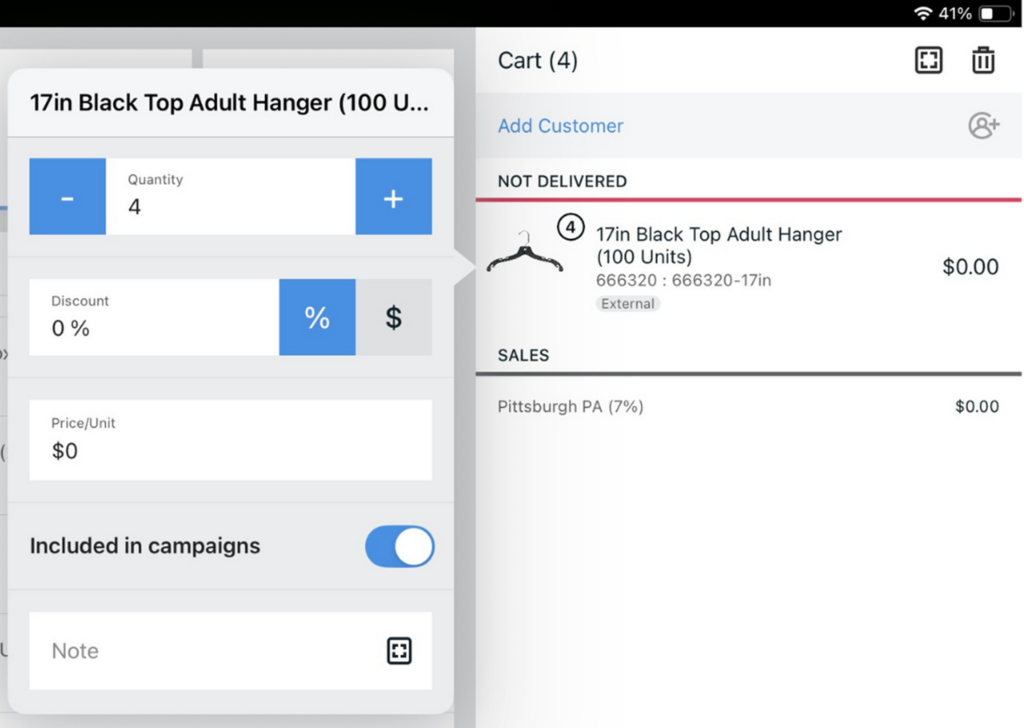
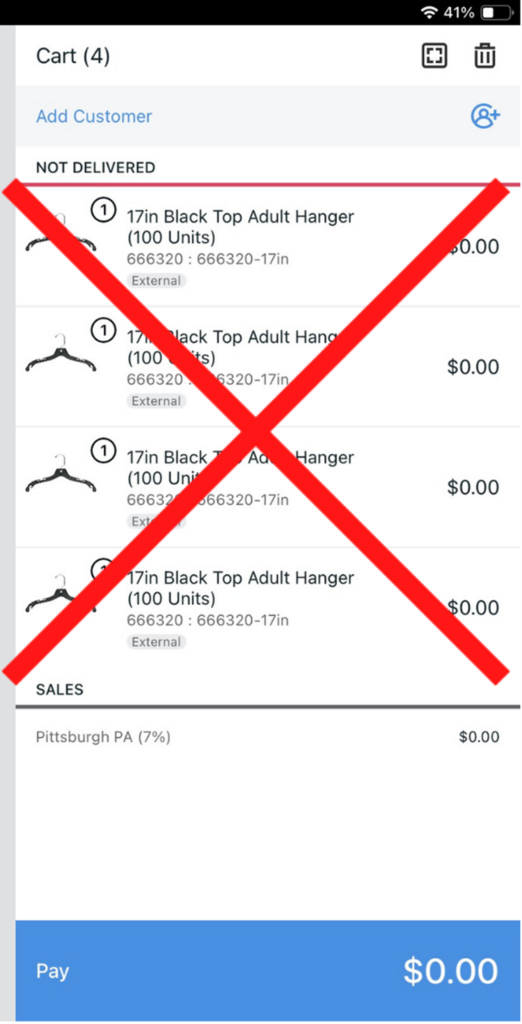
- Adjust Quantityif ordering more than one. (Do not add duplicate lines.)
- Correct (Adjusting Quantity):
- Incorrect (Adding Same Item Multiple Times):
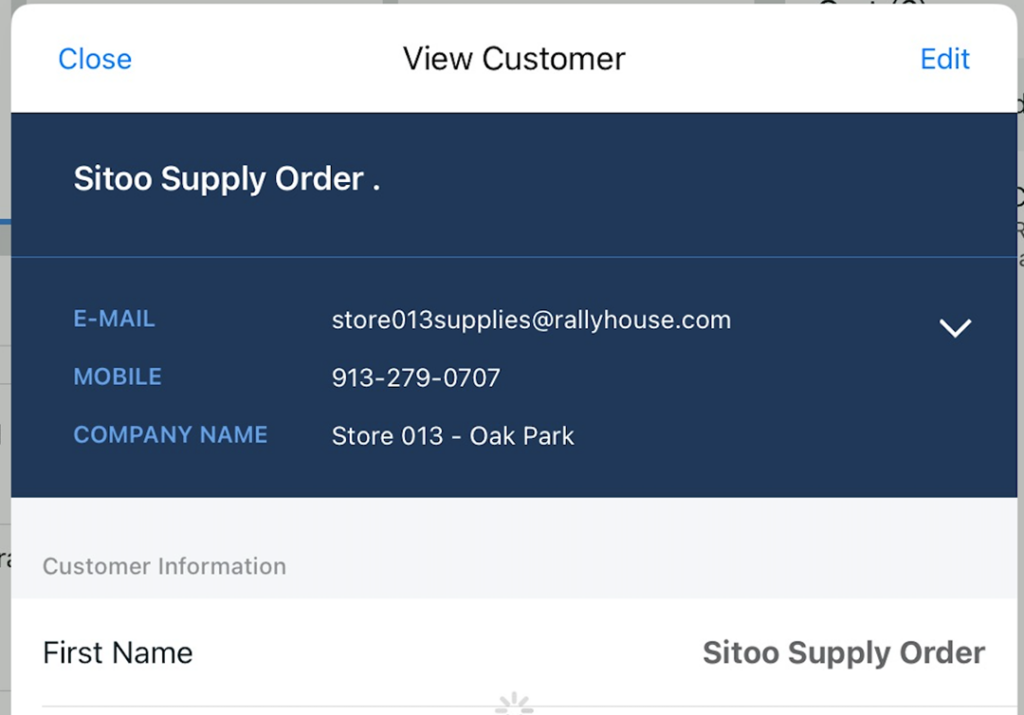
4. Add the customer to the transaction: store###supplies@rallyhouse.com
- (Replace ### with your 3-digit store number.)
- Confirm and close View Customer.
5. Tap Pay.
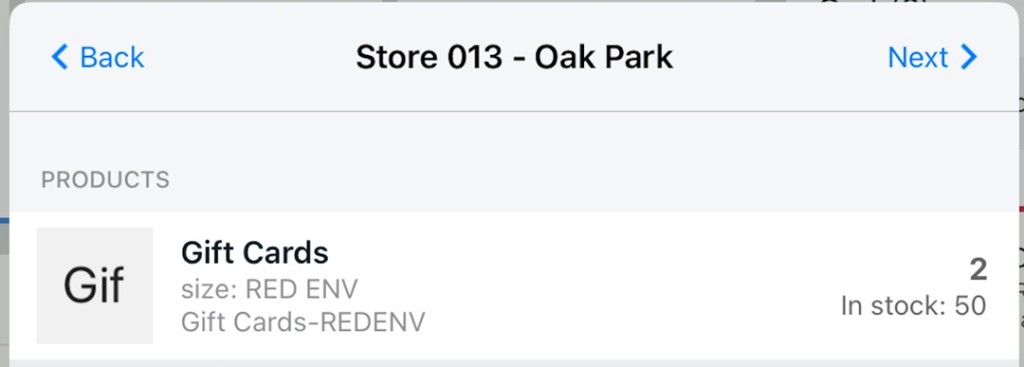
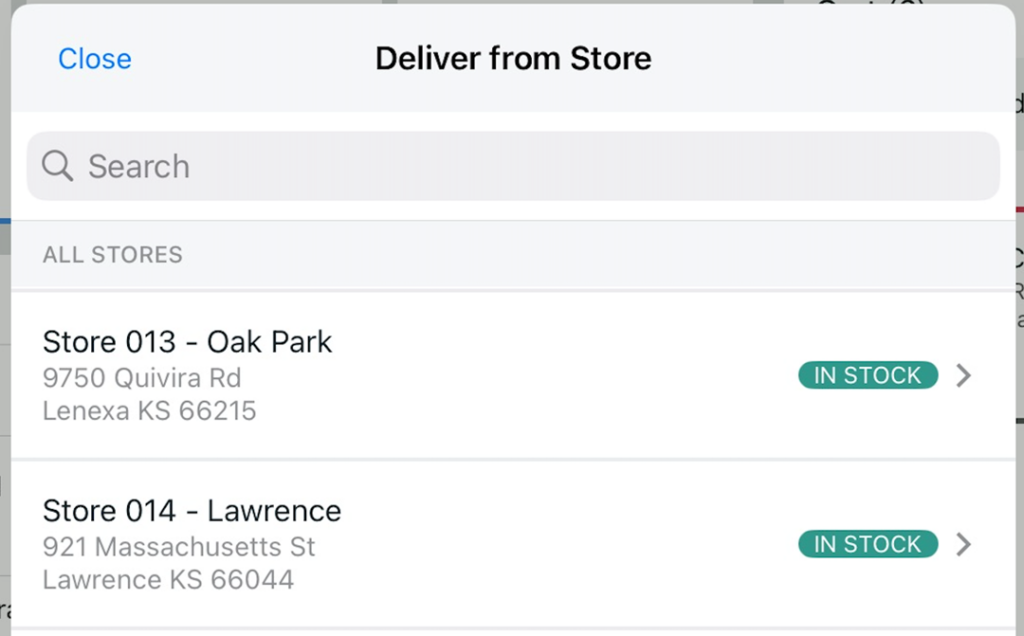
- Tap the current user location for the “Deliver from Store” box.
- Tap Next
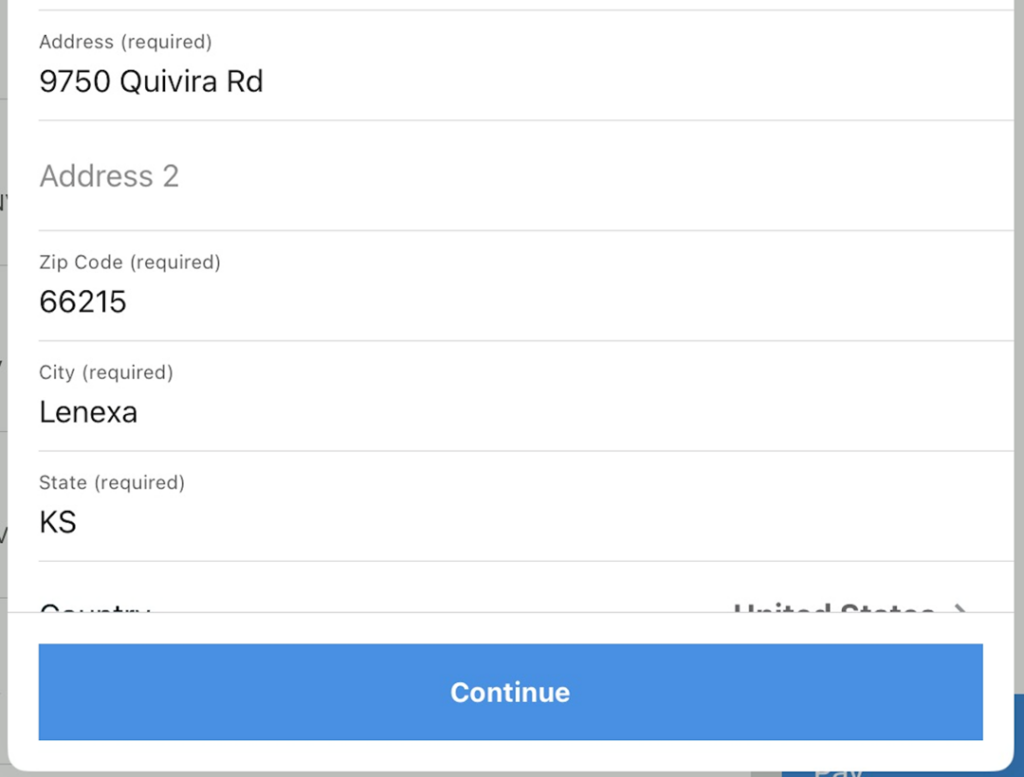
- Confirm store address under Deliver to Address > tap
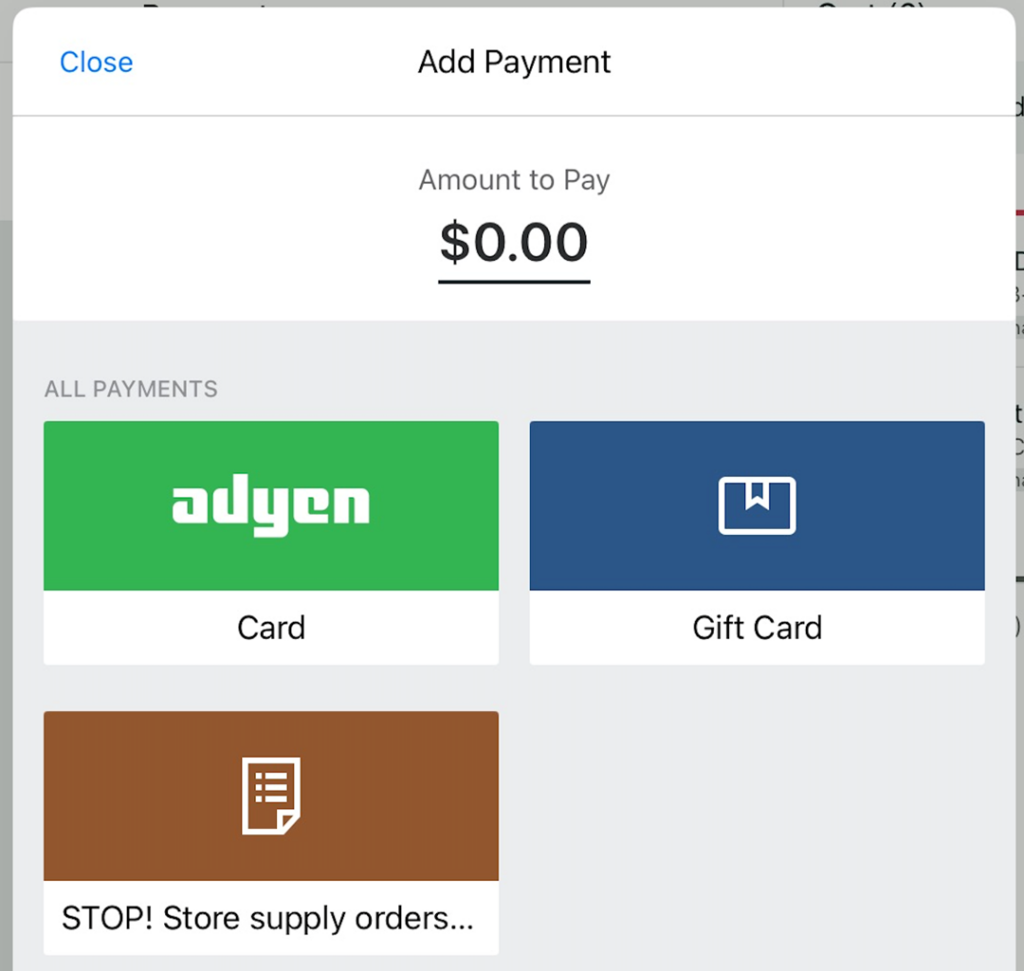
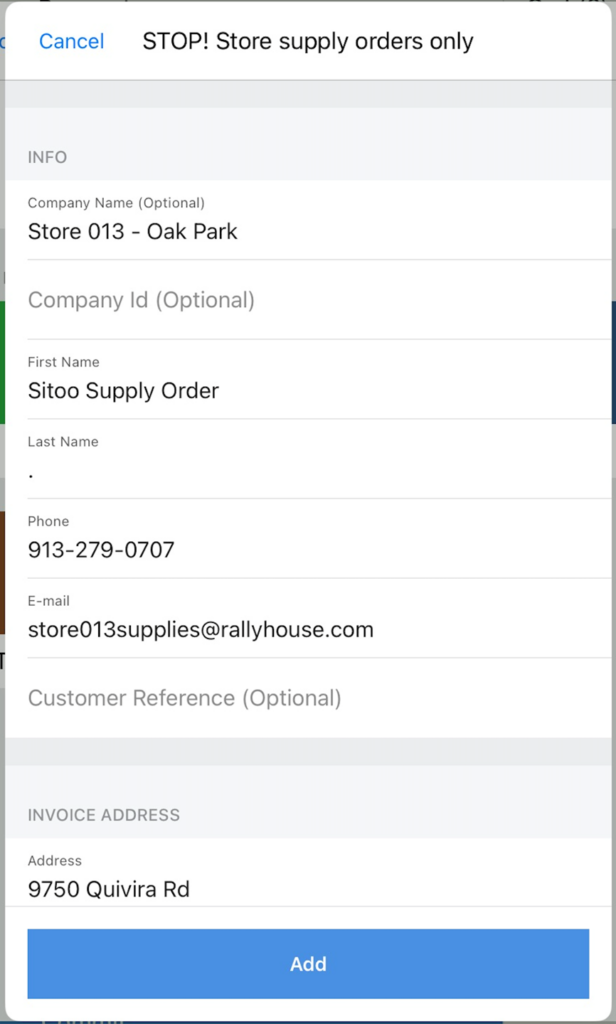
- Select payment method: STOP! Store Supply Orders
- NOTE: This payment method is to be used ONLY for supply orders
6. Tap Add.
7. Tap Commit > Done.
8. Repeat these steps every two weeks on the store’s order week.
Important Notes/Tools:
- These tools are in the Shortcuts on the Store Dashboard
- Stores-Sitoo Order Supply Items shows all items that are available to be ordered in Sitoo.
- Shorr Items need to exceed $175 for the order to be approved, if the order does NOT exceed this amount, then the order will NOT be placed.
- Use the Stores-Sitoo Order Supply Items tool and filter for “Shorr Packaging Corp”
- This will show all the Shorr items and the cost for the item.
- Use this to make the order greater than $175.
- Use the Stores-Pending Shorr Orders tool to confirm the order exceeds $175.
- Use the Stores-Supply Orders (Last 30 days) to review all the items ordered by the store in the last 30 days.
- Any issues at all please create a case and include very detailed description of the issue.
Items Not Available on Sitoo Supply Ordering
- There are select items not available for a store to order on Sitoo Supply Ordering. These items need to be ordered via a support case to Operations with a detailed reason of why they are needed, what they are replacing, and/or where they will be put in the store.
Fixtures Not Available on Sitoo Supply Ordering | Equipment Not Available on Sitoo Supply Ordering |
|
|
Store Supply Inventory Sheet
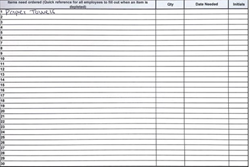
1. The store should have a Blank Supplies Order Form in the Store Binder.
- Let staff know that when they notice the store is running low on a supply item or use the last unopened package, they can place it on the order form for the store leader to see that it needs reordered.
2. The Store Supply Inventory Sheet is printed and reviewed by the store leader ordering supplies for the store.
- Download the excel file. Upload the Excel file to the store’s Microsoft365 in the internet browser to view the full file.
- There are multiple tabs on the excel file for the different vendors that stores order supplies from with the items from each vendor. Each tab will need to be printed.
- Only print the tab for size beads that your store uses- White Size Beads or Colored Size Beads
- PRINT IN LANDSCAPE ORIENTATION.
3. Complete an inventory of supplies:
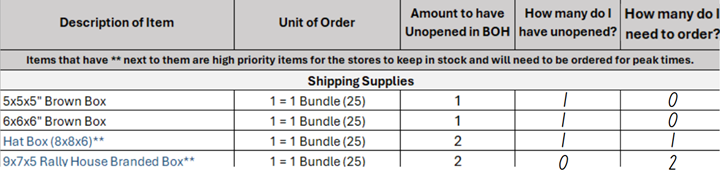
- Review the amount of units for the supply item that are unopened and compare to the listed amount in the column “Amount to have Unopened in BOH”.
- Write down the amount that needs to be ordered for the store based on the subtraction of the amount the store has unopened to the amount the store should have unopened and write in the column “How many do I need to order?”
4. During peak times, items in blue font with ** after the item need to be ordered for frequently and at high volumes than listed on the checklist.
- Peak times are Holiday and Hot Market.
5. After all supply items that need to be ordered are noted, the store leader places the order(s) on the correct ordering platform.
UPS Supplies
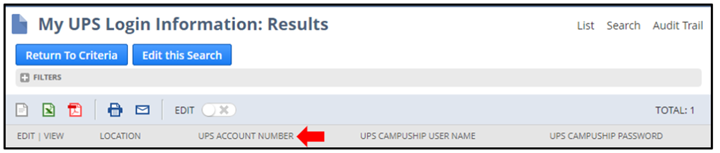
To check the status of an order or to order UPS shipping supplies in bulk, email preferred.us@ups.com providing the UPS account number for your store (found under “My UPS Login Information” in the Shortcuts portlet in NetSuite) as well as the order number you’re inquiring about or the item number, item description, and quantity of the item(s) you would like to order.
1. Log into UPS.com.
- Username and Password can be found in NetSuite under the “Shortcuts” portlet.
- “My UPS Login Information”.
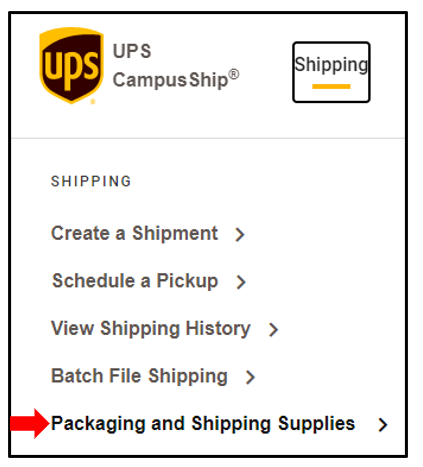
2. Click the “Shipping” tab.
3. Click “Packaging and Shipping Supplies”.
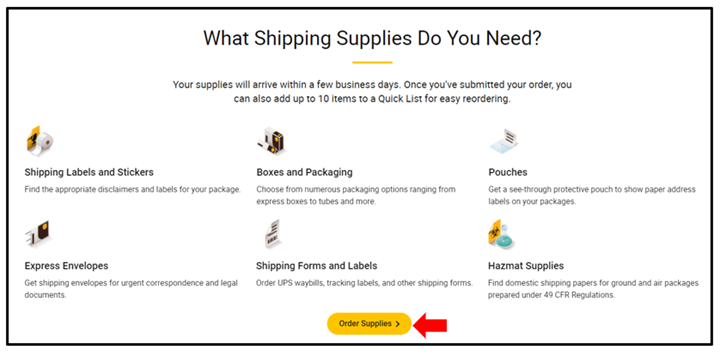
4. Click “Order Supplies”.
5. Choose packaging needs.
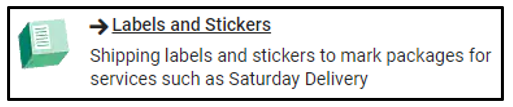
6. To reorder blank 4X6 Labels for the UPS printer, click “Labels and Stickers”.
- If one roll is needed:
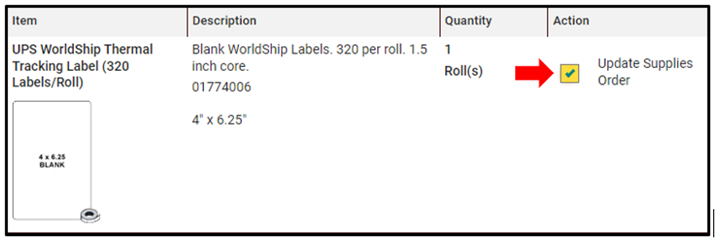
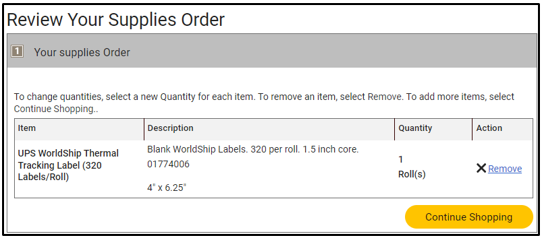
- Choose “UPS WorldShip Thermal Tracking Label (320 Labels/Roll).
- Under “Action”, check the box to “Update Supplies Order” then “Add Selected to Your Order”.
- If more than one roll is needed:
- Email preferred.us@ups.com including:
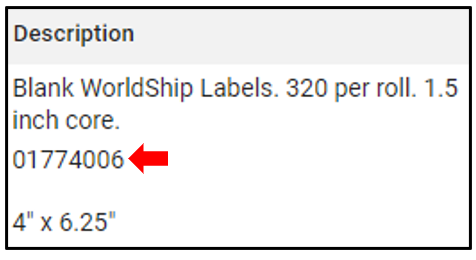
- The Item Description and Item Number (01774006).
- The Quantity needed.
- The UPS account number for your store.
- This is found under “My UPS Login Information” in the Shortcuts portlet in NetSuite.
7. To reorder boxes, Click “Packaging”.
- “UPS Express Pak” is the equivalent to a Poly Bag used for soft line items (Shirts, socks, etc.).
- Choose the quantity needed and then check the box to “Update Supplies Order”.
- “UPS Pad Pak” is used for wrapping glassware before packing in a box.
- Choose the quantity needed and then check the box to “Update Supplies Order”.
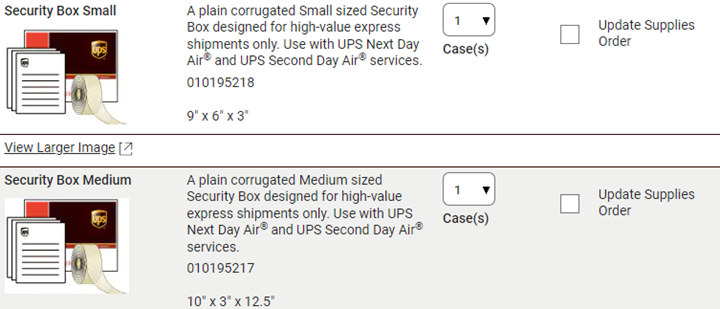
- “Security Box” can be used for hardline items.
- Choose the size(s) and quantity needed and then check the box to “Update Supplies Order”.
- Once all boxes have been selected, click “Add Selected to Your Order”.
- Click “View Your Supplies Order”.
9. Verify the items and quantities are correct.
10. Review the “Shipping Information” to confirm the store address is correct.
11. Click “Submit Order”.
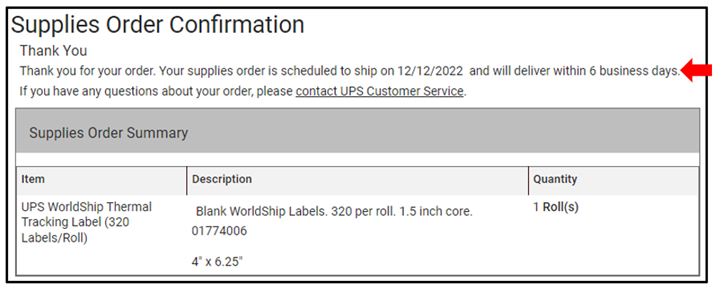
12. This will prompt the Confirmation page that will provide an estimated arrival time.
Expense Reporting
For Use of Personal Funds and travel policies/meal limits, please refer to the Company Handbook.
Receipts and mileage requests for team members’ out-of-pocket expenses must be reported by the 4th of the month following the incurred expense monthly.
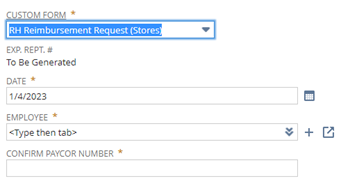
1. On the NetSuite dashboard, select “Enter Expense Report” from the Shortcuts.
2. Enter the employee’s information at the top of the form.
- The date will default to the current date.
- Employee = Employee’s name
- Confirm Payroll Number = Payroll Number
3. Under the “Expenses” tab you will document the expense.
- Dates = Date of the expense
- Category = Category of the expense
- Amount = Amount of the expense
- Memo = Description of the expense
- Location = Store where the expense should be posted.
- This will default to the store logged in. Change the location if needed.
- Attach File = Receipt photo
- ALL expenses require a photo of a receipt in order to be approved
- Corporate Card = Check this field if it was purchased using an expense card
- The employee will not be reimbursed for this amount as a company card was used.
- If the expense report is for mileage follow the directions on the expense report for mileage.
4. Click the blue “Add” button once the line is complete.
5. Repeat to add additional expenses if necessary.
6. Click the blue “Submit” button.
MARKETING EVENT REQUEST
THE PLAY:
Marketing Events provide Head Coaches with the opportunity to bring the Rally House Party beyond the four walls of the store and strengthen connections within their local community. Whether supporting a university tradition, participating in a community event, hosting an after-hours shopping experience, or creating a unique local activation, Head Coaches are responsible for identifying opportunities that drive brand awareness, increase traffic, and support business growth.
Successful events begin with thoughtful planning. Head Coaches should evaluate the purpose of the event, identify the target audience, understand the potential business impact, and determine the resources needed to execute effectively. Events should align with local market opportunities, seasonal moments, community celebrations, athletic events, and other activities that connect Rally House with fans and guests. Strong event planning includes clear goals, logistical preparation, staffing considerations, inventory needs, and a well-defined execution strategy.
The Marketing Event Request process ensures visibility, alignment, and support from Regional leadership before committing resources or promoting an event. Head Coaches should provide complete information, clearly communicate the who, what, where, and why of the event, and outline any support needed to execute successfully. By utilizing the Marketing Event Request process, stores can partner with Corporate and Regional leadership to maximize event impact while maintaining consistency with company priorities and brand standards.
IMPACT:
Well-executed marketing events strengthen Rally House’s connection to the communities we serve and create opportunities to engage fans in meaningful ways. By participating in local celebrations, athletic events, campus activities, and community gatherings, stores increase brand visibility, deepen hometown relationships, and create memorable experiences that encourage guests to visit, shop, and return.
Marketing events also provide opportunities to drive sales, introduce new guests to Rally House, support seasonal and team-specific initiatives, and expand awareness of the products and services available within the store. Events can generate immediate business results while also building long-term loyalty and community presence that benefits the store beyond the event itself.
For Head Coaches, marketing events reinforce ownership of the local business. Understanding the market, identifying opportunities, building relationships, and proactively creating experiences for fans demonstrates leadership beyond daily store operations. Stores that consistently leverage local events and community partnerships are often better positioned to capitalize on market opportunities, support key business initiatives, and establish Rally House as the destination for hometown pride and fan experiences.
GAME PLAN
Marketing Event Request
Why Events Matter
Events help us bring the Rally House Party directly to our fans. Whether it’s game day or a community celebration, these events deepen hometown connections, boost brand visibility, and create memorable moments that drive sales and give every reason to return.
Examples of Common Events
Events can be either something that you want to participate in (e.g., remote selling at campus event, need for marketing coupons) or something that will impact your sales (e.g., Family Weekend). This record is how you tell HQ of what is happening in your store!
- Homecoming Football Tailgate
- Set up a remote selling location aligned with the university’s homecoming game.
- Championship Welcome Home Bash
- Celebrate conference or national wins with a pop-up event that features championship gear and welcomes the team and fans back to town.
- Support for Other University Sports
- Smaller activations can be approved through the same process to show up for less prominent sports in your market
- Coupons
- Coupons may be needed to pass out to on campus organizations or to build relationships with a community partner to drive traffic into your store. If coupons are a need as part of an actual event, include that in the description of the event.
- Pop-Up Tent Sale
- Set up outdoors during street event or for a store event.
- After Hours Shopping Events
- Events for organizations that occur after hours
Note: These are just examples. You are encouraged to propose creative ideas that reflect your store’s culture and local community.
Off-site Event Request Process
| Step 1: Plan the Event You will be submitting the event to your Regional for approval. | Include:
Once your idea is mapped out, move to entering in NetSuite for Regional Approval. |
| Step 2: Enter into NetSuite for Regional Approval |
|
| Step 3: Review Regional Response |
|
BULK ORDERS
THE PLAY:
Bulk Orders provide Head Coaches with an opportunity to create meaningful community connections while driving incremental sales and expanding the Rally House brand. Whether supporting student organizations, university events, local businesses, alumni groups, or community celebrations, these orders allow stores to deliver solutions that go beyond a typical transaction and strengthen relationships within the local market.
Head Coaches should approach every bulk order with a service-first mindset by utilizing the FAN approach. Start by understanding the purpose of the order, learning about the event or organization, gathering important details, and identifying the guest’s timeline and expectations. Strong leaders focus on understanding the guest’s needs before recommending solutions that can be fulfilled successfully. This includes suggesting products, identifying available inventory, exploring website options, and partnering with Corporate when additional sourcing opportunities may be available.
When inventory is available, stores should complete the transaction directly through Sitoo. When inventory is unavailable or additional support is required, Head Coaches are responsible for collecting accurate guest information, completing the Bulk Order Request process, and submitting all required details to Corporate for review and follow-up. Clear communication, accurate information, and timely submission are critical to ensuring a positive guest experience and successful order execution.
Bulk orders should be viewed as relationship-building opportunities rather than simply large sales. Every interaction is a chance to strengthen community partnerships, support local organizations, and create future Rally House advocates.
IMPACT:
Successful bulk orders increase brand visibility, strengthen community engagement, and position Rally House as the destination for local pride, team spirit, and event needs. When guests see Rally House merchandise represented at campus events, organization functions, graduations, celebrations, and community gatherings, it extends the Rally House Party beyond the store and introduces the brand to new audiences.
Bulk orders also create opportunities for long-term business growth. A single successful order can lead to repeat purchases, future partnerships, referrals, and increased traffic from organizations, students, alumni, and community groups. These relationships help establish Rally House as a trusted partner for local events and fan-focused experiences.
From an operational perspective, following the established bulk order process ensures accurate communication, realistic expectations, and successful fulfillment. Proper documentation, timely submissions, and collaboration with Corporate help prevent missed opportunities while providing guests with confidence that their needs will be met.
Most importantly, bulk orders allow Head Coaches to create memorable experiences and meaningful connections within their market. By understanding guest needs, providing thoughtful solutions, and delivering exceptional service, stores strengthen their local presence while supporting both immediate sales opportunities and long-term community relationships.
GAME PLAN
Bulk Order Process
Why Bulk Orders Matter
Bulk orders are more than just big transactions. They are big opportunities. Whether it’s 25 mugs for a student event or 50 shirts for a sorority, we’re not just selling gear. We deliver on our commitment to offer everything a fan could need!
These large quantity orders:
Help us become the go-to brand on campus
Boost brand visibility during high-traffic events
Drive future foot traffic when students or staff see our gear in action
Create strong, long-term local partnerships
1. This is one of the most FAN-tastic ways to Create Connections in our community and Make our brand Memorable. Follow FAN to support the guest.
![]() | Find out what the guest needs and what makes the bulk order special.
|
![]() | Ask for details
|
![]() | Next, offer solutions
|
2. Bulk Order Purchase Process or Order Request
- ALL quantity or units on hand (available in store) ➡️➡️complete the transaction in Sitoo.
- Quantity or units on hand is not available, MOD or Store Management, follow these steps:
|
CAMPUS STORE RESOURCES
THE PLAY:
Campus Resources provide Head Coaches with tools and processes that support the unique needs of campus stores and high-volume university markets. Whether managing gameday traffic through effective line control or supporting merchandise visibility through item image uploads, these resources help stores deliver a better experience for Guests while supporting operational execution.
Head Coaches are responsible for ensuring Team Members understand their roles during high-traffic events and that line control processes are executed consistently to create a fast, organized checkout experience. Leaders should also ensure stores utilize available tools and resources that support merchandising, inventory visibility, and online selling opportunities. By leveraging these resources effectively, stores can better support university events, seasonal demand, and the unique shopping behaviors of campus communities.
IMPACT:
Effective use of Campus Resources helps stores operate more efficiently during some of the busiest and most important moments of the year. Strong line control reduces wait times, improves Guest satisfaction, and allows Team Members to maintain energy and engagement during high-volume gameday traffic. Clear role ownership and execution help create a seamless Rally House Party experience when demand is at its highest.
Additionally, maintaining accurate item images supports both internal tools and online sales opportunities by improving product visibility and helping Guests find the items they need. Together, these resources help campus stores maximize sales opportunities, improve operational efficiency, and create memorable experiences that strengthen Rally House’s connection to students, alumni, fans, and the local university community.
GAME PLAN
Gameday Line Control
Line control is essential to deliver a speedy checkout during busy gamedays.
Watch the🔗Line Control video in the link provided to learn more about the different roles in line control.
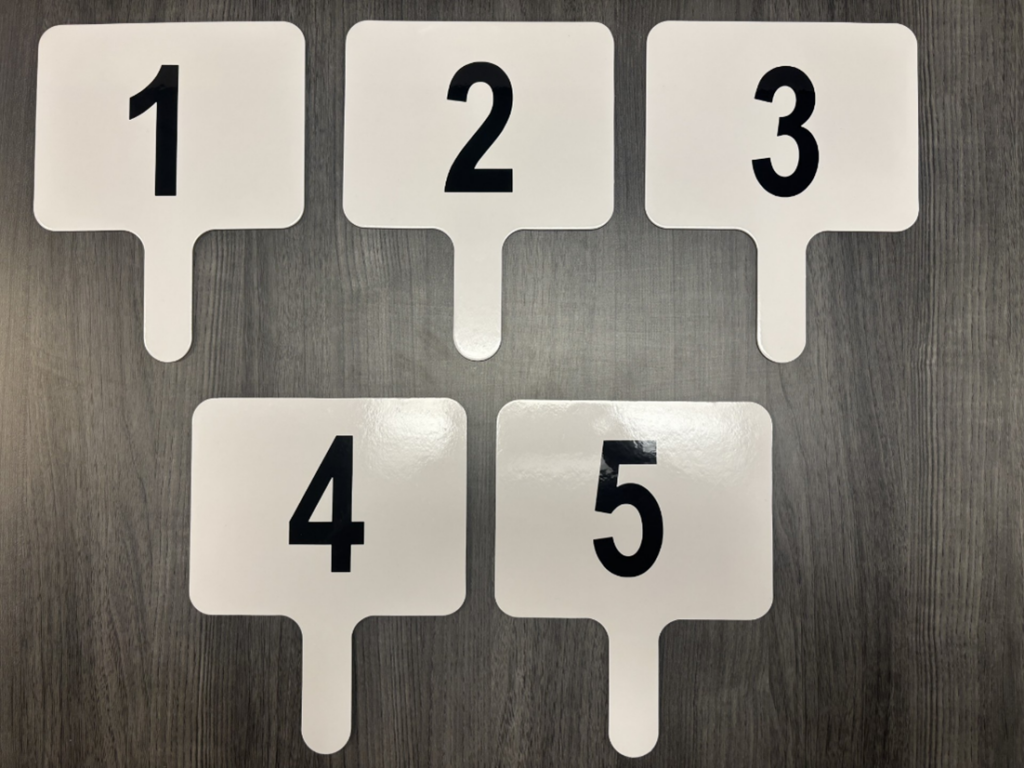
How to Use Cashier Number Paddles
- Number Paddles should be used by the cashier on gameday to signal to the line captain when they are ready for another customer.
- When the customer is finishing getting their personal items and purchased items together, the cashier should then raise their number paddle.
- Once a paddle is raised by the cashier, the line captain should then send the next customer in line to the cashier to be checked out.
- If more paddles are needed, open a case to Operations.
MDEN Image Process
This process guide will outline the steps to put images to styles from the MDen acquisition. By doing so we will be able to see images in our internal applications. In addition, Rally House will be able to put those items on the website for online purchases.
1. Tap on the NetSuite icon on the second home page of the Zebra.
2. Log into NetSuite using the store login credentials
- This may require 2FA
3. Tap the hamburger in the top left corner
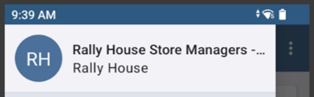
4. Tap the Rally House Store Mangers icon in the top left corner
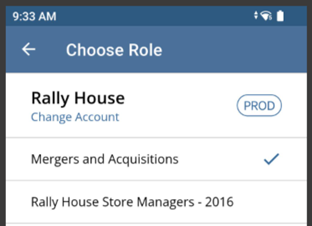
5. Tap the “Mergers and Acquisitions” role
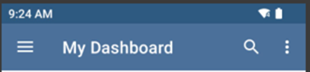
6. From the “My Dashboard” screen tap the magnifying glass to search
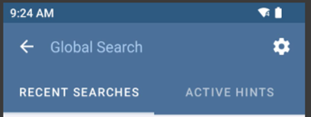
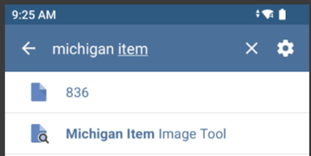
7. In the “Global Search” type “Michigan Item Tool”
8. Tap on “Michigan Item Image Tool”
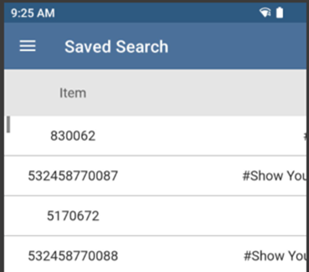
- This will pull a report of all items that need an image
- The report can be scrolled to see more information (description, dept, class, and subclass)
- It is sorted so that like items are together
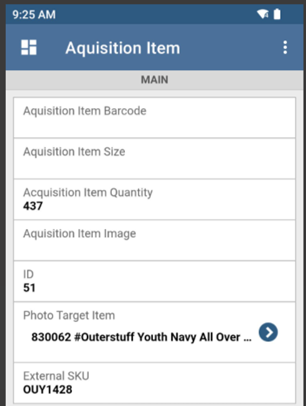
9. Tap on the item that is getting the image
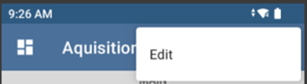
10. Tap the ellipsis in the top right hand corner and tap “Edit”
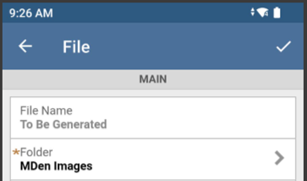
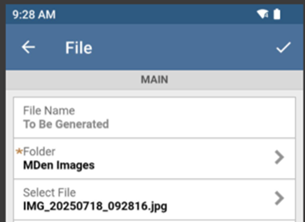
11. Tap “Folder”
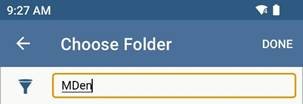
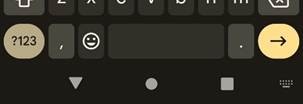
12. Type “Mden” in the search box and tap the return arrow in the QWERTY
- This will take several seconds to pull up the correct folder, do not navigate away from the screen until it loads
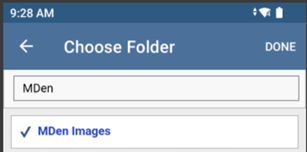
13. Tap “MDen Images” so that there is checkmark beside it and tap “Done”
- This will only be required the first time and will remain set unless a different folder is selected
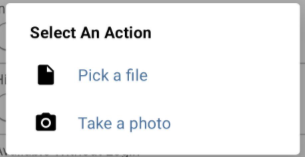
14. Tap “Select File”
15. Tap “Take a photo”
16. Take a picture of the item
- Lay the item flat on the ground (clean area)
- Ensure that the image is clear and captures the features of the item
- These images will be used for the website and our internal apps
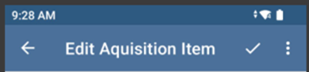
17. Tap the checkmark in the upper right-hand corner once the image has loaded
18. Tap the checkmark again
- This will save the record and load the image
19. Tap the “4 square” icon in the upper left-hand corner
- This will return to the report
20. Tap the “Back” icon in the lower left-hand corner and reload the report
- This will update the report and remove the item that has been completed
21. Repeat for all items