
OPERATIONS
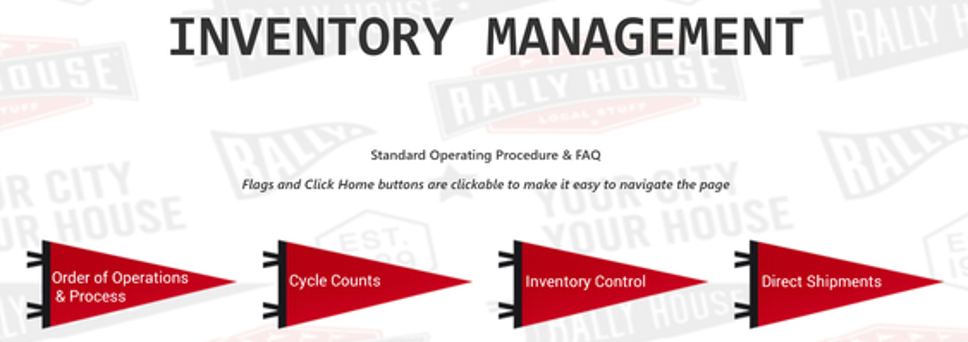
Standard Operating Procedure & FAQ
Flags and Click Home buttons are clickable to make it easy to navigate the page


INTRODUCTION
THE PLAY:
Operations execution is what keeps product moving, stores organized, and customers taken care of.
Across Customer Orders, Interim Ship To Store, Store Maps, and shipping processes, these functions work together to ensure product is received, processed, fulfilled, and delivered efficiently. They support both in store sales and online demand, while also preparing inventory for new store growth.
Strong execution in these areas allows stores to manage inventory flow, maintain organization, and respond to changes in volume. From receiving product to fulfilling orders and preparing shipments, each step plays a role in keeping the business running smoothly and supporting the customer experience.
IMPACT:
Effective operations execution directly supports sales, inventory accuracy, and customer satisfaction.
When done well:
- Product is available and ready to sell or fulfill without delay.
- Customer Orders are completed accurately and on time.
- Stores stay organized, allowing teams to work efficiently.
- Inventory is controlled and easy to locate
- New store openings are supported without disrupting existing stores.
- Teams can keep up with demand during high volume periods.
Breakdowns in operations lead to delays, missed sales opportunities, inventory issues, and a poor customer experience, all of which increase workload and impact overall performance.
ON FIELD TERMINOLOGY
- Customer Orders: Online orders fulfilled by the store, including Ship to Customer and In Store Pick Up.
- In Store Pick Up: Orders placed online and picked up by the customer in store.
- SPOC: Store Pickup Order Completion app used to assign and pick Customer Orders.
- LISP: Location In Store Pickup app used to check in and check out In Store Pick Up orders.
- ISS (Interim Ship To Store): Product routed through an existing store to support new store openings before transfer.
- Operational Store Map: Store specific layout that defines where key operational tasks are completed.
- MPA (Merchandise Processing Area): Designated area where product is prepared for the sales floor.
- Inbound (IB): Designated location for incoming shipments.
- ATM (Available to Merchandise): Temporary staging fixture for product before it moves to processing or the sales floor.
- NIU (Not in Use): Designated storage area for fixtures and tools when not actively being used.
- The Huddle: Rally House’s communication platform where stores receive messages, announcements, and action-based tasks from Corporate teams.
- Fieldhouse: Rally House’s document repository that houses playbooks, guides, policies, job aids, and other reference materials for store teams.
- Admin Chat Bot: A self-service support tool that helps Team Members find answers to common questions and connect with Support Services when additional assistance is needed.
CUSTOMER ORDERS


THE PLAY:
Customer Orders are a core daily responsibility that ensure online and In Store Pick Up purchases are fulfilled accurately and on time.
This process focuses on how stores organize orders, assign work, and move orders from pick to completion. Teams use a structured bin setup to keep each order separated and easy to manage. Orders are picked through the SPOC app, where Teammates locate product, confirm accuracy, and assign it to the correct bin.
In Store Pick Up orders follow a consistent cadence throughout the day and must be completed in a timely manner. Once picked, orders are packed, labeled, and staged in the designated pickup area. Ship to customer orders follow a similar flow, moving from pick to pack to carrier pickup.
Execution relies on strong organization, clear ownership, and consistent use of reporting tools to monitor progress and resolve issues quickly.
IMPACT:
Customer Orders execution directly affects speed, accuracy, and the overall customer experience.
When done well:
- Orders are completed on time and ready when the customer expects them
- In Store Pick Up orders are staged and easy to retrieve
- Orders remain organized, reducing errors and rework
- Teams maintain a steady workflow throughout the day
- Issues are identified early and resolved before they impact the customer
- Stores avoid backlog and stay current on all assigned orders
Breakdowns in execution lead to delays, missed orders, and poor customer experience, which increases workload and creates avoidable issues for the store.
GAME PLAN
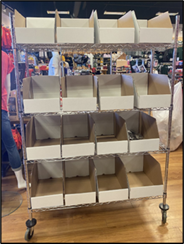
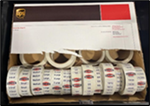
Setting Up Customer Order Bins
1. Get an empty salesman or Mini-Z rack.
- If there are no available racks, then a shopping cart or rolling workstation will work.
2. Print the barcode sheet.
3. Get some empty Rally House bags.
- Large clear or large red plastic bags work the best.
4. Get the same number of hangers as bags.
- Kids’ hangers work best.
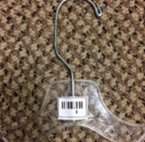
5. Cut out the barcode and tape them to the hangers.
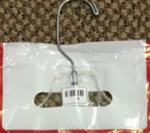
6. Hang the bag on the hangers so that the barcode faces forward.
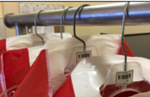
7. Hange the bags on the salesman or Mini Z-rack.
8. These bags will act as the “Bin” for each of the orders that will be picked.
9. The barcode will be scanned to assign the “Bin”.
10. The “Bins” will keep the orders separated to avoid being mixed together.
- Tubes or boxes can be put on the bottom of the rack for larger items when needed.

Picking Orders
1. Open the “SPOC” app on the Zebra handheld device.
- This will prompt a login page.
2. Log in using the store Pass Phrase and the employee’s Username and Password.
3. Choose the type of order to complete, either Ship to Customer or In Store Pickup.
- The number of orders available to assign will be listed next to each option.
- In Store Pickup orders should be completed every 15 minutes.
4. Select the team from the “Team” drop down menu to start picking orders in.
5. Select the type of order to pick from the “Status” drop down menu.
- Any Status: All orders no matter what status the order is in.
- No Hold: All orders that are not on hold.
- This will be the default choice.
- Bad Image: All orders that have been flagged with a bad image.
- Do not pick/ship units with a bad image.
- Only select this status if an item was placed on Bad Image hold by mistake.
- Hot Market: All orders that have at least one “Hot Market” item on the order.
- These should be done first and frequent during “Hot Market” periods.
- Hold: All orders that are currently on hold.
- This is set by the user when picking items and mostly for “Hot Market” periods.
6. Select the number of orders that will be assigned to this user from the “Orders” drop down menu.
- This will default to the total number of orders that are assigned to the store.
- Suggested size is between 5-10 depending on how many associates are picking.
- This is because those orders will be assigned to only that user, that means no other associate will be able to pick those orders unless the user releases them.
- Ensure that there are the same number of empty bins taken as orders assigned.
7. Click “Begin”.
- This will prompt orders to be picked.
- Click “Reload Data” anytime to refresh the orders.
- Click “Release Orders” to remove the assignment to the active user.
- VERY IMPORTANT: If orders are not released then no other user will be able to complete them.
- The Store Manager can view any such “stuck” orders by using the “Stores-Assigned Customer Orders Not Shipped” report in the “Reminders” portlet on the dashboard.
- Click “Release Orders” to remove the assignment to the active user.
- Click “Reload Data” anytime to refresh the orders.
8. Locate the item.
- If the item prompts a message that reads “This item requires customization”, then follow the steps in the “Custom Jersey” section of this Best Practice.
- If the item cannot be found, click the “Not Found” checkbox.
- Select the correct action needed:
- Skip: Skip this item and come back to it at the end of picking
- Pick Exception; Remove inventory from the store and reassign the order to another store.
- Cancel: This will cancel the “Not Found/ 0 OH” checkbox being clicked
- Hold: Place item on hold to complete later.
- This is primarily for Hot Market items that have not arrived yet.
- This should rarely be used outside of Hot Market because the item should either be skipped or adjusted.
- Select the correct action needed:
- If the item is a “Hot Market” item that has not been delivered yet, then click the “Not Found” checkbox.
- This will prompt the “Confirm” box.
- Click “Hold”.
- “Pick Exception” will not be an option for these items.
- If there were other items for this order that have already been picked, then that “Bin” will need to be left on the rack until the item is delivered and then completed.
- The Store Manager can use the “Stores-Bins on Hold” report in the “Reminders” portlet on the dashboard to review these orders to ensure they are completed once the item arrives.
- Please see Hot Market Picking.
- If the image is incorrect then click the “Bad Image” checkbox.
- This will prompt the user to upload an image of the item.
- Take a picture of the item using the Zebra Handheld device.
- Click on “Choose Files”.
- Select the image file.
- Enter any special notes about why the image is incorrect in the “Bad Image Description” text box.
- Click “Submit Description”.
- This will notify Customer Service to contact the customer and the buyer to resolve the order.
- This will prompt the user to upload an image of the item.
9. Scan the barcode of the item into the “Barcode” box.
- If the barcode cannot be scanned, or shares the same barcode as another product, then enter the style number with the size.
- Example: 1234567-L.
10. Enter the number of units picked for that item in the “Pick Qty” box.
- If the quantity entered is over the order quantity, this error will display:
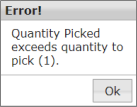
- If the quantity entered is less than what is ordered, the “Confirm” box will appear.
- Select correct action to take.
- If the order cannot be completed and there were other items on that order, the app may prompt the user to place the other items from the “Bin” back on the sales floor and will reassign the order to another store.
11. Assign a Pick Bin to the order by scanning or entering the bin barcode in the “Scan Bin” field.
- If the “Bin” field says “-Assign-”, scan or enter the barcode of an empty Pick Bin in the “Scan Bin” field.
- If the “Bin” field displays a number, this means that the customer order includes multiple items and has already been partially picked into a Pick Bin.
- Locate the Pick Bin that matches the Bin number displayed, then scan or enter the Bin barcode into the “Scan Bin” field to verify the bin numbers match.
12. Place the requested item into the Pick Bin that was assigned.
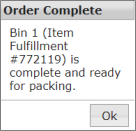
13. If the “Order Complete” box is displayed, then that order is now complete and ready to be packed and shipped.
14. Repeat steps until all orders that have been assigned are completed and in their correct “Bins”.
15. Once the orders are completed, the app will display a “Notice” box.
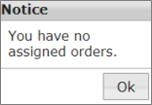
- If this message is not displayed once the user is done with the orders, they must click “Release Orders” because there are still orders assigned to that user.
- VERY IMPORTANT: No other associate will be able to pick those orders until they are released by the current user.
- This can be viewed by the Store Manager using the “Stores-Assigned Customer Order Not Shipped” report.
16. Return all completed Pick Bins to the station to be packed and shipped.
In-Store Pickup Orders
1. This should be checked every 15 minutes.
- Remember to click the refresh button in the upper right-hand corner on the Reminders portlet each time the report is checked.
2. Check the “Stores-In Store Pickup Orders” link in the “Reminders” portlet on the Dashboard.
- This will display how many “In Store Pickups” are for the store.
- It will be green when there are no orders to be completed.
3. Open the Picking App (Stock Pickup/Order Completion = SPOC).
4. Select “In Store Pickup” then the Team and number of orders to assign.
- If the order cannot be completely fulfilled:
- Click the “Not Found/ 0 OH” checkbox.
- Click “Hold”.
- “Pick Exception” will not be an option.
- Customer Service will correct the order.
- Customer Service will notify the store with any directions if needed.
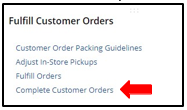
5. Once all orders have been picked, click on the “Complete Customer Orders” link in the “Fulfilling Customer Orders” portlet on the dashboard.
6. This will display all the orders/bins ready to be packed.
- If the order does not pull up, then it is missing items and will need to be fully picked before it can be completed.
- In-Store Pickup Orders will be listed in red with a caution sign by it to be easily identified.
7. Pick an order to start with and find the bin number in the “Bin” column.
- This will prompt the “Item Fulfillment” page for that order.
- Open the page in a new tab by middle clicking on a mouse or clicking left on a laptop pad and choosing to open in a new tab.
8. Verify that the items picked match the items listed on the Store Pickup Fulfillment.
- Check the style number, size, and quantity.
9. Verify that the items picked are not damaged.
10. Click “Mark Shipped”.
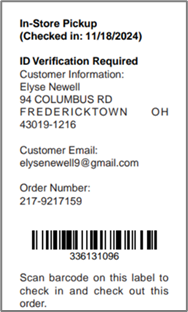
11. Click the “Print Shipping Label” button.
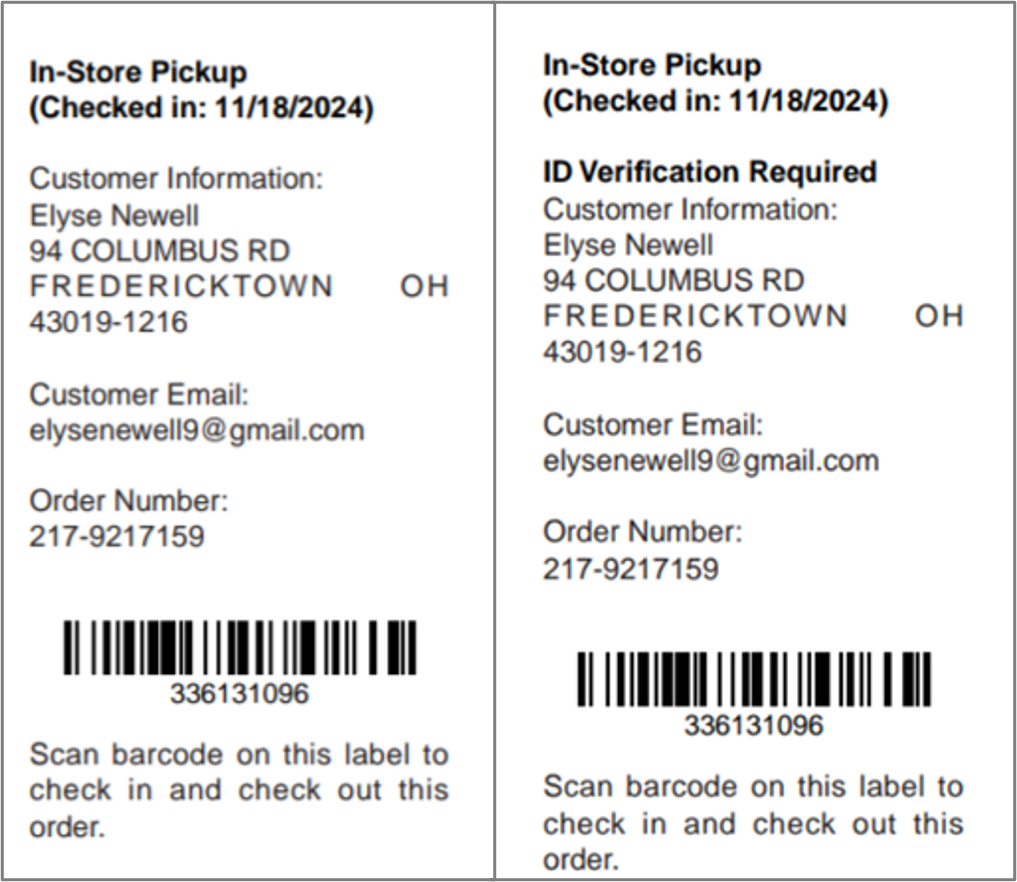
- When printing the Shipping label for an In-Store Pickup the label will be different than an order to be shipped.
- The label may or may not have ID Verification information based on the contents of the order.
12. Pack the order and attach the ‘shipping’ label.
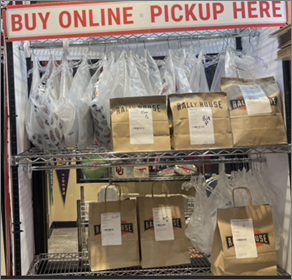
- If the order is apparel, use a Red Rally House bag and hang on the Pickup Rack.
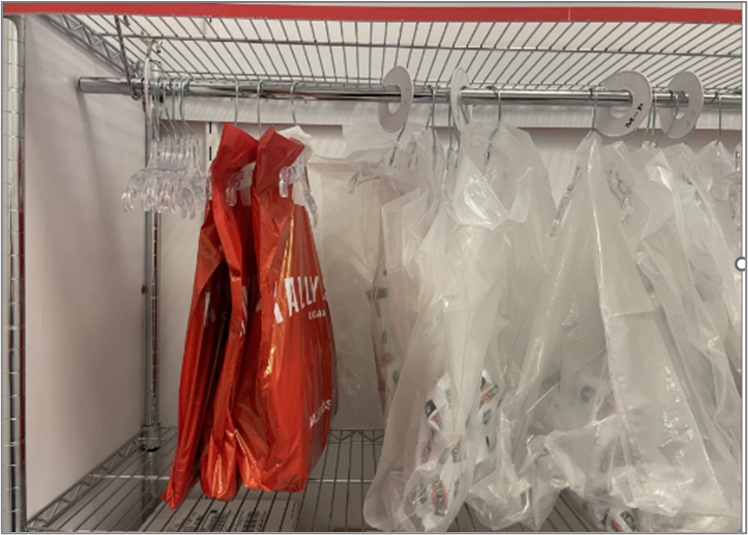
- If the order is hardlines or heavy items, then use the Brown Kraft Paper bag and place them on the Pickup Rack shelves.
13. Check the order into LISP to notify the customer that the order is ready to be picked up.
Checking In/Out In-Store Pickup Orders
1. Open and login to the Location In-Store Pickup (LISP) App.
- There is a link in the Shortcuts in NetSuite as well as a shortcut on the Zebra handheld.
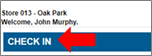
2. Click on “Check In”.
3. Scan the barcode on the Shipping Label in the “Barcode” box.
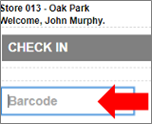
- This will check the order in and notify the customer.
- The store does not need to contact the customer.
4. The app will list which Bin on the In-Store Pickup fixture to place the order.

5. Place the order in the corresponding Bin and wait for the customer to come in and pick up.
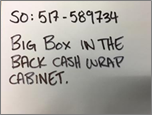
- If the item is too large to place in the Bin, then put it in a secondary location and write the Sales Order number and where the order was stores on an Index Card and place in the Plastic Sleeve in the Bin.
6. The customer will come into the store with email confirmation to pick up their order.
7. To Check Out the order open and login to the Location In-Store Pickup (LISP) App.
8. Click “Check Out”.
9. Enter the full order confirmation number from the customer’s email in the “Barcode” box.
- This will include a 3-digit prefix.
- If the order number is not shown in the email body, check the subject line of the email.
10. The app will display which Bin the order is in and how many packages the customer has.
11. ⚠️Check the Shipping Label for “ID Verification Required”.
- When an ID check is required, it will print “ID Verification Required” and customer’s name and billing address from the invoice.
12. If ID verification is required, the team member will ask the customer for their ID.
- The team member confirms that the ID name and address match the information on the Shipping Label.
- If the information does not match, alert the customer that their ID does not match the billing information for the in-store pick up, which is required to check out the order.
- Offer to refund the in-store pick up order to the original form of payment and then process a sale of the item(s) on Sitoo with new payment so they guest can take them home today.
- To return the in-store pick up, follow Online Order Return process.
- To process the sale on Sitoo, follow Completing a Sale process.
- Offer to refund the in-store pick up order to the original form of payment and then process a sale of the item(s) on Sitoo with new payment so they guest can take them home today.
- If the information does match, continue with the process.
- If the information does not match, alert the customer that their ID does not match the billing information for the in-store pick up, which is required to check out the order.
13. If there is not an ID check required, then continue with the process.
14. Scan the barcode on the Shipping Label in the “Barcode” box.
15. The order has now been checked out and can be given to the customer.
- Offer to open and inspect the order for the customer.
- This is in case the customer needs to return/exchange the order.
Manage Oders Not Checked In/Not Checked Out
1. Use the “Stores-In Store Pickup Not Checked In” report in the “Reminders” portlet to identify any In Store Pickup orders that have not been checked in yet.
- If the order has been packed and is ready for customer pickup, the order should be checked into LISP and should not be shown in this search.
2. Use the “Stores-In Store Pickup Not Checked Out” report in the “Reminders” portlet to view all the In-Store Pickup Orders that are currently checked in and ready for customer pickup.
- Confirm the orders listed in this report are in the In-Store Pickup fixture and in the correct bin.
- If the order is not in the In-Store Pickup fixture awaiting customer pickup, it should not be shown in this report.
- If the order has been picked up, check the order out using LISP.
- If the order was refunded/returned or has been misplaced, create a case for Customer Service with the order number, style number(s), and the type of issue.
- If the order is still in the In Store Pickup fixture but has been awaiting customer pickup for 60+ days, use the “Online Returns and Abandoned In Store Pickups” Best Practice to return and refund the item(s).
Troubleshoot LISP
1. If the label will not scan into LISP to check the order in:
- Manually type the barcode listed on the In Store Pickup label into the barcode field.
- Log out of LISP and then back in and try again.
- If this still does not check the order in, then create a CASE with the Sales Order number and assign to Customer Service.
2. If the order is too large or the Bin assigned is full:
- Write the Sales Order and the location of where the order was placed on a notecard and put in the plastic sleeve on the Pickup Bin door.
3. If the label will not scan to check out the order OR the customer wants Curbside service:
- Open the Stores-In Store Pickup Not Checked Out report in the Reminders.
- This will show the Sales Order, Customer Information, the Customer Email Checkout Barcode, the Package Order Checkout Barcode, and the Pickup Bin.
- Copy and paste or manually type in the Customer Email Checkout Barcode to start the checkout process.
- Copy and paste or manually type in the Package Order Check Out Barcode to complete the checkout process.
- If this still does not check the order out, then create a CASE with the Sales Order number and assign to Customer Service.
Packing and Shipping the Orders
1. Set up 3 boxes/areas to hold orders that are awaiting pickup by the carrier.
- These boxes/areas should be near the delivery section of the store.
- Label one “United States Postal Service” or “USPS”.
- Label one “United Parcel Service” or “UPS”.
- Label one “United Parcel Service Next Day Air” or “UPS NDA”.
2. Click on the “Complete Customer Orders” link in the “Fulfilling Customer Orders” portlet on the dashboard.
3. This will display all the orders/bins ready to be packed.
- If the order does not pull up, then it is missing items and will need to be fully picked before it can be completed.
- If the order is listed in red and has a caution sign by it, then this is an “In-Store Pickup” order and should not be shipped.
- The order needs to follow the “In-Store Pickup” process
- If the order/bin is highlighted in yellow, then the packing slip needs to be printed and included with the shipment.
- If the order/bin has a green flag beside it, then this is a gift order. White out the price on the tag(s) before packing.
- If the order/bin has a green dollar sign beside it, then the order needs to be packed first and the package needs to be placed with the “UPS NDA” pickups.
4. Pick an order/bin to start with and find the bin number in the “Bin” column
5. Open the order in a new tab by clicking “View”
- This will prompt the “Item Fulfillment” page for that order.
- Open the page in a new tab by middle clicking on a mouse or clicking left on a laptop pad and choosing to open in a new tab.
6. Verify that the items picked match the items listed on the item fulfillment.
- Check the style number(s), size(s), and quantity.
7. Verify that the items picked are not damaged.
8. Click “Mark Shipped”.
9. If the order was highlighted requesting a packing slip be printed, hover and select the ‘Print” icon.

- This will prompt the “Packing Slip”.
- Print this sheet.
- It will go in the package with the product.
10. Click the “Print Shipping Label” button.
- This will print a shipping label.
- UPS labeled orders will need to go in the United Parcel Service box for pickup.
- USPS labeled orders will need to go in the United States Postal Service box for pickup.
11. Pack the order.
- The store should set up an area that includes all the shipping materials for easy use.
- VERY IMPORTANT: Be sure to remove any hard sensors from the product prior to packaging it.
- Choose the appropriate box/bag to ship the product.
- The package should be the smallest package that can be used for the item
- Use an appropriate amount of bubble wrap, butcher paper, packing materials to protect any breakable/hardline items.
- Remember these are customer orders and it is imperative that the order arrives undamaged.
- If requested, include the “Packing Slip” in the package.
- Adhere the “UPS Shipping Label” or “USPS Shipping Label” to the outside of the package.
- If the order requires multiple shipping labels (multiple boxes) to ship, create a case for customer service including the sales order number, item fulfillment number, and what styles(s) will be shipped in each box.
12. Set the package in the appropriate USPS or UPS shipment boxes and ensure the package is picked up with the next delivery/pickup
- USPS Ground Advantage will be picked up by USPS.
- UPS Ground Saver (USPS Parcel Select), UPS Ground, UPS Ground 3-Day Select, UPS Ground 2-Day, UPS Next Day Air, UPS 2nd Day Air, and UPS Next Day Air Saver will be picked up by UPS.
- Keep UPS NDA and NDA Saver separate from UPS Ground for easy pickup.
13. Repeat until all orders have been completed and shipped.
Customer Order Backup Plan
There may be times when the Store Pickup/Order Completion (SPOC) app is down. This process is a backup procedure in this scenario and will be one of the two stages based on severity. This process should only be completed when directed by Operations.
Stage 1: Pick the items off the floor so they do not get sold and wait for SPOC to come back up.
Stage 2: Pick, pack, and ship all orders manually until SPOC comes back up.
Stage 1: Picking the Item
1. Log into the NetSuite ERP.
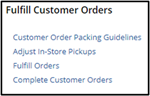
2. Click on the “Fulfill Orders” link in the “Fulfill Customer Orders” portlet in NetSuite.
3. This will prompt the “Stores-Fulfill Customer Orders” results page.
- These are the items that need to be pulled and shipped
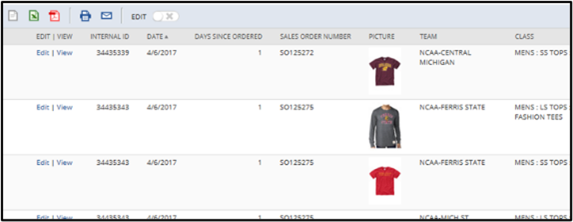
- NOTE: Use the Key at the bottom of the report to identify special orders:
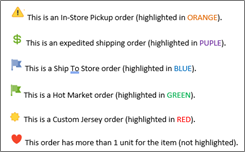
4. Click on the “Print” Icon.
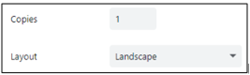
5. Print the report in landscape format.
6. Locate and pull each style.
- Ensure that the size is correct, and the product is not damaged in any way.
- Note on the printed list if the style/size is not available in the store.
- If an item cannot be found, then follow the Adjust Order section of this Best Practice.
7. HOLD all items in the Customer Order area of the store until SPOC is back up and running.
Stage 2: Pick, Pack, and Ship
This process will not be available unless approved by Operations and can only be completed with approval.
1. Log into the NetSuite ERP.
2. Click on the “Fulfill Orders” link in the “Fulfill Customer Orders” portlet in NetSuite.

3. This will prompt the “Stores-Fulfill Customer Orders” results page.
- These are the items that need to be pulled and shipped
- NOTE: Use the Key at the bottom of the report to identify special orders:
4. Click on the “Print” Icon.
5. Print the report in landscape format.
6. Locate and pull each style.
- Ensure that the size is correct, and the product is not damaged in any way.
- Notate on the printed list if the style/size is not available in the store.
- If an item cannot be found, then follow the Adjust Order section of this Best Practice.
7. Return to the “Stores-Fulfill Customer Orders” report from the “Fulfill Orders” link in the “Fulfill Customer Orders” portlet in NetSuite.
8. Click on “View” for the first item.
Cancelled Customer Orders
The Stores-Customer Order Item(s) Cancelled (ACTION) NetSuite dashboard report shows any orders or in-store orders that a customer has cancelled but you may have already picked and put in a bin or packed up.
1. Stores need to pull those canceled items out of the order and put them back on the sales floor.
2. This tool will identify those for you.
3. All you need to do is take them out of the order and follow the instructions on the report.
4. It will have you open the Item Fulfillment or Store Pickup Fulfillment and click the “Cancel Action Taken” button.

Expedited Customer Order Shipping
In the rare event that there are too many orders to complete that the store cannot get to the Expedited Orders, then the store will need to complete in NetSuite following the process below.
1. Click on the Stores-Expedited Customer Orders link in the Reminders.
2. Click on the Item Fulfillment Number.
3. Locate ALL the items listed on the report for that order.
4. Click View.
- This will open the Item Fulfillment page.
5. Confirm you have all the items and in the correct quantities.
6. Click “Mark Packed”.
7. Click “Mark Shipped”.
8. Pack the order.
9. Click “Print Shipping Label”.
10. Ship Order and repeat for all Expedited Orders.
Unknown Customer Order Return
There may be times when a customer mails in a return without a Sales Order number. In this case follow the steps below.
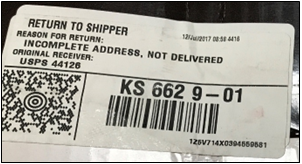
1. Item is delivered without a Packing Slip or a Sales Order number on the Shipping label.
- Double Check the Shipping Label.
2. Click on the “Unknown Customer Order Return Form” link in the Shortcuts.
3. Enter all the information on the form:
- Customer first and last name.
- Can be found on the Shipping Label.
- Customer Address.
- Image of the product.
- Image of the Shipping Label.
- Style number of the item being returned.
- If more than one item, then enter those in the box below the style number.
4. Click “Save”.
- This will provide Customer Service with the necessary information to find the Sales Order.
5. Once the return has been reported, the item(s) can be placed on the sales floor.
- Transfer if it is a team that is not carried by the store.
Pick Exception Review
When an item is not found during the Customer Order process, it creates a Pick Exception. This removes the item from the store’s inventory and creates Shrink. Rally House is dedicated to maintaining an accurate inventory to avoid Pick Exceptions. It is the Store Manager’s responsibility to follow this process to identify the reasons for the exception and take appropriate training and coaching steps to prevent them in the future. The Rally House expectation is that the Store Manager is to review these exceptions during each shift and complete this process.
Note: By completing pick exception reviews first, they will be removed from the Shrink Review report as well.
Process
1. Click on the “Stores-Pick Exception Review” link under the “Reminders” portlet on the NetSuite Dashboard.
- NOTE: If the store has not completed the adjustments that are over 5 days old, they will be highlighted in red. These need to be completed ASAP.
2. The “Stores-Pick Exception Review: Results” page will show a report of items that could not be found for customer orders.

- The report will include information about each adjustment.
- Muse User: Employee who made the adjustment.
- Date
- Days Old
- Picture
- Team
- Class
- Style Number
- Description
- Quantity Removed: How many units were adjusted out.
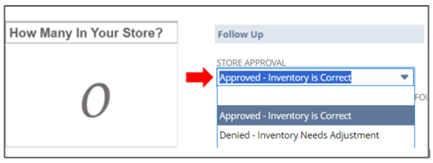
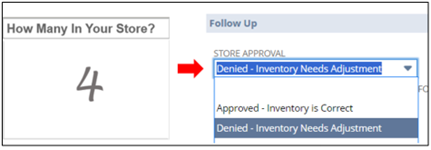
- How Many In Your Store: Empty field to enter the quantity physically found in store.
- Store Shrink Created: Retail value of units removed.
3. Click on the “Print” icon
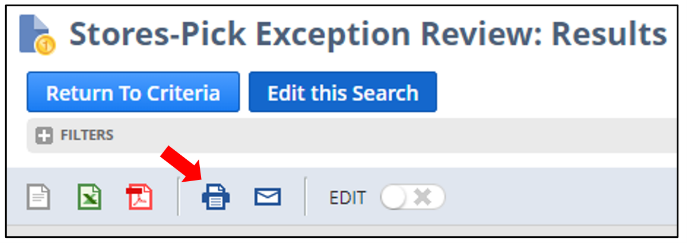
- Print the report in “Landscape” format.
4. Use the printed report to locate the items and provide a physical on hand count
- Write the quantity that is found in the “How Many In Your Store” column.
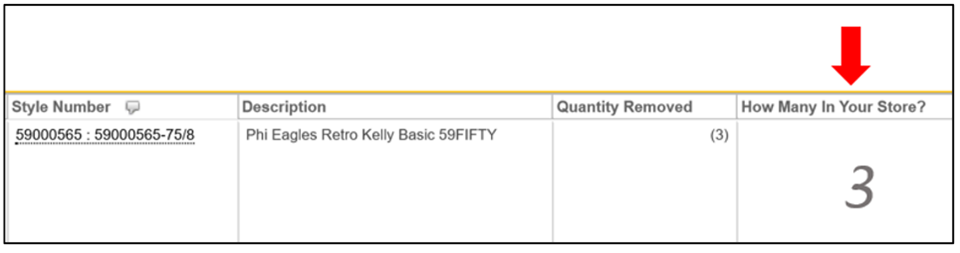
- This includes current receiving, holds, go backs, anywhere in the building.
5. Once all items have been found and recorded on the printed report, they need to be approved on the report in NetSuite.
6. Return to the “Stores-Pick Exception Review” link under the “Reminders” portlet on the NetSuite Dashboard.
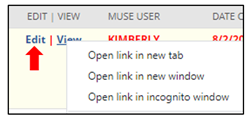
7. Right click on the “Edit” link to the left of the first line on the report that a physical count was completed for and select “Open link in new tab”.
8. This will open the “Inventory Transfer” record in a new tab in the browser.
9. Only the Store Manager should be doing this task.
10. Fill out the following fields in the ‘Follow Up’ section:
- Store Approval: On the printed form, reference the “How Many In Your Store?” column for the item being reviewed and choose ‘Approved’ or ‘Recount Needed’.
- If NO units were found, select ‘Approved – Inventory is Correct’.
- If ANY units were found, select ‘Denied – Inventory Needs Adjustment‘
- Store Notes: Enter the reason for the adjustment and/or any relevant information regarding the item.
- Current Physical On Hand: Enter the amount that was physically found in store from the “How Many In Your Store?” column of the printed form.
- Pick Exception Reason: Select the appropriate reason for the pick exception.
- Employee Could Not Find (Found by Manager).
- Employee Could Not Find (Not Found).
- Found in Damages (Found by Manager)
- In Backroom/Fitting Room/Other Misc Area (Found by Manager).
- Incorrect Merchandising (Found by Manager).
- Incorrect Merchandising (Not Found).
- Other (MUST EXPLAIN IN PICK EXCEPTIONS NOTES).
- This option requires that the explanation be entered into the “Pick Exception Notes” box.
- Tagged Incorrectly (Found by Manager).
11. Click “Save”.
12. Repeat for all items.
Customer Order Troubleshooting
SPOC Won’t Loade Orders to Pick
The outlined process does not work in- store pickup orders. These must be assigned in SPOC.
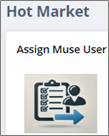
1. Click on the HOT MARKET tab on you NetSuite dashboard.
2. Once there click on the clipboard icon in the ASSIGN MUSE USER box.
3. This will open the SET MUSE USER COMMAND CENTER.
4. In the ***EMPLOYEE ID ONLY*** box enters the ID number that is in parentheses next to the employee who is going to do the orders.
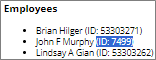
- ONLY THE ID NUMBER.
5. Then select the number of orders to assign from the TOTAL ORDERS TO ASSIGN drop down menu.
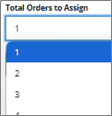
6. Then click SUBMIT.
7. This will assign the first X number of orders to that employee.
- When they log into SPOC the next time it will skip the order assignment and just bring up the order to complete.
Address Error When Printing Shipping Label
Use the Help Chat located on the admin site and follow the prompts to report the customer order shipping label issue.
Order Was Returned To Sender (The Store)
1. Remove the “Packing Slip” from the package.
2. Issue a refund for this order as normal.
- See the “Online Returns and Unclaimed In Store Pickup Orders” Best Practice.
- Open the “Sales Order” in the NetSuite ERP.
- Click on the “Related Records” tab.
- Click on “Fulfillments & Invoices”.
- Click on the date for the “Cash Sale” type.
- Click “Authorize Return” and follow the next steps.
- Select the reason “Return to Sender” in the “Online Return Reason” drop down menu.
- Select “Return to Sender” in the “How Did The Customer Return This Item” drop down menu.
- Confirm the item(s) being returned.
- Remove any items that are listed but not being returned.
- Click on that item.
- Click “Remove”.
- Confirm the quantity is correct for the number of units being returned.
- Click in the box in the “Quantity” column.
- Adjust the number of units being returned.
- Click “Save”.
- Click “Receive”.
- This will prompt the “Item Receipt” page.
- Click “Save”.
- The item(s) can now be merchandised on the sales floor.
- If the product is for a team that the store does not carry use the “Team Not Carried Return Transfer” Best Practice.
Reports
1. Stores-Fulfill Customer Orders
- This report will display the total number of orders the store needs to complete.
- It can also be used as a backup if the Store Pickup/Order Completion app (SPOC) is not functioning (this direction will come from the corporate office).
2. Stores-Overdue Customer Orders
- This report will display the number of orders that have been assigned to the store for more than 18 hours that still need to be completed.
- This report should be always zero to ensure timely execution of this process.
- If there are orders on this report, they need to be completed ASAP.
3. Stores-In Store Pickup Orders (New)
- This report will display the total number of orders that are to be completed by the store but are to be picked up by the customer and not shipped.
- These orders should be completed every 30 minutes to satisfy the customer who is driving in to pick them up.
4. Stores-In Store Pickup Orders Not Checked In (New)
- This will display all complete In-Store Pickup orders that have been picked and packed but have not been checked into LISP.
- Scan these orders into LISP to check them in.
5. Stores-In Store Pickup Orders Not Checked Out (New)
- This will display all In-Store Pickup orders that have not been picked up by the customer yet.
- Orders will need to be checked out using the LISP app before they will drop off this report.
- This report should be kept current with only orders that still need to be picked up.
6. Stores-Hot Market Customer Orders
- This report will display the total number of Hot Market orders the store needs to complete.
- Some of these items may not be in the store yet.
7. Stores-Bins on Hold
- This report will display all items that have been placed on hold (Hot Market, Bad Image, and generic Hold).
- Generic holds are primarily for In-Store Pickup items that cannot be found and contact with the customer is needed.
8. Stores-Assigned Customer Orders Not Shipped
- This report will display any orders that are currently assigned to users in the store.
- It is used to determine if a user did not release the orders prior to leaving or simply did not complete the orders.
- These orders are currently assigned to that user only and will need to be released before another user can complete them.
- Store Managers: you can now release orders individually by opening the Item Fulfillment in NetSuite.
- Simply click the “Remove MUSE User” button so someone else can pick the order.
9. Stores-Custom Jersey to Make
- This report will display all the custom jerseys that need to be made.
- This is only for Jersey Press stores.
- The jersey will remain on this report until the order has been completed and shipped.
Free Shipping Code
A customer comes in looking for a specific team, item or size that is not available in the store.
- Example: Needs a large but the store is currently sold out, wants Baylor but your store does not carry Baylor, or wants a long sleeve item they saw at another RH store and its available online, but you don’t have it.
- Explain to the customer and apologize for not having the style/size, but that it can be ordered with free shipping to their home.
- If the customer wishes to place the order in the store, then we can offer them “Free Shipping” to their home.
- Use the Free Shipping Code for your store to give them free shipping during checkout.
- The code can be found in NetSuite under the Shortcuts portlet named “Free Shipping Code (Online Use)”.
- This can only be used in store; It cannot be given to the customer to place an order at home.
- The Free Shipping Code is only valid on “Standard” shipping.
- The online shipment form defaults to “UPS” and will need to be changed to “Standard” shipping to apply the Free Shipping Code.
- This code offer does not apply to Hot Market situations where the product has not yet arrived.
Common Customer Order Questions
There are times a customer will call or come into the store and have questions regarding a Customer Order. This Best Practice will outline how to research and provide answers for the customer. Researching an order may require looking at a variety of different pages in NetSuite.
Where is my Order?
- Open Stores-Customer Order Research Report and enter the Sales Order number in the filter – Press Tab.
- Note: Use the Stores-Customer Lookup to find the order if the customer does not have it available.
- The report will show:
- Order placed date.
- Order completion date.
- Oder shipped date.
- Expected Delivery Date.
- Tracking number.
- Copy the Tracking number and use Google to search for it.
- Click the “Track via”.
- Troubleshooting Notes:
- Both UPS and USPS have detailed tracking history on the pages that can be used for specific updates.
- This is important to check to see if there are delays from the carrier.
- If UPS says, “Delivered by Local Post Office”, then use the Tracking number in the “Additional Information” box to track further.
- Copy the tracking number and click on the link to USPS.
- Click on “Track & Manage”.
- Paste the Tracking number and search.
- Both UPS and USPS have detailed tracking history on the pages that can be used for specific updates.
Where is my Refund?
- Open Stores-Customer Order Research Report and enter the Sales Order number in the filter.
- Click “View” for the order.
- This will open the Sales Order page.
- Scroll down to the blue tab bar and click on the “Related Records” tab.
- Click on the “Fulfillments & Invoices” tab.
- Look for a Return Authorization line.
- Review the “Status”.
- Refunded = the refund has been completed.
- Any other “Status”, then create a Support Case and assign to Customer Service.
- Notify the customer that the refund is still being processed and the Customer Service team is being notified to follow up with them.
- The “Date” is the date the refund was processed.
- IMPORTANT: Refunds can take between 2-10 Business days depending on the Customer’s financial institution.
- If the customer needs further information, direct them to call their financial institution.
- Troubleshooting Notes:
- If there is no “Return Authorization”, then create a Support Case and assign to Customer Service.
- Notify the customer that their refund request has been escalated to the Customer Service department who will contact them regarding their refund.
Can I Place My Order with You?
- Use rallyhouse.com to process an order.
- The Customer must be present in the store to place the order.
- Payment cannot be taken over the phone.
- Confirm all information when completing the order.
How much is left on my gift card? OR what is my PIN number for my gift card?
- Use the Stores-Gift Card Lookup report and enter the gift card number in the filter.
- The report will show the Gift Card and PIN Numbers.
- Copy the PIN number.
- Click on the “Use PIN Number to Check Balance” link in the report.
- This will bring up the rallyhouse.com check balance page.
- Click “Check Balance”.
- Paste the PIN number and click “Submit”.
How do I return my order?
- Online returns follow the same policy as a normal return.
- Return Instructions can be found on rallyhouse.com under “Returns & Exchanges”. Click here.
Do you have this item available?
- Use rallyhouse.com to locate the item the customer is asking about.
- Select the size requested.
- This will show the stores that have the item in stock.
- Troubleshooting Notes:
- Hot Market items sell very quickly; the best option is to go to the store or place an order for the item.
- These items are not eligible for overnight shipping.
- Check the “Shipping Notes” as the expected shipping times may vary for these items.
- Hot Market items sell very quickly; the best option is to go to the store or place an order for the item.
Other Questions
- Create a Support Case and assign it to Customer Service.
- Include:
- Sales Order number.
- Customer Information (Name, Address, Email, Phone).
- Product information (Style Numbers, Sizes, Quantities).
- Detailed description of the issue.
- Be very specific to avoid any additional communication.
- Notify the customer that the issue has been escalated to the Customer Service team to correct the issue.

INTERIM SHIP TO STORE
THE PLAY:
Interim Ship To Store supports new store openings by routing product through an existing store ahead of launch.
To ensure this product is available for Customer Orders, purchase orders for new locations are sent, received, and merchandised through an active store. This may include product your store already carries or completely new teams and assortments.
While in your store, this product must be received and handled like any other incoming shipment. Teams are responsible for maintaining awareness of incoming ISS product, ensuring it is accessible for Customer Orders, and keeping it organized.
A portion of the product should be merchandised on the sales floor, with remaining units maintained in back stock for easy access. This product is temporary and will be transferred out as part of the new store setup process.
If there are questions or uncertainty, partner with your Field Leader or OPS Coordinator.
IMPACT:
Clear execution of ISS ensures product is available for customers while supporting new store openings.
When done well:
- Product is available for Customer Orders without delay
- Teams confidently work with both familiar and new product
- Inventory remains organized and easy to access
- Product is protected and ready for transfer when needed
- Stores avoid unnecessary movement, errors, or confusion
Breakdowns in execution can lead to missed orders, inventory issues, and delays in supporting new store openings.
GAME PLAN
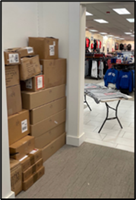
What is Coming
- Click on the Stores-Incoming Shipment (Interim Ship To Store) report in the Reminders.
- This will show:
- The new stores that will be arriving.
- Total PO’s for that location.
- Teams being carried.
- Total Styles.
- Total Children.
- Total Units.
- The report shows only the Pending Receipt PO’s.
- This will show:
- Click on the store in “For Stores” column.
- This will show all the PO’s, when they will ship, and when they are due to arrive.
- Use the filter to set a date range to see what is coming in that timeframe.
- Pro Tip: Set it from today to 30 days from now to get a better idea on timing.
- Press TAB when using filters (do not press ENTER.

Receiving
- Receive in PORT as normal.
- NOTE: This may be for Teams that the store does not normally carry.
- Do not transfer this product out of the store.
- Do not create PO Issues or cases for these items.
- If there are questions on these PO’s reach out to the OPS Coordinator.
Merchandise and Storage
- Once received each style needs to be displayed on the Sales Floor.
- A single size run per style.
- This is in a non-dominant location at the back of the store.
- New teams should have at least a 4-way presentation.
- This is so the store can pick any Customer Orders.
- The remaining units/sizes should be back-stocked on Z-Racks and/or Bakers Racks.
- Back-stock is not to be put back in boxes.
Transfer
- This product is for a new store, and transfers will be created to ship it once the new store is set to open.
- Follow the TOE process for NSO.
OPERATIONS STORE MAPS


THE PLAY:
Operations Store Maps provide a clear structure for how each store organizes and executes key operational tasks.
Rally House stores vary in size, layout, sales volume, and assortment, which means operational setups are not one size fits all. Each store map is designed to reflect the needs of that specific location while supporting efficient execution and a strong customer experience.
The map outlines where key work happens across the store, including inbound shipments, merchandise processing, and sales floor preparation. It also defines how fixtures and tools are used to support these tasks and where they are placed when not in use.
This structure gives store leadership and teams a clear understanding of how work flows through the store and how to maintain organization throughout daily operations.
IMPACT:
A clear and well maintained store map creates consistency, efficiency, and a better in store experience.
When done well:
- Teams know exactly where to complete each task
- Product moves efficiently from receiving to the sales floor
- Work areas stay organized and do not disrupt the customer experience
- Coverage is maintained while operational tasks are completed
- Fixtures and tools are used correctly and returned when not in use
- Stores can adapt to volume and space while staying organized
Lack of structure leads to confusion, inefficient workflows, and disorganized work areas that impact both the team and the customer experience.
GAME PLAN
Example Operational Store Maps
- Each Operational Store Map will be marked with the following locations:
- IB – Inbound Shipment
- MPA – Merchandise Processing Area
- PH – Party Host
- NIU – Not in Use
- PSR – Pack, Ship, Receive Station
- Each Operational Store Map will be marked with the following fixtures:
- ATM- Available to Merchandise
- HT -Hand Truck / Dolly
- CW – Cash Wrap
- PSR – Pack, Ship, Receive Station
Receiving Merchandise
- The Operational Store Map should designate the location for Receiving Merchandise.
- In a low volume store or in the off season, this is often done on the front or back cashwrap as the primary option. However, it is often required that a secondary location is required away from the commotion of the cashwrap.
- This location should be marked on the Operational Store Map with RM.
- The RM should be located to maintain visibility to high traffic customer areas but also shielded to avoid messy work areas.
- Follow Purchase Order Receiving Tool (PORT) and place received product on ATM (Available to Merchandise) fixture and then move to the MPA.
- ATM Fixture is a baker’s rack with white box bins or a hardlines cart where received shipment is placed to be able to move to an MPA.
- In mall stores the hardlines cart is a mail cart and in other stores it is a shopping cart.
- ATM Fixture is a baker’s rack with white box bins or a hardlines cart where received shipment is placed to be able to move to an MPA.
Merchandise Processing Area (MPA)
- Each store will identify one or more Merchandise Processing Area (MPA) locations, where received products (including transfers) are processed for merchandising.
- This location should be marked on the Operational Store Map with MPA.
- Transfers and direct shipments should be sorted into hanging, folding, and peggable/shelving categories.
- When the cashwrap is in the front of the store, it is advantageous to identify the MPA in a location further into the store to maintain positive coverage to assist customers.
- In the event the primary cashwrap is in the middle or rear of the store, the MPA location should always be at the front of the store and act as the Party Host.
- In higher volume stores, there may be 2-3 MPA locations throughout the store.
- MPA locations may be permanent with specific fixtures or may be temporary based upon coverage and volume. An MPA location can be set up for a single shift in some cases.
- When hanging products at an MPA location, an associate will use the Apparel Hanging Cart (AHC) prepped for the hanging product.
- Review the AHC and Size Bead directive.
- When folding, only the Refresh and Apparel Folding Table (RAFT) is needed, not the AHC rack.
- The workstation should have full assortment of size labels in the workstation drawer.
- Folded product can be under the RAFT on a shelf, in 2-3 boxes that are placed neatly, or back onto the MPA rack.

- Fold the apparel, place a size sticker on the bottom right side of the garment, and then have another associate place the apparel stack in the pre-planned location for the style.
- When a style is going to be folded, there must be a planned location for the style to be placed.
- With hardlines and peggable items, use the MPA fixture to sort by team and take the MPA fixture to the correct department and merchandise directly from the MPA fixture to the floor fixture for hardlines.
- In all cases, when fixtures are not being used to actively process merchandise, they should be returned to NIU (Not in Use) located on the Operational Store Map.
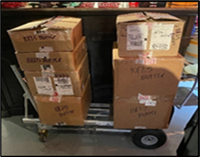
Inbound Merchandise Delivery
Each store should identify the location for the UPS/FEDEX delivery of inbound shipments. The location should be flexible to handle a wide variety of volume depending on the season. The primary location in most stores will be at or near the primary cashwrap away on the far side away from the front door. Many newer cashwrap’s have large open spaces underneath the rear cashwrap for inbound shipments. If there is a secondary processing area for receiving, the Inbound Shipment may be directed to that location.
- The UPS/FEDEX driver should place the packages where identified on the Operational Store Map. In rare occasions, the Inbound Shipments may be placed in the back room but must be approved in advance by RM/COO.
- Mark the Inbound Merchandise Delivery location on the Operational Store Map with IB and identify a primary, secondary, and tertiary.
- IB1: <10 packages or what neatly fits in the space
- IB2: In addition to IB1 this space is used
- IB3: >20 packages and IB1 and IB2 are full
- Accepting Incoming Shipment Process
- UPS/FEDEX driver places the packages in IB1 if available.
- If IB1 is already full, have the driver place the packages in IB2.
- If there are more than 20 packages and IB1 and IB2 are already full, have the driver place the packages in IB3.
- UPS/FEDEX driver places the packages in IB1 if available.
- A Manager on duty should sign for the shipment.
- Count all boxes being delivered and confirm that amount with the driver.
- Box count must match the driver before accepting the delivery.
- If the Box count is incorrect, the driver must document that and find the missing scanned package prior to leaving.
- Confirm all packages are for Rally House.
- Count all boxes being delivered and confirm that amount with the driver.
- Discrepancies need to be communicated using the Report UPS Delivery Issue form.
- Packages that are damaged should be notated by the carrier or refused by the store.
- Only refuse a package if it is severely damaged.
- Package has broken glass.
- Package is wet and has soaked through the box.
- If unsure, contact the Field Leader immediately.
- Only refuse a package if it is severely damaged.
- Separate boxes by Transfers, Supplies, Online Returns and Direct Shipments, then write the Date on the Direct Shipment Box by the Shipping Label. While the delivery is happening, move or process transfers, supplies, and online returns as to get them out of the way.
- Transfer shipments from other stores or the warehouse do not need to be received and move directly to Merchandise Processing using the hand truck / dolly for immediate sorting.
- Open and place on the Merchandise Processing Area Baker’s Racks.
- Supplies will come from Amazon, Rally House Warehouse, or another related vendor and need to be received in NetSuite.
- Warehouse Supply Transfers and store’s Amazon orders do not need to be received in NetSuite.
- Online Returns need to be taken to the cashwrap and be put at the Manager Station to process the return the same day they arrive to the store.
- Direct Shipments will come directly from the Vendor and need to be received in PORT.
- These shipments can have multiple boxes of the same Purchase Order (PO).
- They may be indicated as box 1 of 5, 2 of 5, 3 of 5 and so on.
- Transfer shipments from other stores or the warehouse do not need to be received and move directly to Merchandise Processing using the hand truck / dolly for immediate sorting.
- Sort (if box states contents) or open boxes (box does not state contents) and prioritize product for receiving.
- Hot Market, In-Season Teams, or Special products should be first.
- Replenishment or Out-Of-Season teams should be done last.
- Once ready to begin receiving, use a dolly to move a manageable number of boxes at a time to the receiving area.
- The receiving area is generally in a different location to the store from where UPS dropped the shipment.
Placing Merchandise on the Salesfloor
- Merchandise should be prepared for the sales floor at either the mini-z rack or workstation, depending on if the merchandise is being folded or hung.
- Preparing merchandise is a great task for the Party Host to complete near the front of the store in the designated spot for preparing merchandise on the store’s Operational Store Map.
- Party Host should be marked as PH on the Operational Store Map.
- Ensure that the shipments have been received.
- If the merchandise is on the MPA fixture, it should be received or was a transfer.
- Prioritize merchandise based on “in season” teams and replenishment needs.
- Product Placement.
- Follow the Visual Merchandising Guide.
- General guidelines.
- Apparel.
- Ensure that a full size run available for each apparel item is on the sales floor.
- Hanging items need to have the correct size brick on the hanger and should not be bulging.
- If the size bricks are not lying flat on the face out then there are too many items on the one face out.
- Shirt stacks should be balanced in heights and not exceed 8-11 inches.
- 2-Smalls, 2-Mediums, 3-Larges, 3-XLarges, 2-XXLarges
- Follow directions for New Arrivals and Seasonality.
- New Arrivals
- Seasonality
- Hardlines.
- Make sure every item is represented.
- Do not overfill fixtures with a single style of product.
- Place excess items on tabletops in the team shop or in backstock if needed.
- Follow H.A.M. for merchandising hardlines.
- Please remember to rework areas as needed to maximize space and to best display our newest merchandise.
- Food.
- It is imperative that all food safety processes are followed for the integrity of our stores and the safety of our customers.
- As food arrives in shipment, the associate working the shipment will leave the food in the backroom.
- It should not be placed for replenishment on the sales floor at this point.
- If the new food item is not back stocked in the backroom, then they may be placed directly on the sales floor after checking for expiration dates.
- After all other shipments have been completed, the associate working the shipment can return to the food restock.
- The associate working the shipment will put food away in the designated food storage area in the backroom. Any existing food items on the fixture are to be pulled to the front of shelf, and any new food replenishment will be placed to the back of the shelf.
- This allows for a first-in, first-out process that rotates food stock for freshness. As the associate working the shipment needs to check for expired dates while placing the new food replenishment in the back of the bin.
- If expired food is identified, follow the Damaged, Defect, Expired Product Best Practice.
- Apparel.
- Backstock.
- After the shipment has been completed and the fixtures are filled with all sizes and colors represented according to the Visual Merchandising Guide, the remaining product needs to be stored in the backstock area of the backroom.
- Organize items that needed to be placed in backstock.
- Put away backstock by department to correspond with the Visual Merchandising Checklists.
- Hat Backstock Rack (HBR) – Hats
- Smaller leagues can be combined on HBR
- Hang, Fold, Box (HFB) – Hanging and folded apparel for men’s, women’s, or kids
- Z-Rack – Hanging apparel for men’s, women’s, or kids
- Baker’s Rack – Folded apparel for men’s, women’s, or kids OR hardlines
- Hat Backstock Rack (HBR) – Hats
- End of Process Clean-Up
- Empty all AHC racks, Salesperson Racks, and RAFT of product and trash.
- Return the empty AHC Rack and other racks to the backroom.
- All Product is placed.
- All trash is disposed.
- Cardboard boxes are recycled or stored for store transfers.
- Manager on Duty Follow-Up
- After all stock is completed and the excess is put away, the Store Manager or Assistant Store Manager will need to walk the store to ensure that:
- All products are placed as directed.
- All visual displays are set.
- All merchandising standards are followed and executed on the sales floor.
- All carts have been cleaned off, and shopping carts are back in service for the customers and unused workstations are placed into their storage location.
- After all stock is completed and the excess is put away, the Store Manager or Assistant Store Manager will need to walk the store to ensure that:
UPS LABEL CREATION
THE PLAY:
Creating a UPS label is a core task used across multiple operational needs within the store.
Teams generate UPS labels to ensure packages are properly identified and prepared for shipment. This supports accurate routing and allows product to move efficiently through the shipping process.
Execution should be consistent and accurate to support timely movement and prevent errors.
IMPACT:
Accurate label creation ensures product moves correctly and reaches its intended destination on time.
When done well:
- Packages are labeled clearly and ready for shipment
- Product moves without delay or confusion
- Shipping errors are minimized
- Teams maintain a consistent and reliable process
Errors in this step can lead to delays, misrouted packages, and additional work to resolve issues.
GAME PLAN
Creating UPS Labels
1. Go to https://www.ups.com/lasso/login.
2. Login using the store’s login information.
- Click on the “My UPS Login Information” link in the “Shortcuts” portlet on the NetSuite dashboard.
- This will display the “Username” and “Password” for the store.
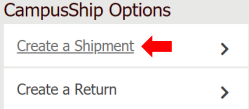
3. Under “CampusShip Options” click “Create a Shipment”.
4. Under #1 “Where is this shipment going?”:
- Click on the “Corporate Address Book” link.
- This will prompt a pop-up window.
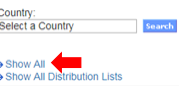
- Scroll to the bottom of the window and click “Show All”.
- This will display all locations at the bottom of the page.
- Click on the button beside the store that the package is going to.
- Click “Select”.
- This will add that location to the shipment label.
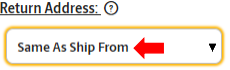
5. Under #2 “Where is the shipment coming from?”:
- In the “Return Address” box it should read “Same As Ship From”.
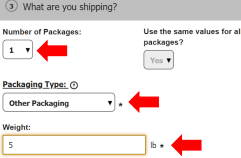
6. Under #3 “What are you shipping?”:
- “Number of Packages” should always be 1.
- A new label should be created for each box.
- Select “Other Packaging” from the “Packaging Type” drop down menu.
- Enter the “Weight of the Package”.
- This is the best guess on weigh
- Leave “Package Dimensions” blank.
- Leave “Package Declared Value” blank.
- “Number of Packages” should always be 1.
- A new label should be created for each box.
- Select “Other Packaging” from the “Packaging Type” drop down menu.
- This will be the default selection and should not be changed.
- Enter the “Weight of the Package”.
- This is the best guess on weight.
- Leave “Package Dimensions” blank.
- Leave “Package Declared Value” blank.
7. Under #4 “How would you like to ship?”:
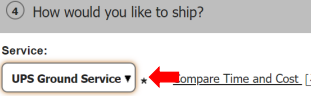
- Select “UPS Ground Service” from the “Service” drop down menu.
- This is the default selection and should not be changed.
- No additional services need to be selected.
8. Under #5 “Would you like to add reference numbers to this return shipment?”:
- The “Reference 1” field will be the store location and cannot be changed.
- The “Reference 2” field.
- Enter “Store Transfer”.
- The “Reference 3” field.
- Enter “Merchandise” for any product that is being shipped.
9. Under #6 “How would you like to pay?”:
- Select “Y793E4- Sampler Stores” from the drop-down menu.
- This is the default selection and should not be changed.
10. Click “Next”.
11. Review your shipment details from the “Shipping Summary” screen for accuracy and make any changes necessary.
12. Click “Ship Now” at the bottom right and a new screen will pop-up.
13. Print your shipping label from this new screen and tape it to the box ready for shipment.
14. Log Out of the account.
HARD SELL DATE
THE PLAY:
Hard Sell Date merchandise protects important league, university, and vendor product launches by ensuring items are not sold, displayed, photographed, or shared before the approved release date. Store teams are responsible for identifying Hard Sell Date merchandise during receiving, securely storing product in the backroom, monitoring upcoming launch dates in NetSuite, and moving merchandise to the salesfloor only when authorized. Following the Hard Sell Date process helps Rally House maintain strong partnerships while delivering coordinated product launches to our Guests.
IMPACT:
Executing the Hard Sell Date process protects Rally House’s relationships with leagues, universities, licensors, and vendors while ensuring all stores launch product at the same time. Proper handling prevents unauthorized sales, protects future product allocations, and creates a better Guest experience by supporting organized and impactful product launches. Consistent execution helps safeguard access to exclusive merchandise and ensures Rally House remains a trusted retail partner.
GAME PLAN
Notification of Hard Sell Date Item
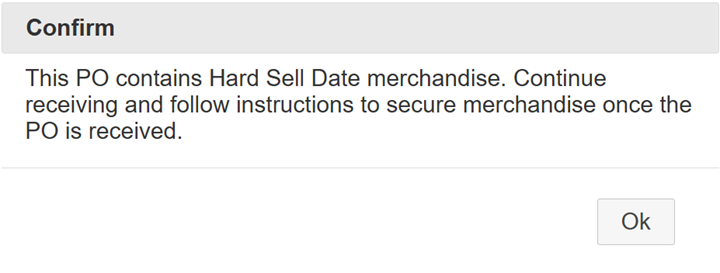
- Stores will be notified of a Hard Sell Date for an item when Receiving the item in PORT (Purchase Order Receiving Tool).
- If the PO entered includes items with hard sell dates, a message will be displayed. Click Ok to proceed with receiving.
- After the item is scanned, the Hard Sell Date will be displayed below the price, above the image.
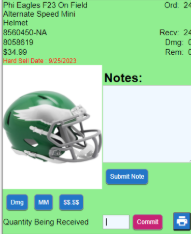
- After completing the receipt follow the directions on the message displayed.
- The Hard Sell Date can be found above the image of the item on the confirmation page.
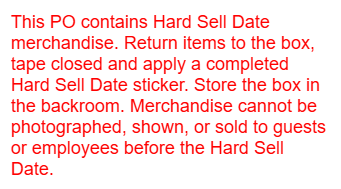
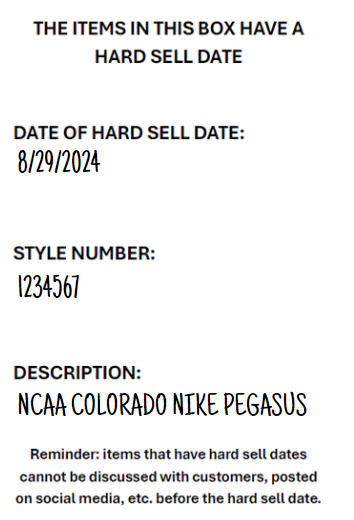
- Place items back into the box and seal the box after received.
- Print a Hard Sell Date Sticker using the 4×6 printer and place on the box.
- Write on the Hard Sell Date Sticker the information shown on the sticker.
Confirming Past and Upcoming Hard Sell Dates in Store
- Use the Hard Sell Dates Shortcut on the store’s NetSuite dashboard to confirm past and upcoming hard sell dates in store. Stores are to check this Shortcut daily.
- This shortcut will display
- Items launching in the next 5 days
- Items launched within the past 10 days
- If there is an item on the search that does not match the date that is on the Hard Sell Date sticker, then the date has been adjusted for the item.
- The store is to follow the date in NetSuite.
- On the date shown on the Hard Sell Dates Shortcut for the item, the store removes the item from the backroom and merchandises on the salesfloor to be sold.
Merchandising Hard Sell Date Items
- Jerseys with hard sell dates must follow EAS Sensor Tag Placement. Jerseys are then merchandised following Jersey Merchandising.
- Footwear with a hard sell date are merchandised following Product Launch Footwear.
- Hats with a hard sell date are merchandised in the team’s Hat Wall following Hat Wall Process.
- When there is a full collection such as City Connect, the collection should be merchandised together to show the customer all items carried for the collection.
- Stores may need to work with their District Manager for space and fixtures for a full collection allocation.
COMMUNICATIONS


THE PLAY:
Communication is essential to executing Rally House standards consistently across every store. From company updates and operational tasks to support resources and reference materials, stores rely on communication tools and resources to stay informed, take action, and access the information needed to support Team Members and Guests. Understanding where information lives and how to access it helps ensure important updates, tasks, and resources are never missed.
IMPACT:
Effective communication improves execution, accountability, and operational consistency across the company. When store teams regularly review messages, complete assigned tasks, utilize available resources, and follow established communication channels, issues are resolved faster, expectations are clear, and stores can focus on delivering a great Guest experience while maintaining operational excellence.
GAME PLAN
Store Binder
The Store Binder allows for a one-stop location for information that may be needed for employees to quickly access.
Store Binder Set-Up
- Use the list below to set a Store Binder. Additional documents and information should not be kept in the Store Binder and should be accessed from the site when it is needed.
- Use tab dividers between each section to keep the binder organized.
- Store Binder Cover
- This is placed in the front clear sleeve of the Store Binder.
- Daily Zone Chart
- This is the chart used to zone employees for their shift.
- This is also used to track KPI metrics throughout the day.
- You will need a Daily Zone Chart for each day of the week.
- Store Supply Inventory Sheet
- Have a blank order form handy for team members to report when they grab or use the last of a supply item to allow the manager on duty to place a supply order quickly on their order day.
- Recording Hours Worked
- In the instance that the electronic timeclock is down, time punches need to be manually tracked until the electronic timeclock is back up.
Huddle Account Setup
The Huddle is where field employees will access messages and tasks from the Corporate Office. Setting up your account is important to ensure timely access to these items.
Process
1.Locate “The Huddle” application on your store handheld.
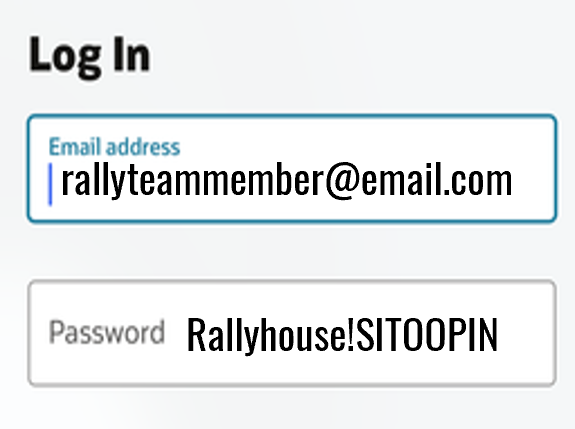
2. Login using your email listed in Workday for the email.
- If issued a Rallyhouse email, it is NOT this email.
3. Use your unique temporary password. This will include your Sitoo pin.
- Rallyhouse!SITOOPIN
- Example: If your Sitoo Pin is 1234, your temporary password is Rallyhouse!1234
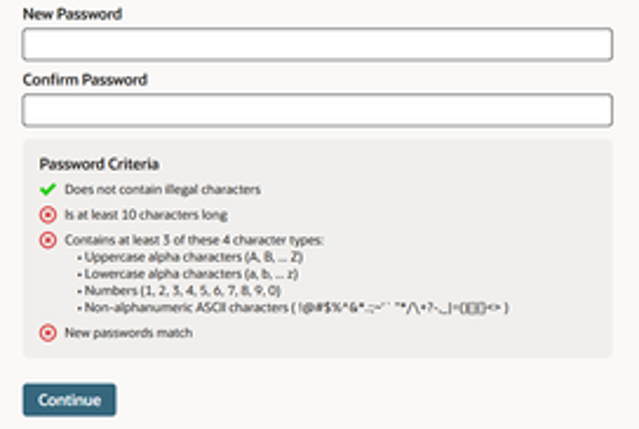
4. Reset password following on-screen prompts.
5. Setup Security Questions by following on screen prompts. This allows for you to use “Forgot Password” in the future.
- Click Settings>Security Questions> Set/Update.

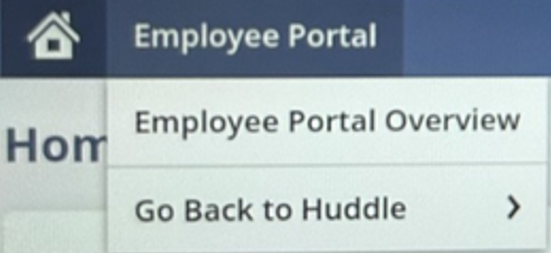
6. When complete, navigate back to The Huddle.
- Zoom in to the upper left. Select Employee Portal>Go Back to Huddle>Go

Huddle Navigation
Logging In
- Open The Huddle application on your device. The Huddle is best used on a Zebra or iPad.
- The Huddle can be accessed on Desktop using this 🔗link.
- Log in using your credentials. Ensure Account Set-Up is complete prior to logging in.
- Username: e-mail listed in Workday/personal e-mail
- Password: password you set up during account set-up
Navigation of Home Screen
- Select a tile to navigate into the associated content and resources.
- Home screen options vary between job titles. E.g., Teammate and Head Coach have different views.
- All levels will have access to these tiles:
- Messages: Messages for you will appear here. When you have an unread message, a notification bubble will appear.
- Task: Tasks for your store will appear here. When there is an outstanding task, a notification bubble will appear.
- Fieldhouse: Takes you to our document and process guide library.
- Learning: Timeout: A new LMS is being worked on!
- Store Visits: Opens the past 30 days Store Visits for your location.
- Inventory Management: Opens options for you to navigate to:
- PORT (Receiving)
- TOE (Transfers)
- Cycle Counts
- Customer Orders: This tile will open SPOC (Customer Order Picking) application.
- Quick Links: Opens options for you to navigate to:
- Open New Support Case
- Legion
- Workday
- Settings: Opens options for you to:
- Log Out
- Switch Stores, if applicable
- Team Captain, Assistant Coach, Head Coach additional access:
- Reporting: Flag on the play: reporting not yet available.
- District Manager and Regional Directors additional access:
- New Visit: This tile will open your Store Visit form.
- Approve Photos: Click on this tile to see photos pending your approval submitted by your stores.
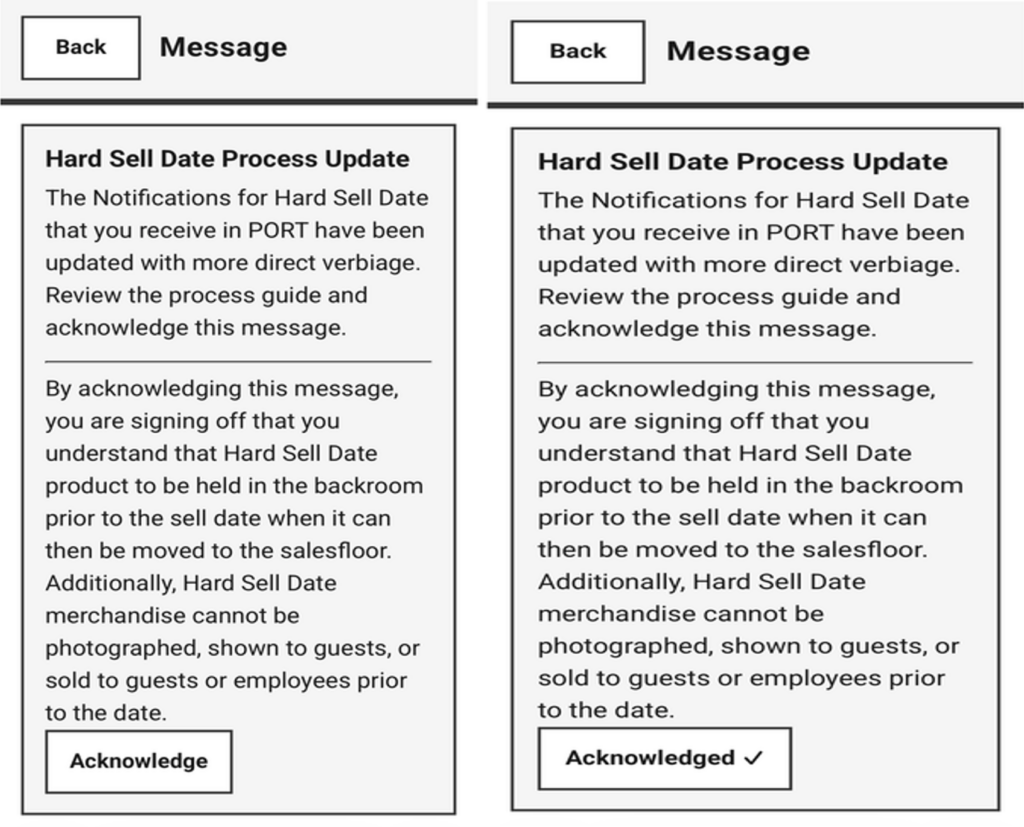
Messages
- Click on Messages to view your inbox. These messages are specific to you or your job title.
- Click on the specific message that you want to view.
- If there is an Acknowledge Message button, click this once you have read the message.
- This will timestamp your acknowledgement of the items given in the communication.
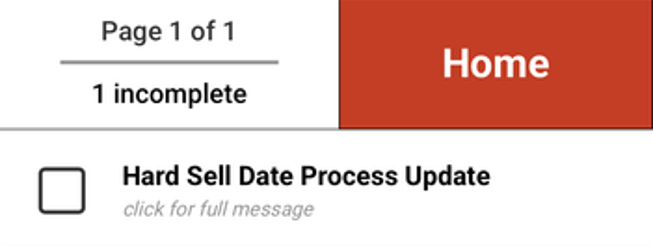
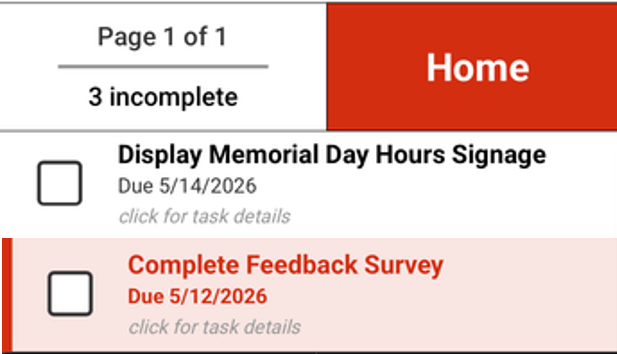
Tasks
- Click on Tasks to view outstanding tasks for the store.
- Click on the specific task you want to view the details for or complete.
- To assign the task to a specific team member, click the drop-down and select the team members name.
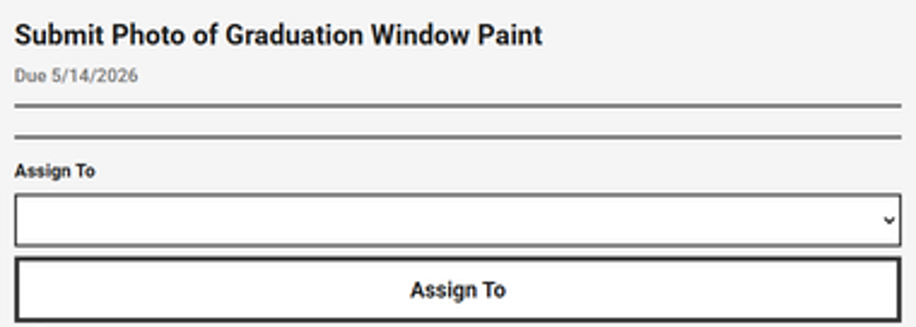
- To complete a task, follow the actions outlined.
- If the task requires:
- Photo > click Choose File and upload the photo prior to marking the task complete
- If the task requires:
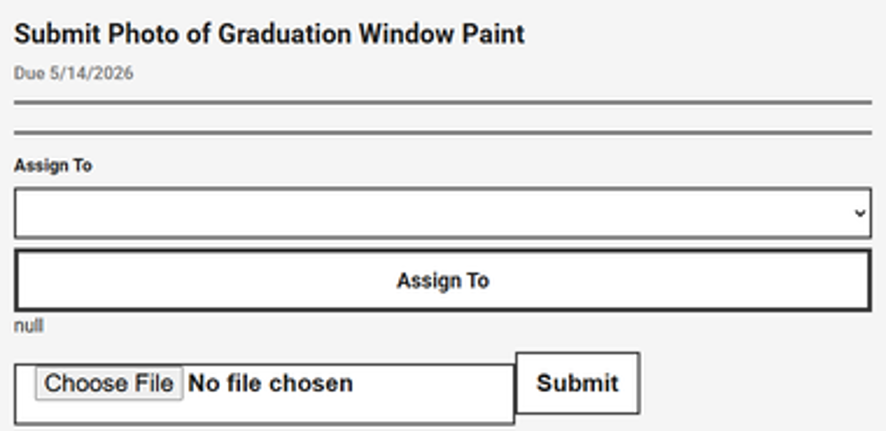
- Survey > click the link the survey to complete prior to marketing the task complete
- Mark the task “Done” once finished.
- This will move the task to Completed
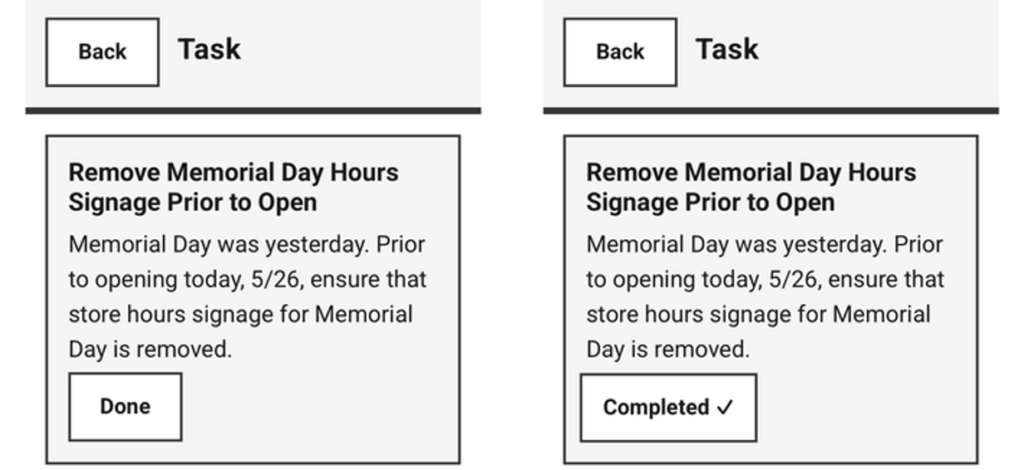
Overdue Tasks
- Overdue tasks highlight red as a visual queue that they are overdue.

FAQs
- How do I log out of my Huddle Account?
- Click Settings > Log Out. Closing out of your account is necessary to ensure that team members are not accessing messages or tasks intended for another individual or role within the store.
How do I set-up security questions to be able to reset my password?
- Click Settings > Security Questions > Set/Update. Set up security questions within one month of account access.

- After security questions are set up you will need to navigate back to The Huddle from NetSuite. Follow steps below.
- My Huddle has taken me to a page that looks like NetSuite ERP.
- This may happen if a button is mis-clicked. Zoom in to the upper left. Select Employee Portal > Go Back to Huddle > Go
- Forgot password?
- Click Forgot Password while on log in screen and follow on screen prompts. You cannot use the Forgot Password feature if security questions aren’t set-up.
- Need access to multiple locations?
- Open a support case to Operations with the location(s) and date(s) that you need access to another location. Once you have been assigned to the needed location, you can access their messages and tasks by clicking Settings > Switch Stores.
- My job title or e-mail address on my account is incorrect?
- Open a support case to Employee Relations to assist in correcting the issue in Workday.
- I have a general question about the system/having a system issue?
- Open a support case to Operations > Huddle Issue/Question.
Fieldhouse Navigation
Accessing the Fieldhouse
- The Fieldhouse can be accessed on any store device.
- Within The Huddle, the tile for Fieldhouse can be selected.
- To access without logging into The Huddle use this 🔗link
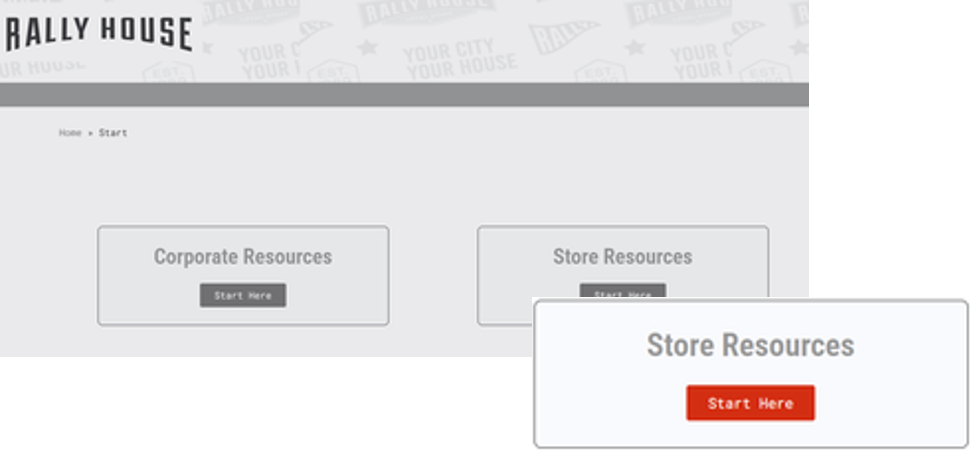
Navigation to Resources
- Select Store Resources.
- Hover over the category from the top menu options and select the playbook.
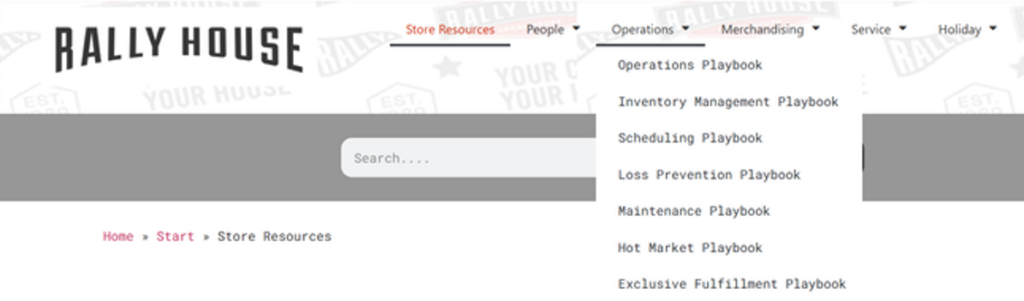
- Select the playbook or quick guide you are needing.
- Type in the password storeresources
Navigation of Playbook
- Sections within the playbook are displayed at the top of the page using flag navigation tabs. Select the flag to move to that section.
- Review the information displayed beneath the flags, including:
- The Play = Why the process is important
- The Impact = How the process impacts stores
- On-Field Terminology = Key terminology associated with the process
- When entering a section with more detailed content use the additional section flags to quickly navigate between topics.
- Throughout the playbook, use the navigation buttons to:
- Return to the top of the current section ⟶ Return to Section

- Return to the top of the page ⟶ Click to Home

Admin Chat
The Admin Chat is Rally House’s primary support channel for internal support questions, including Store Support, Supply Chain, and Information Technology.
Meet RALPH
RALPH (Rally Admin Learning Process Help) is the AI assistant that powers the Admin Chat Bot. While R.A.L.P.H. may communicate in a conversational manner, it is not a real person. RALPH is designed to answer questions, provide resources, and route requests to the appropriate support team when additional assistance is needed.
Use the Admin Chat whenever you need assistance and follow the prompts to be routed to the appropriate support resource.
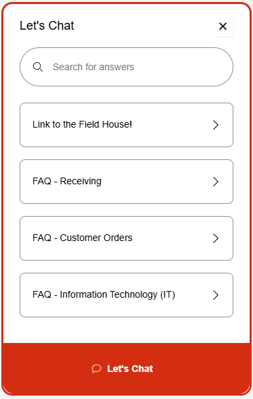
- Access the Admin Chat Bot by clicking the Red Chat Bubble located in the bottom right corner of your screen.
- Browse available FAQ topics for quick answers to common questions.
- Select “Let’s Chat” when you need assistance with a specific question or issue.
- Follow the prompts to be routed to the appropriate support team or resource.
- Enter your question or issue using normal business language and provide as much detail as possible
Process
1. Click the Red Chat Bubble icon located in the bottom right corner.
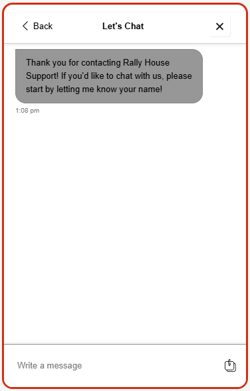
2. Click “Let’s Chat” to start conversation.
- Note: The chat panel opens with a list of FAQ topics & a “Let’s Chat” option.
- You are welcome to browse the FAQ topics for answers to common questions.
3. Follow the Bot prompts/questions.
Pro Tip: Phrase your question/issue the way you naturally would. You do not try to optimize wording or “help” the tool by making it sound perfect.
Who to Contact
Back Office
Most Back Office (HQ) communication will remain in NetSuite as a support case or for immediate needs utilize Teams. Please use this guide for department specific communication.
- Operations: Support Cases or Teams for Inventory-related needs.
- Customer Service: Anything Customer Service related. Immediate customer needs Call 800-381-9177 or upon customer request provide number.
- Maintenance: General building upkeep needs open a service request in Ecotrak or immediate needs contact DM.
- Accounting: Deposit issues Support case or Teams for immediate needs. Email for submitting invoices: invoices@rallyhouse.com Store Tax information: salestax@rallyhouse.com
- IT: Technical difficulties or equipment issues. Immediate needs call IT Hotline 888-397-0150, store phone #3
- Buying: Product inquiries feel free to email any product needs to buying@rallyhouse.com, but additionally complete the feedback form in NetSuite.
- Marketing: Store closures or sudden change in operating hours it is an EMAIL to marketingteam@rallyhouse.com, otherwise support case.
Human Resources
Store email to HR is generic requests or information that does not reveal confidential, restricted, or protected information. All other inquiries should be through Zipline Channels as outlined or Support case.
- Payroll: Payroll related issues, contact payroll@rallyhouse.com
- Recruiting: Offer Letter questions, NSO related hiring, Requisitions, & Social Media hiring, contact recruiting@rallyhouse.com
- Employee Relations: Policy questions, employee concerns, performance management, contact employeerelations@rallyhouse.com
- Benefits: Benefits, FMLA or Leave inquires, contact benefits@rallyhouse.com
- Onboarding: I-9 questions, background checks, Workday account issues contact onboarding@rallyhouse.com
Anonymous Reporting Call 1-248-955-5953