INTRODUCTION
THE PLAY:
Marketing execution helps create a consistent and engaging guest experience across all Rally House locations. From marketing rack topper organization to stanchion signage and marquee messaging, these tools help stores communicate key moments, highlight relevant products, and connect with the local community in a fun and impactful way.
This playbook outlines the standards and expectations for maintaining marketing materials in stores, ensuring signage is current, organized, and aligned with the Rally House brand experience.
IMPACT:
Consistent and creative marketing execution helps stores stay visually relevant, support key selling moments, and improve the overall guest experience. Organized marketing materials allow store teams to quickly access and deploy signage during VMC changes, promotions, holidays, and local sports moments.
Strong execution of stanchions and marquee messaging also helps stores connect with their local communities by creating memorable and engaging moments that encourage guests to stop, smile, and shop.
ON FIELD TERMINOLOGY
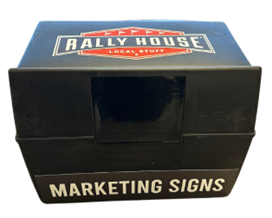
- Marketing Box: The workstation box that stores marketing rack topper signs and marketing materials used for VMC execution and store signage updates.
- Rack Topper Signs: Signs used on grid headers, fixture toppers, and merchandising displays to identify product categories, promotions, or messaging.
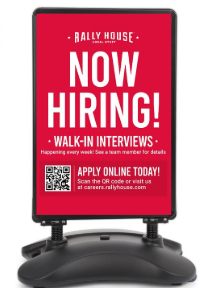
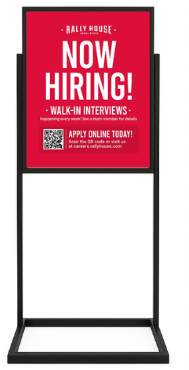
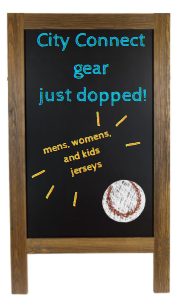
- Stanchion Sign: Indoor, outdoor, or chalkboard signage placed at the front of the store to promote hiring, game day messaging, or local engagement.
- Game Day Stanchion: Laminated dry erase signage used to promote upcoming local sports games and highlight community engagement.
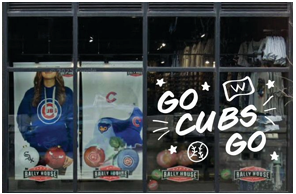
- Marquee Sign: Window fixture signage used to display creative and locally relevant messaging visible from outside the store.
- Team Decals: Team logo decals applied to stanchion or game day signage to highlight teams carried within the store.
- VMC: Visual Merchandising Checklist completed within the store to maintain merchandising and presentation standards.
MARKETING
GAME PLAN
MARKETING BOX
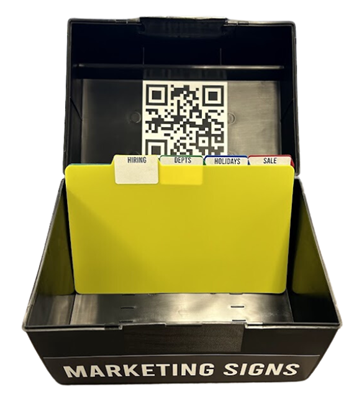
To allow stores to keep all rack topper size signs in a consistent location that is planogrammed on the Workstation. The “Marketing Signs” box is kept on the workstation to allow it to be ready to VMC use.
Contents & Directional:
- Tab
- Endless Aisles x15
- Place in Register Lane grid sign holders and in grid sign holders in team sections.
- Flagpole x1
- Place in grid header in Register Lane where Flag Poles are directed.
- Line Starts Here Right
- Place in the grid header in the Register Lane where a guest enters the queue. Select the correct arrow for your store.
- Line Starts Here Left
- Place in the grid header in the Register Lane where a guest enters the queue. Select the correct arrow for your store.
- Left Marquee
- Place on the front and back side of grid header on top of Marquee Fixture in window. Place to Left of Bowtie.
- This is only for stores that have marquee fixtures. If you do not have a marquee fixture, hold onto this signage as buying is working on getting marquee signs in all stores.
- Right Marquee
- Place on the front and back side of grid header on top of Marquee Fixture in window. Place to Right of Bowtie.
- This is only for stores that have marquee fixtures. If you do not have a marquee fixture, hold onto this signage as buying is working on getting marquee signs in all stores.
- Gift card
- Place in Register Lane Grid Headers and through top team sections on 5Gs.
- Hiring Tab
- Generic Now Hiring
- Departments Tab – store can use as needed
- Infant x15
- Toddler x15
- Little Kids x15
- Youth x15
- Women’s x10
- Women’s Plus x10
- Big & Tall Vertical x10
- Big & Tall Horizontal x10
- Executive Brands x5/brand
- Holiday Tab
- 5 Christmas Designs and Green Now Hiring
- Mother’s Day
- Father’s Day
- Sale Tab
- SALE x15
- Endless Aisles x15
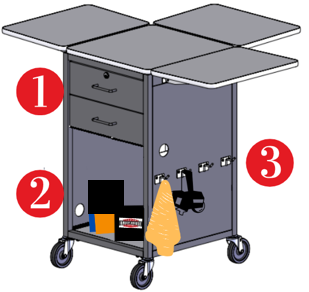
Workstation Planogram
1. The drawers will hold size labels and supplies. Follow planogram under Workstation Drawers.
2. Wastebasket, adult and kids folding board, and marketing rack topper box are placed on the workstation bottom shelf.
- The marketing rack topper box is kept here to allow for store teams to easily access store marketing while completing the VMC such as Big and Tall & SALE signs.
3. The hooks are to hold microfiber cleaning rag and markdown pricing gun.
STANCHION SIGNS
Types of Stanchion Signs
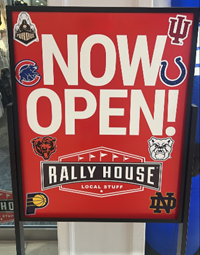
Decals on Indoor/Outdoor Stanchion Signs
- Stores that are walk by stores (malls, outlets, plazas, downtown) are able to put team decals on their stanchion sign marketing.
- The purpose to show the guest walking by the teams that are carried in the store, specifically those that are hard to see when looking into the store.
- Decals should be 3″ of bigger in size.
- Decals need to be damaged in Admin with reason code “Marketing”.
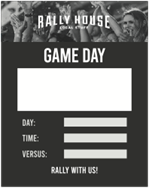
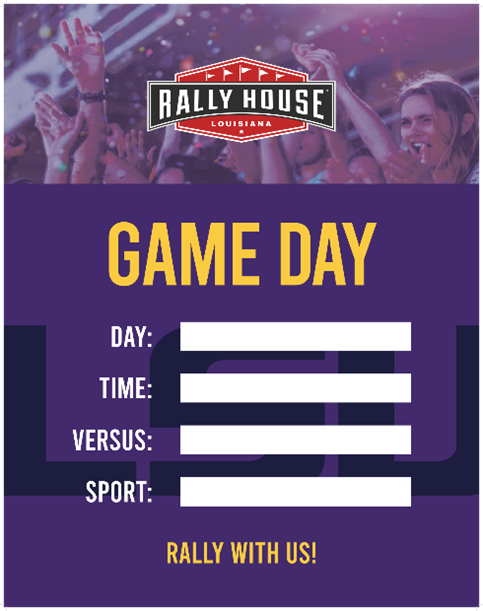
Game Day Laminated Stanchion Signs
These signs are meant to grab the attention of foot traffic by highlighting the most relevant local sports games happening that day. Use them to show your store’s community engagement and sports knowledge.
- Usage Instructions
- These are laminated, single-sided stanchion signs designed for dry erase markers only (do not use Sharpies or permanent markers).
- Write in game-specific details (team, day, time, opponent) to promote the next upcoming relevant game.
- Once a promoted game is over, update the sign with the next game.
- To Install:
- These signs slide into existing stanchion holders in front of your current signage (like “Now Hiring,” “Game Day,” etc.).
- You must have a stanchion inside for stability.
- To promote multiple games, sandwich another stanchion between two game day signs.
- Generic Game Day
- Identify the most relevant local team/game to feature.
- Apply the appropriate team decal inside the large “GAME DAY” box (left-justified).
- Decals need to be damaged in Admin with reason code “Marketing”.
- Write an additional message in the same box (e.g., “Go Birds!”, “Undefeated!”, “Starting Pitch: [Name]”).
- Use the Day, Time, and Versus boxes to complete the game details.
- The back of the sign is laminated—store unused decals there for future use.
- Each store will receive two signs, allowing you to promote two games at once if needed.
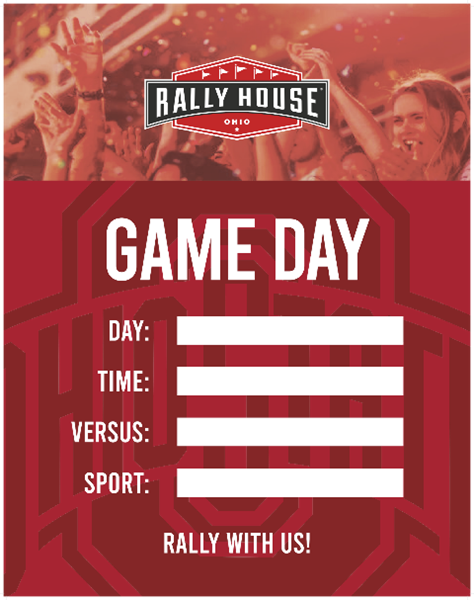
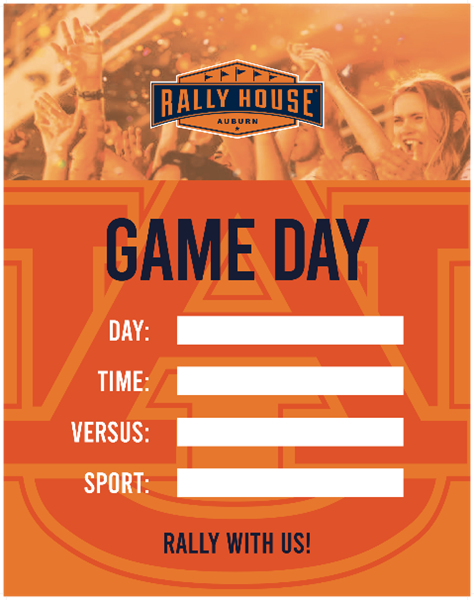
College Market Game Day
- Select the most relevant team and sport to highlight.
- Fill out the Day, Time, Versus, and Sport boxes accordingly (e.g., football, women’s soccer, volleyball, etc.).
- You will receive two signs to promote up to two games or sports at the same time.
Marque Signs
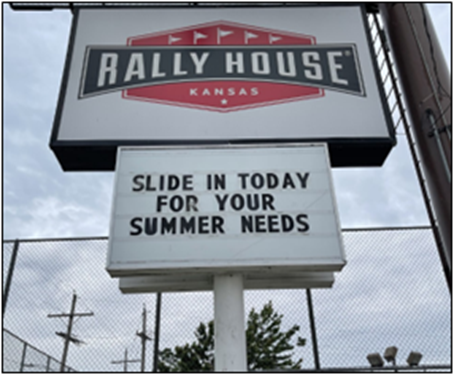
For Rally House stores that have a marquee sign it is an important task to change the messaging weekly.
- Messaging should be changed on all sides of the marquee sign on Mondays.
- Signs do not have to point out obvious items occurring such as an NFL or MLB game or.
- This is not the recommended use for this sign.
- If this is the messaging that the store would like to put out, make it so it is in a creative way.
- Example: say “Mothers deserve the world, get her a gift!” instead of “Happy Mother’s Day”
- Stores should find creative ways to tell what is happening in the city/area, local phrases, dad jokes, and more.
- A good rule of thumb is that a guest who reads the marquee sign should smile or laugh when they read it.
- Marquee signs cannot have offensive or derogatory verbiage on them.
- Here are some examples of great Rally House marquees!
Window Art
NCAA Team Spirit Window Art Guide
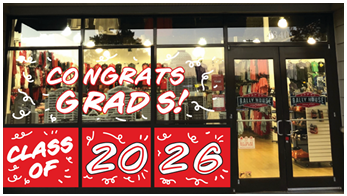
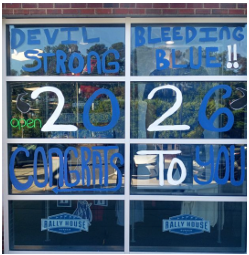
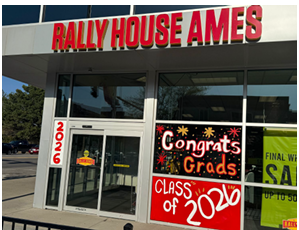
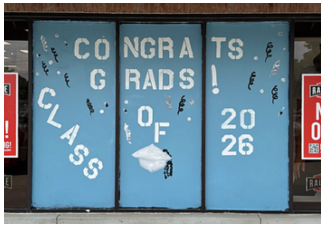
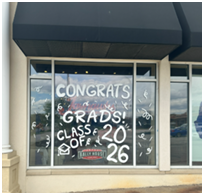
Window painting creates a bold, celebratory storefront presentation that highlights school pride, attracts guest attention, and supports graduation gifting sales. Proper preparation, application, and removal techniques help ensure a professional appearance while protecting store fixtures and windows.
Gear Check
Before beginning your window artwork, gather the following supplies. Many of these items are already available in your store. If replacement supplies are needed, place a Sitoo Supply Order using the FACET SUB DEPT: Store Operations. Refer to the Sitoo Supply Ordering section for ordering instructions.
Store Supplies
- Glass cleaner
- Paper towels
- Acrylic paint (school colors and accent color)
- Chalk marker (for sketching)
- Cup of warm water (for brush cleaning)
- Spray bottle (warm water)
Order Through Sitoo (FACET SUB DEPT: Store Operations)
| Item # | Item | Description |
|---|---|---|
| 204711649 | Drop Cloth | 10 ft x 20 ft Clear Plastic Drop Cloth |
| 202985038 | Paint Applicator Kit | 8 Piece Metal Tray, Roller & Applicator Kit |
| 205541528 | Paint Tray Liners | 9 in Plastic Tray Liners (10 Pack) |
| 100551480 | Paint Brush Set | 2 in Flat, 3 in Flat & 2 in Angled Sash Utility Paint Brush Set (3 Piece) |
| 300960464 | Sponges | Extra Large 7 in Polyethylene Sponges (3 Pack) |
| 309996622 | Plastic Scraper | 2 in Disposable Plastic Putty Knife |
Prepare and Apply Your Design
- Select a focal window that does not have a hanging window banner. Be mindful to ensure the artwork does not block sunlight and visibility into the store.
- Clean the window thoroughly using glass cleaner and paper towel. Paint will not adhere properly to dirty surfaces. Allow the window to fully dry before beginning any design work.
- Sketch your design directly onto the window using a chalk marker. Be mindful to ensure the artwork does not block sunlight and visibility into the store.
- Keep designs bold and easy to read from a distance. Block lettering works best.
- Get creative with school colors, alternating lettering, and celebratory elements like confetti, graduation caps, or mascots.
- Step back and confirm your design is centered and visually balanced before painting.
- Use a small brush to outline each element of your design in the desired paint color.
- Once outlined, use a flat brush to fill in each section with thin, even coats.
- Allow each coat to dry for 10–15 minutes before applying the next coat.
- Apply a minimum of three coats for best visibility and coverage.
- Use a paper towel as needed to clean edges and remove any drips for a polished finish.
Removal
- Use a sponge with warm water to fully soak the painted area.
- Wait 10–15 minutes for the paint to loosen.
- Gently remove paint using a plastic scraper, taking care not to damage the glass.
- Reapply warm water as needed for any remaining areas.
- Finish with glass cleaner and paper towel for a clean window.
Execution Inspiration
Local Pro Team Pride Window Art Guide
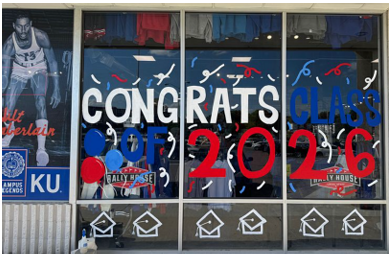
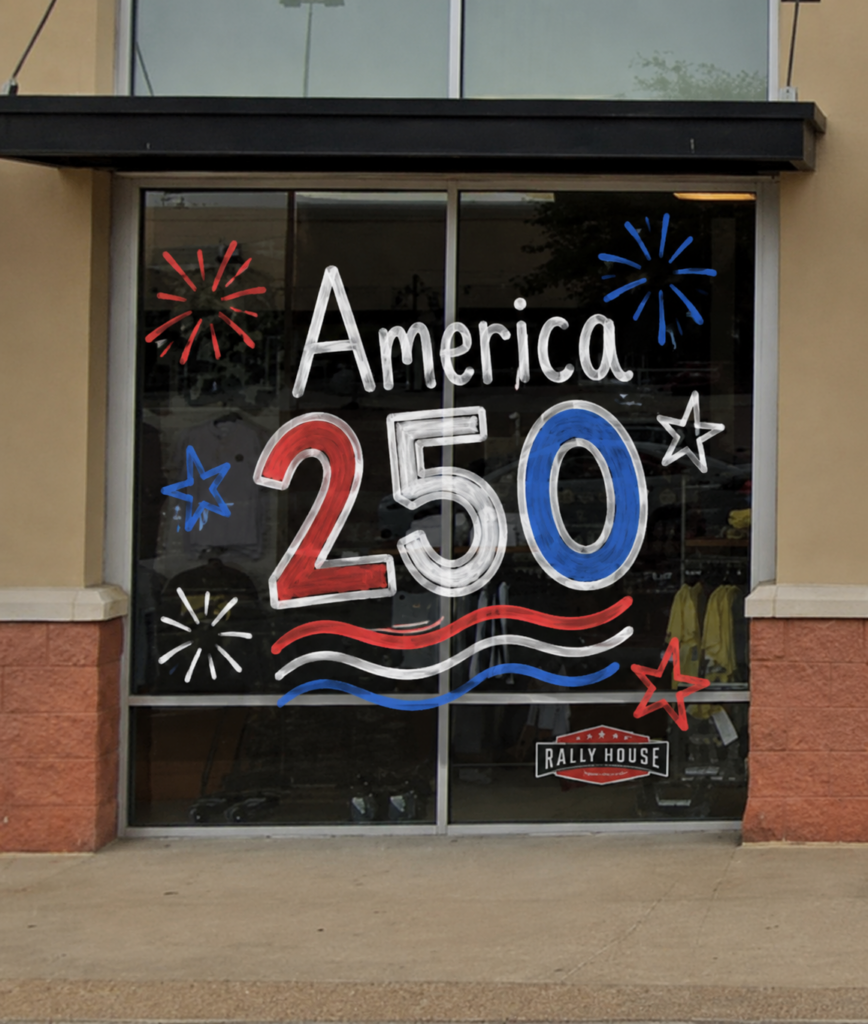
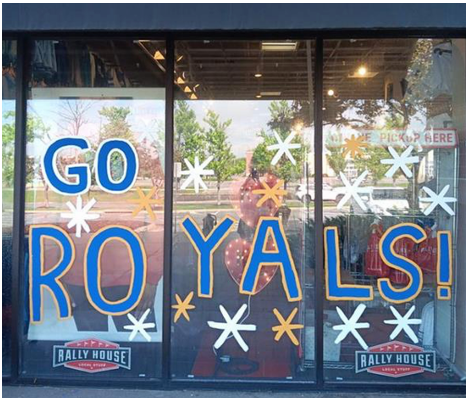
Window painting creates a bold, celebratory storefront presentation that highlights local team pride, attracts guest attention, and supports national holiday gifting sales. Proper preparation, application, and removal techniques help ensure a professional appearance while protecting store fixtures and windows.
Gear Check
Before beginning your window artwork, gather the following supplies. Many of these items are already available in your store. If replacement supplies are needed, place a Sitoo Supply Order using the FACET SUB DEPT: Store Operations. Refer to the Sitoo Supply Ordering section for ordering instructions.
Store Supplies
- Glass cleaner
- Paper towels
- Acrylic paint (school colors and accent color)
- Chalk marker (for sketching)
- Cup of warm water (for brush cleaning)
- Spray bottle (warm water)
Order Through Sitoo (FACET SUB DEPT: Store Operations)
| Item # | Item | Description |
|---|---|---|
| 204711649 | Drop Cloth | 10 ft x 20 ft Clear Plastic Drop Cloth |
| 202985038 | Paint Applicator Kit | 8 Piece Metal Tray, Roller & Applicator Kit |
| 205541528 | Paint Tray Liners | 9 in Plastic Tray Liners (10 Pack) |
| 100551480 | Paint Brush Set | 2 in Flat, 3 in Flat & 2 in Angled Sash Utility Paint Brush Set (3 Piece) |
| 300960464 | Sponges | Extra Large 7 in Polyethylene Sponges (3 Pack) |
| 309996622 | Plastic Scraper | 2 in Disposable Plastic Putty Knife |
Prepare and Apply Your Design
- Select a focal window that does not have a hanging window banner. Be mindful to ensure the artwork does not block sunlight and visibility into the store.
- Use glass cleaner and paper towel to clean the window surface thoroughly. Paint will not stick to dirty windows.
- Allow the window to dry completely and sketch the artwork design onto the window using a chalk marker. Plan for bold, block lettering that is easily visible from a distance. Be mindful to ensure the artwork does not block sunlight and visibility into the store.
- Use a small brush to outline each element of the artwork design in the desired paint color.
- Have fun with it! Try alternating each letter in local team colors or painting one word in each color. Add celebratory confetti, team chants, and/or local icons to your design.
- Step back and confirm the design is centered and balanced in the window, then use a flat brush to fill in outlined elements in thin, even coats.
- Allow each coat to dry for 10–15 minutes before applying the next coat. A minimum of three coats is recommended.
- Use a paper towel to smooth edges of each letter and clean up any drips, as needed.
Removal
- Use a sponge to soak the entire design in warm water. Wait 10–15 minutes for the paint to loosen.
- Use a scraper to gently remove paint from the window, taking care to avoid damage to the glass. Apply warm water with a sponge again as needed.
- Once paint has been removed, use glass cleaner and paper towel for final window cleaning.
Execution Inspiration
Store Image Request
You have the power to drive hyper-local awareness! Submit photos and videos directly to the Marketing team to highlight what’s happening in your store and respond to Marketing’s content requests by capturing and sharing requested images or videos.
Every submission helps tell your store’s story, keeps your online presence fresh and accurate, and connects your community with what’s happening in your location.
Team Members can capture and submit photos and videos using their store iPad, store PC, or if they prefer, their personal device.
How to Access NetSuite via the Store iPad
If using the store iPad to capture and submit content, follow the below steps:
Navigate to the NetSuite Store Image Request Icon on your store iPad, and login with your NetSuite store login
Carefully remove your iPad from the mount to take and upload your content. Please handle your iPads with care when not in the mounts, and avoid setting them down on any surface between use.
NetSuite Content Submission Process
After logging in to NetSuite on your store iPad, you’ll see options to submit photos and videos, as well as any pending content requests from the Marketing team. Simply select an option to upload new content or respond to a requested submission.
This view will also be accessible on your NetSuite Dashboard via the Manager PC, offering quick visibility into pending Marketing content requests and enabling you to upload new photos and videos directly from your computer.
Uploading Self Submitted Content
Be the influencer of your store! Submitting your own content is a great way to drive hyper local awareness of your store in your community! Have an exciting presentation you want to show off? Received amazing new product? Hosting an event? Show it off & submit content!
After logging into NetSuite from either the store iPad, personal device, or store PC:
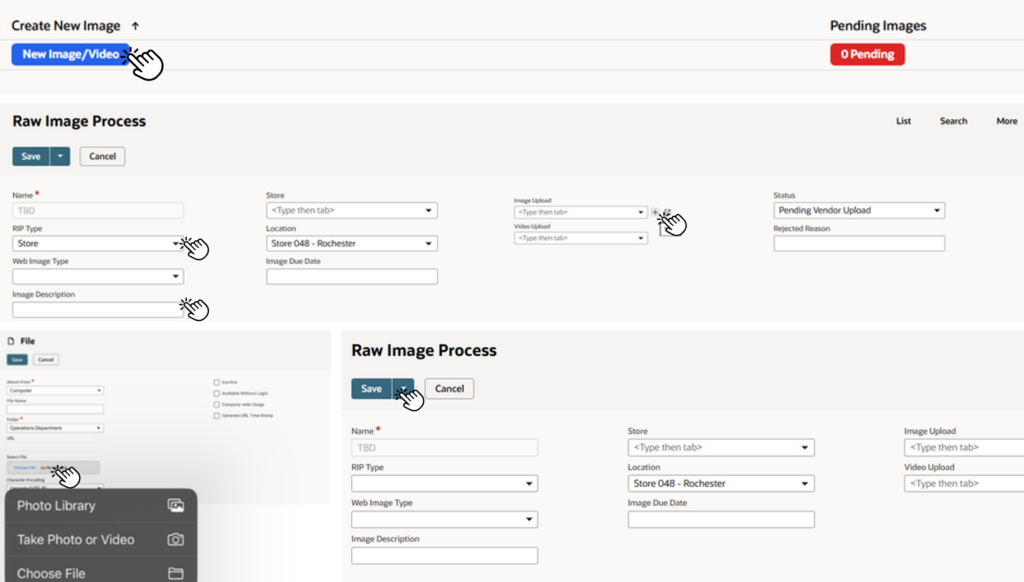
- Select New Image/ Video
- The “Name” will automatically generate once you save the content upload
- Select RIP Type: Store
- Enter the image description – this is where you enter what you taking an image/ video of
- Click the “+” sign next to either the Image or Video upload section
- Within the Select File section, click on “Choose File”
- Select your content upload method (Upload from Photo Library, Take Photo or Video)
- All other fields can be left blank and not filled out
- Click “Save”
- You will be returned to the main content upload screen – click “Save” in the upper left corner to submit your content!
Prefer to use your personal device?
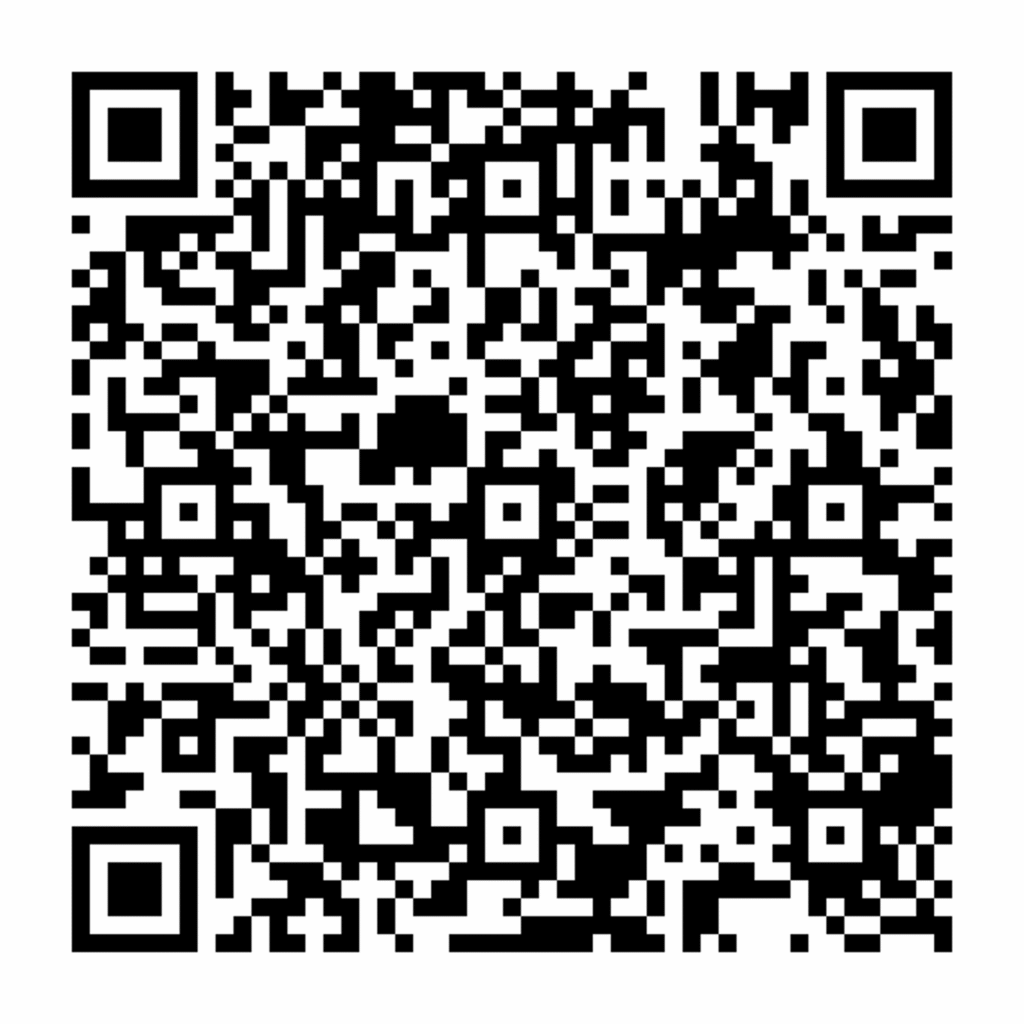
The last page of the guide has a QR code to go directly to this NetSuite page!
Requested Content
Our Marketing Team is hard at work creating energy around our stores! Periodically, content requests will come through asking that specific sections of the store, or other content be uploaded. This content directly helps drive freshness on your social sites and create that hyper local connection with the community!
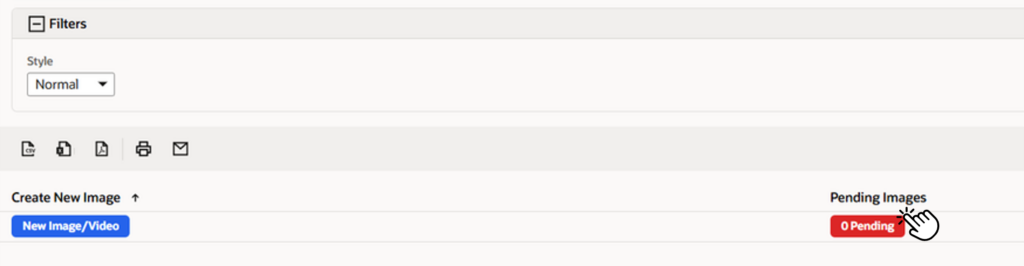
Requests from Marketing will show up on your dashboard under the “Pending” section
To view the pending requests in detail, click on the red “Pending” button.
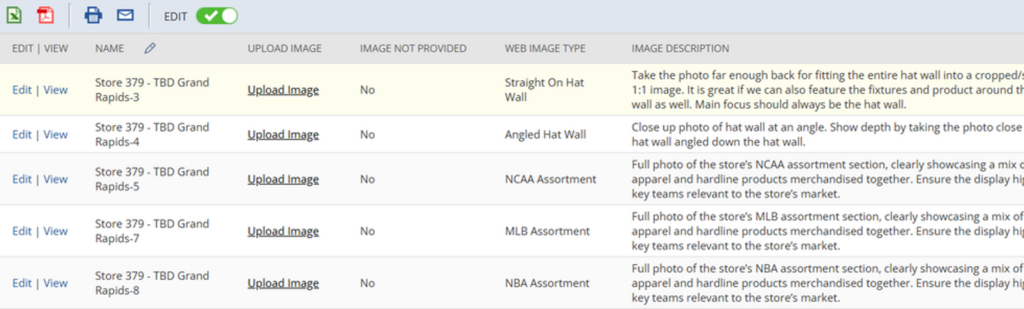
This section breaks out each content upload request as a separate line, with details on the image/ video type, and description of how to take the image/ video
Understanding the Image Request Types:
- Web Image Type = the type of photo/ video needed for the record selected
- Image Description = detailed requirements of the content needed
Taking the Image/ Video:
- Click the “Upload Image” button for the content type you are going to submit
- Select “Choose File” ⟶ “Take Photo or Video”
- Take your photo, then select the blue “Upload” button on the upper left
Once saved, you will be brought to the upload screen for the image you just uploaded.
- To navigate back to your Store Image Request list, click the purple “Open List” icon
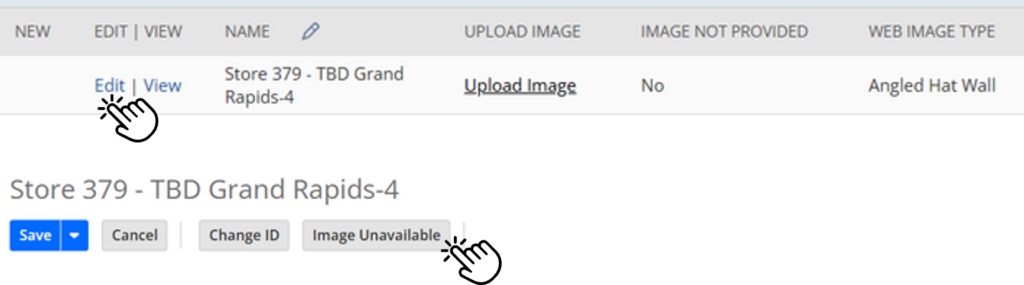
If you are unable to take the photo for any reason:
- Select the “Edit” button on the image type
- Select the “Image not Available” button
- Select “Image Type Not Available” from the dropdown
- Select the blue “Save” button
You will be brought to the upload screen for the image you just uploaded.
- To navigate back to your Store Image Request list, click the purple “Open List” icon
- You can then continue this process to take the remainder of your Store Image Requests.
- If you have no photos remaining in your list, that means you have no more requests!
Photo Guidelines for Great Pics!
- Camera lens is clean
- Subject and requested image type are in focus
- Photo is not too dark or too bright
- Camera is steady
- Background is clean
Video Settings
Proper video settings help ensure every submitted video is clear, professional, and consistent. Before recording, verify your phone is configured using the settings below.
- Record Videos In
- Vertical Format (Portrait Orientation)
- 1080p HD Resolution
- 60 Frames Per Second (60 fps)
| iPhone (2026) | Android (2026) |
|---|---|
| 1. Open Settings. | 1. Open the Camera app. |
| 2. Tap Camera. | 2. Switch to Video mode. |
| 3. Tap Record Video. | 3. Tap the Settings (⚙) icon. |
| 4. Select 1080p HD at 60 fps. | 4. Set the following: • Resolution: 1080p (FHD) • Frame Rate: 60 fps |
Can’t Find These Settings?
- If you cannot locate these settings on your device, ask a manager for assistance or use your phone’s search feature and search “video resolution.”
Filming Best Practices
- Following these best practices will help produce high-quality videos that are easy to review and use.
| ✔ Do | ✘ Avoid |
|---|---|
| Wipe the camera lens with a microfiber cloth or a smooth t-shirt before recording. | Don’t record with a dirty or smudged camera lens. |
| Record in a well-lit area using natural light whenever possible. | Avoid dark rooms or filming with bright lights directly behind the subject. |
| Hold your phone vertically (portrait orientation). | Don’t record horizontally (landscape orientation). |
| Keep your phone as steady as possible while recording. | Avoid excessive camera movement or shaking. |
| Frame the subject so they are centered and easy to see. | Don’t cut off heads, hands, or important parts of the demonstration. |
| Record in a quiet environment whenever possible. | Avoid background conversations, TVs, music, or loud noises. |
| Speak clearly and at a normal pace. | Don’t rush or speak too quietly. |
| Review your video before submitting it to ensure it is clear and complete. | Don’t submit videos that are blurry, cut off, or difficult to hear. |

Examples of Great Content
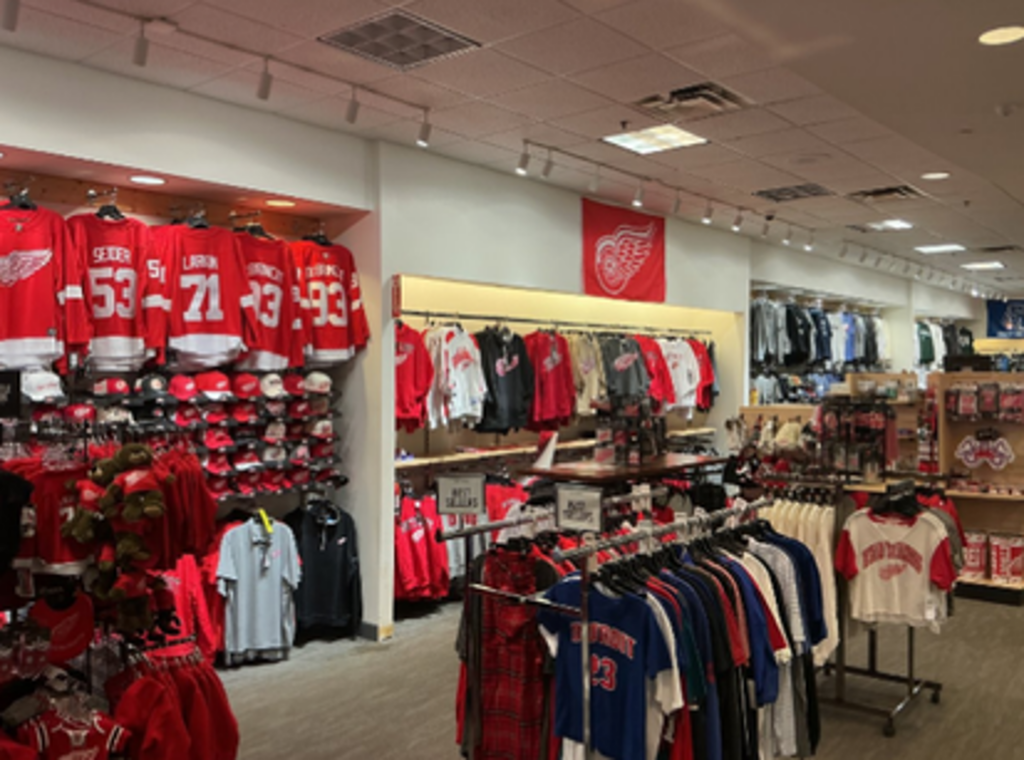
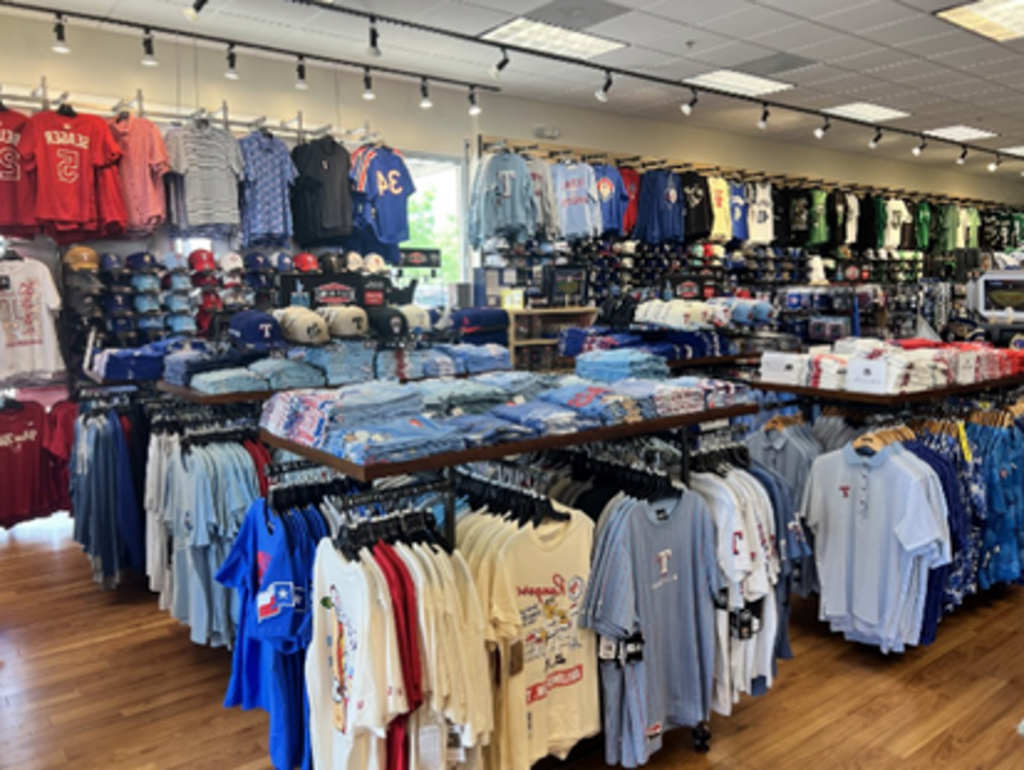
League Assortment
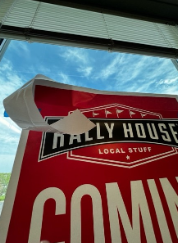
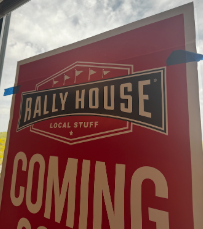
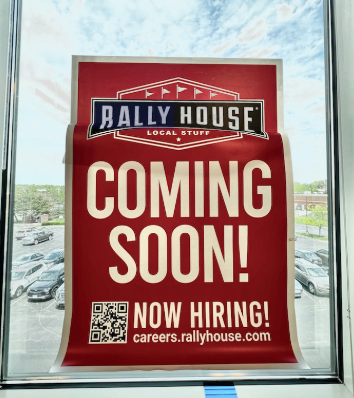
Coming Soon Decal Installation
**Please refer to the mockup that was included with your decals for directions on which windows the decals should be placed on.**
MATERIALS NEEDED
Not included with package:
- windex or similar glass cleaner
Included – *attached to decals in package
- Painter’s tape*
- paper clips or binder clips*
- Squeegee
IMPORTANT INFO
- These decals will be installed on the EXTERIOR of the windows
- The graphic will face out, toward customers, the back/inside of the graphic is blank white
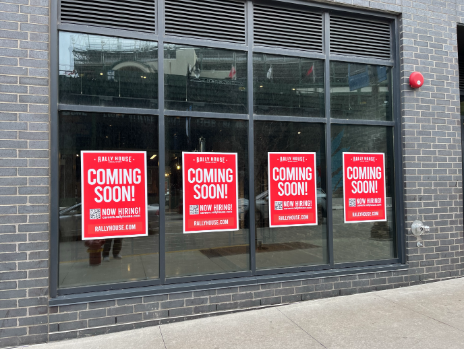
FINISHED EXAMPLE OF WHAT YOU ARE INSTALLING
👉 TIP: If you get any major bubbles, you can easily peel the graphic back up from the window and try again. We want this to look nice, but keep in mind this is a temporary graphic so don’t stress about it too much!
Look for the “👉” for helpful tips along the way!
CLEAN & DRY WINDOWS
- Clean & dry the outside of the windows before proceeding to next steps.
DEFINE PLACEMENT
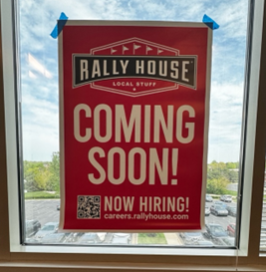
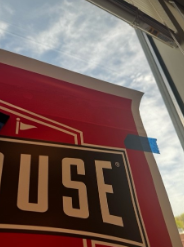
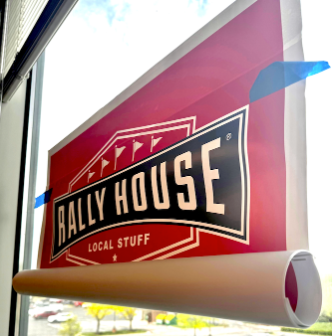
- With paper backing still on, hold the graphic on the window in the spot you want it to be placed. Use painter’s tape on each corner to hold it in place.
- Step away and make sure it’s level and centered in the window, vertically and horizontally to the best of your ability.
TIP: If you’re installing multiple decals, it may be a good idea to measure from the top of the window to the top of the decal for consistency.
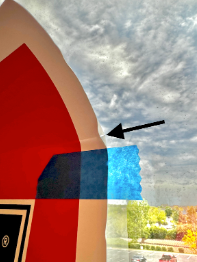
Once you have the graphic placed how and where you want it, shift the painters tape to just below the top “strip” of backing.
(OPTIONAL) Lift up the decal and spray some glass cleaner on the window (not shown in example photos). DO NOT DRY.
👉 TIP: The wet window will make installation easier & more forgiving, and will not ruin the decal itself.
APPLY DECAL TO WINDOW – TOP PORTION
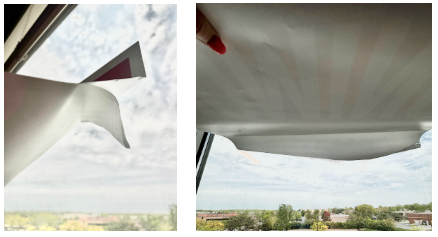
- While the graphic is held with painter’s tape, fold over the top “strip”. Starting on the right side, slowly peel off the backing and squeegee the top right corner from bottom to top.
- Slowly continue to peel of the backing, while using the squeegee as you go to smooth the graphic. Work from bottom to top, right to left until the top strip is completely done.
👉 TIP: If you get air bubbles, you can “pull up” the decal and re-attach.
APPLY DECAL – BOTTOM PORTION
- Once the top is fully stuck to the window, remove painter’s tape.
👉 TIP: Save the tape for the next decal in case you only have 2 strips available!
(OPTIONAL) Roll up the bottom portion of the decal with the backing still on & use paper clips to hold in place.
- Starting from the top right and top left corners, peel away the backing until you have a 4-6” strip of adhesive to work with.
- Using the squeegee (or your hands to begin with) smooth the decal from the top middle, working out slowly to left and right edges. Use squeegee to smooth out until this strip is complete.
- Continue this process, strip by strip to ensure graphic stays smooth, rolling down the paper backing 6” or so at a time. Squeegee as you go to keep air bubbles out. “Squeegee – Roll – Squeegee – Roll”
- Continue from top to bottom until the full graphic is stuck to the window.