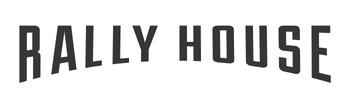
Where to download missing images report: Find missing on order images under the report name “BYR Item – OO Missing Image By Vendor” and “BYR Item – OH Missing Image By Vendor “(For apparel, this search is e-mailed every morning; hardlines is twice a week) or this report is also on your main dashboard and looks like the image below:
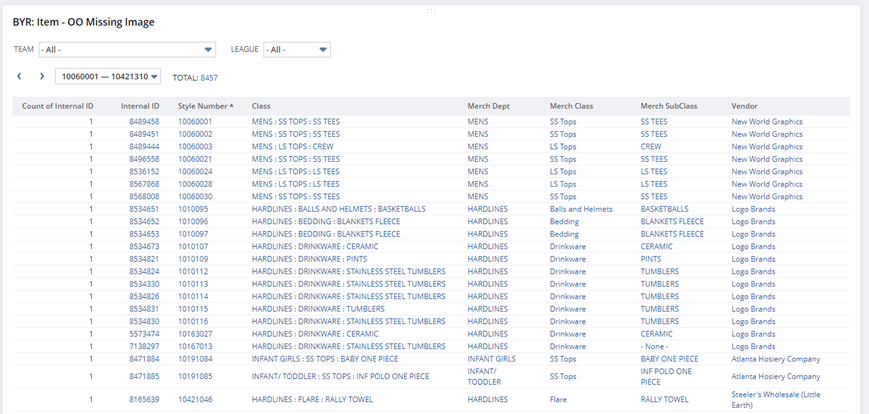
For missing images that are on hand, that report will be emailed to you by CEO Aaron Liebert every morning. That email looks like this below:
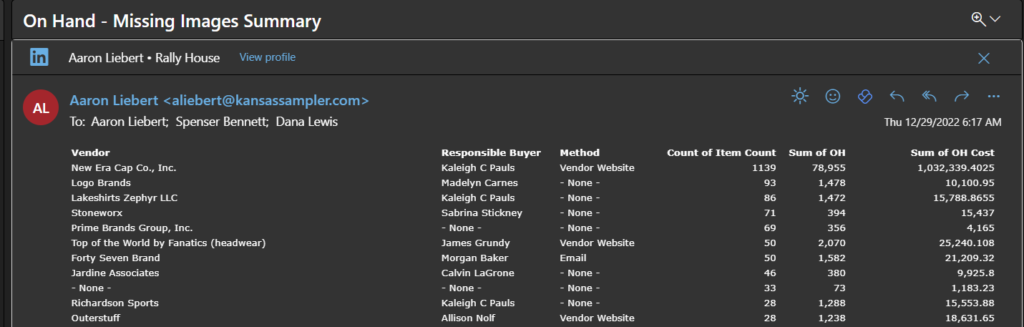
You can also run the report in SOHO, by selecting your department and class, then setting Minimum QOH to 1 and Toggling “has associated image to “NO”
Image Qualifications: Must be MINIMUM 700×700 pixels to upload. File format can be a .jpg, .jpeg, .png, .tiff, and .webp file images. Preferred image format is .jpg for download/upload.
How to ask vendor: If you are looking for images where the vendor doesn’t have an image portal, email your vendor contact and send them a list of styles you are needing images for. Always include vendor MPN and purchase description so it is easy for them to pull or request images further. Some vendors need UPC’s but most will just need the vendor MPN.
Example:
“Hello Dave –
We are needing some web images for the following styles:
| MPN | Purchase Description |
| COKZHF0020 | Central Oklahoma Gray ZH Flex |
| INDZEL0050 | Indiana Hoosiers Red Z11 Snapback |
| INSZEL0010 | Indiana St Sycamores Royal Z11 Snapback |
| INSZHF0010 | Indiana St Sycamores Royal ZH Flex |
| KSTCSY0050 | Kan St Wildcats Commander Staple |
| LOYZEL0050 | Loyola Ramblers Maroon Z11 Snapback |
| MKCZHF0010 | UMKC Roos Royal ZH Flex |
| PTSBIG0010 | Pitt State Gorillas Red Big Rig Trucker |
| PTSSCH0020 | Pitt State Gorillas Red Scholarship adj |
| PTSZEL0060 | Pitt State Gorillas Red Z11 Snapback |
If you could please send web images for these styles in preferred jpg format with minimum 700×700 pixels. Thanks!”
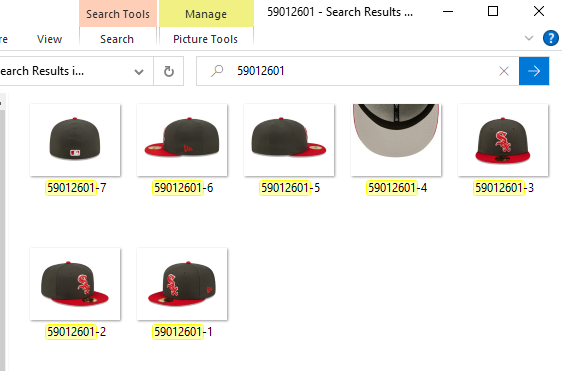
How to rename: You must rename the image the style number followed by “-1” or “-2” etc with NO SPACES. The number following the style number is the way it will show online so for example 59012601-1 will be the first image it shows online while 59012601-2 will be the second image shown on web and so on.
Note: When renaming have the images in a view you can see. Make sure the image corresponds with the purchase description of the item.
For Apparel Only: For jerseys or player tees the image of the back of the item that includes the name/number will be the -1 image, the front will be the -2 image. Make sure to save all images given by the vendor. Detail images are great!
For Headwear: if there is a side patch on the hat, the -1 image should be the angle that shows the front graphic and the side patch.
Click on the options three dots at the top of the image to rename like below:
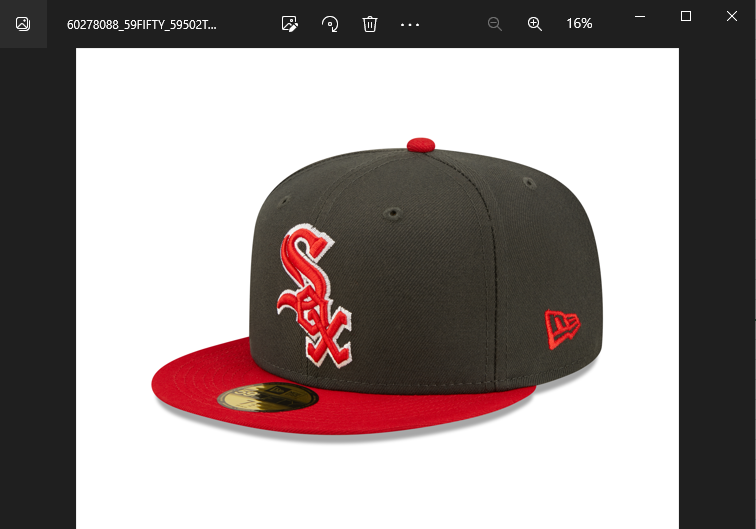
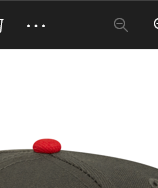
Rename the picture the STYLE NUMBER found in Column C on the “BYR Item – OH Missing Image By Vendor” report or the OO version.
If you only have one image for style you will use “STYLENUMBER-1” and if you have 5 different views/angles of the style then you will use “59012601-1”, “59012601-2”, “59012601-3”, “59012601-4”, and “59012601-5” with the first one being the first view and the fifth one being the last image customers will see.
Example:
Where to upload: Upload images after name is changed to style number with -1,2,3,etc… Link for drop box is: Apparel Flat and Hardlines – Dropbox or https://www.dropbox.com/work/Rally%20House%20Creative%20Team%20Folder
Go into the “Rally House Creative Team Folder” and then go into “Images from Buying Team” folder and select which type of image you are uploading (ex: Apparel Flat and Hardlines, Apparel on Model, Dropship, Lifestyle, or RALLY Licensing) **note, Hot Market images go into an event specific folder inside the “Hot Market Images from Buying Team” Folder.
Drag and drop the images you want uploaded into the corresponding folder – drop box should give an uploaded notification at the bottom of screen when fully uploaded
Bad Image Check Box: After uploading the images into the drop box, check the style to make sure the “Bad Image” box is not checked so it can be uploaded onto the website. You will enter the styler number in NetSuite and go into the parent item. You want this box unchecked for it to be able to be uploaded on the website.
The “BAD IMAGE” box is under the OF Fields and looks like this:
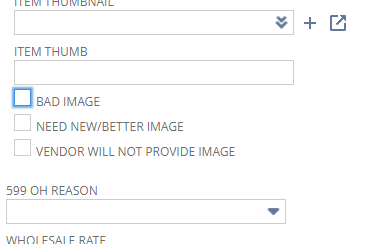
Make sure this box is UNCHECKED when uploading the image of that specific style. Having it checked will not allow the images to be uploaded onto the website.
If the box is checked, you’ll need to click “EDIT” on the parent style and uncheck the “Bad Image” box and then will hover over “Actions” at the top and click on “Mass Update Matrix” and then will click the blue “Submit” button afterwards.
Once you have been trained on and approved to use imports, this check box can be removed via an import. Please speak with your Senior Buyer regarding how and when to do this.
There is a report for the images with the Bad Image box checked and this report is called: “CJN – Bad Image Check – LC Audit”. This report will tell you what styles we don’t have images for or have bad images that don’t meet the image quality requirements.