When training documents (A.K.A. “Posts”) need to be added or updated on the Rally House Training website, follow the guidelines below.
(REFERENCE “STYLE GUIDELINES” BEFORE POSTING YOUR TRAINING DOC)
STYLE GUIDELINES
Retain DEFAULT styling throughout training document
Titles
Titles do not have formatting options.
Copy/Paste your document Title where it says “Add title” at top of document

Headings
Headings automatically populate as an “H2”
KEEP AS IS: All headers should remain as an “H2”

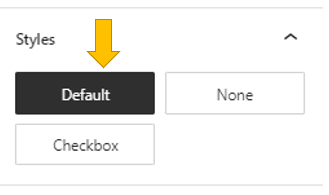
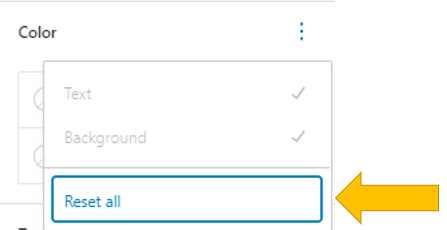
Style, Color, and Typography for All Block Types
Every block type starts with a default Style, Color, and Typography – KEEP AS IS
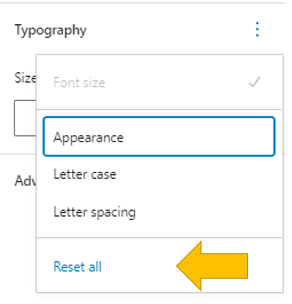
Should you accidentally change Style, Color, or Typography on right of screen, do the following:
- Styles – Select default regardless of block type
- Color – click “Reset all” to revert to original colors
- Typography – click three dots, select “Reset all”
Adding a New Training Document
New Post
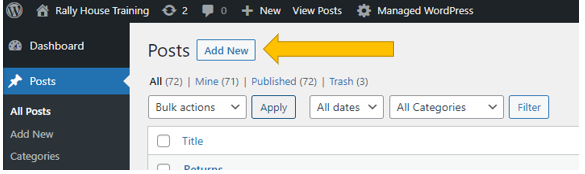
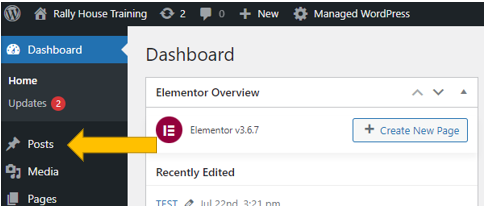
1. Log into the Rally House Training Dashboard as an admin/user
2. Click on “Posts” on the lefthand column

3. Click “Add New” in upper lefthand corner
4. Copy/Paste or write information wanting to be included in the training document (due to formatting issues, you will not be able to copy & paste lists without having to reformat in post itself – better to go line by line to retain desired formatting from original training document)
- Add your title where it says “Add Title”, hit enter
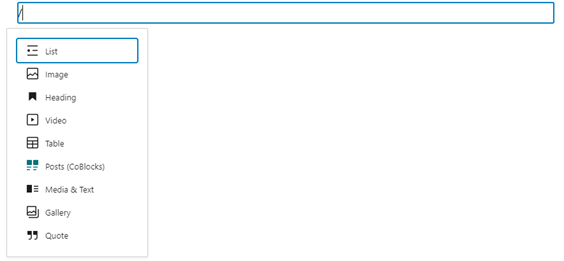
- Either click the small “+” to the right, or type “/” to pull up Block Options
– There are many block options, from a typical paragraph to lists to headings etc.
- You can alter the text with the white bar that hovers at the top of each block (such as bold, italicize, block type, indent left or right, etc.)
- DO NOT CHANGE FONT OR FONT SIZE – KEEP DEFAULT OPTIONS

- To highlight, select color from the section on the right titled “Color”
– Will make all words in block the chosen color- For single lines, highlight text with cursor and choose “Highlight” from dropdown menu in white bar above block, then select color
Linking within a Post
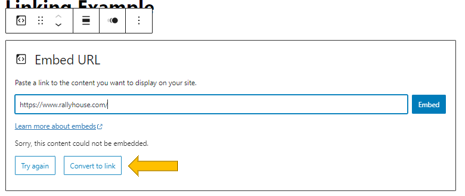
- Copy/paste hyperlinked text directly into post like normal content
– You can also paste a URL directly and click “Convert to Link” in pop-up
- Click directly on link, toggle “Open in new tab” option, then you’re done

Adding Images to Post
Adding an Image in its own block
- Copy and paste image directly into the post
- You can also click the black box with plus sign “+” or type “/”
– Choose “Image” from the menu
– Upload desired image and format accordingly
– You can drag the side or bottom of the image to expand size
– Use the bar above the image to change alignment, add text, etc

Adding an Image to Existing Block/Content
- To continue with the same formatting (ex: you want a list to continue after you insert an image), you must add an “Inline image” at the end of the text line
- With cursor at end of text line, click small arrow from white bar that populates
- A list will pop up, where you find “inline image”
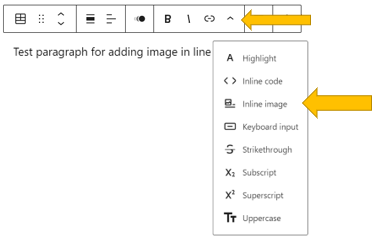
- Clicking Inline Image will pull up an option to “Select or Upload Media”
- Choose the desired image from the Media Library
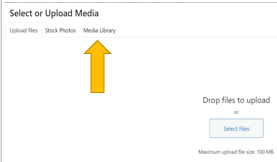
- If the image is not already in the media library, Upload File/image OR:
- Copy/Paste image into Post (will automatically add image to library)
- Delete image from post
- Choose “Inline Image” again, select image from Media Library
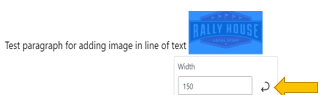
- Resize image by clicking on it and typing in desired width
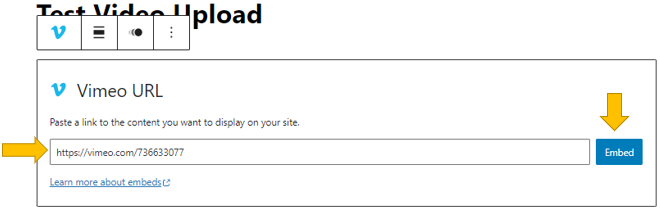
Embedding Vimeo Video
- Add a new Block by clicking the plus sign “+”
- Search for “Vimeo” in the Block Options Menu, select
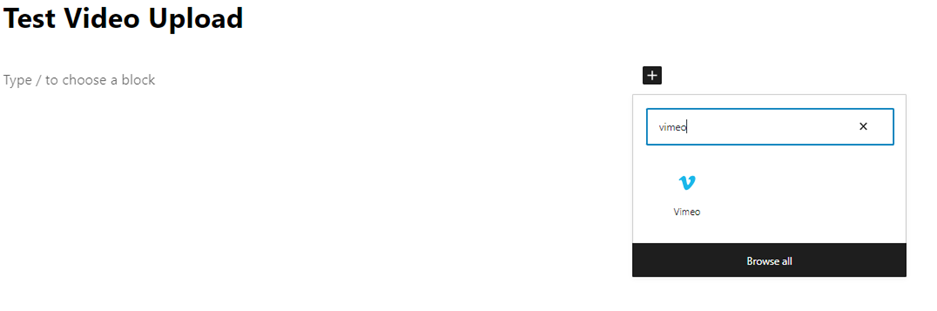
- Enter URL to Vimeo Video you want embedded, click Embed
Creating Accordion Layout
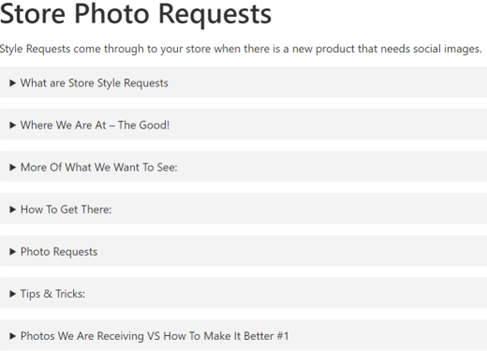
With longer documents that can be broken into multiple sections, it can be easier to create an informational accordion for a more reader-friendly format. Here’s how:
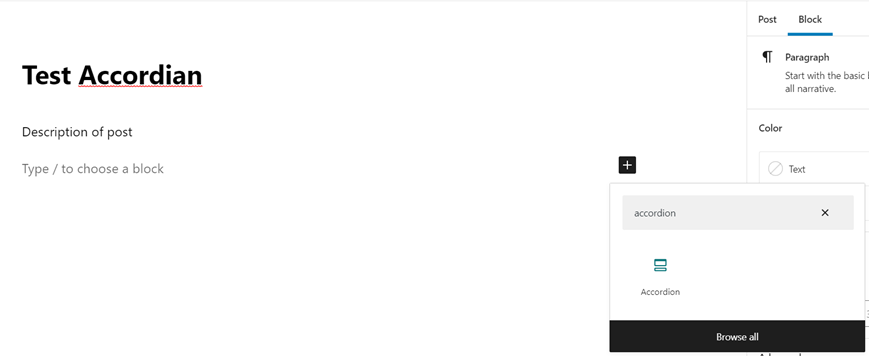
1. Enter title for Post
2. In first block, type a description/introduction of the post as regular Paragraph format
3. In next block, choose “Accordion” from block options menu by clicking plus “+” sign
– You can search for Accordion to find Block Type quicker
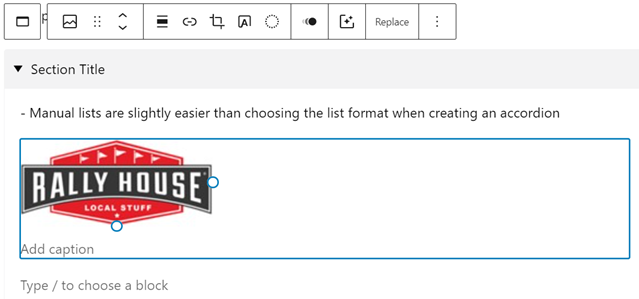
4. Title the accordion section
5. Enter content below title
– With accordions, it is simpler to manually format a list with dashes or numbers rather than selecting List from Block Options, but either route works

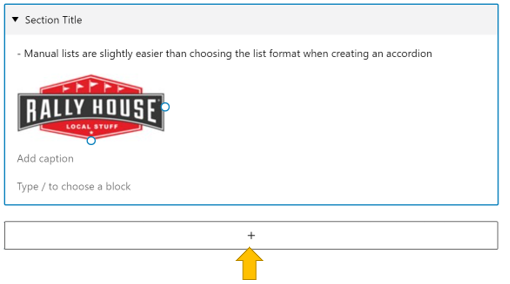
6. To add an image, click at the end of the text line where you want the image
– Copy/Paste desired image
7. Once all content in section is added, click the plus “+” sign at bottom of section to add a new accordion section
Categorizing Post
Once you have all your information in the document and you’re ready to post:
1. Under “Post” on the right side of the screen, decide where you want the post to live
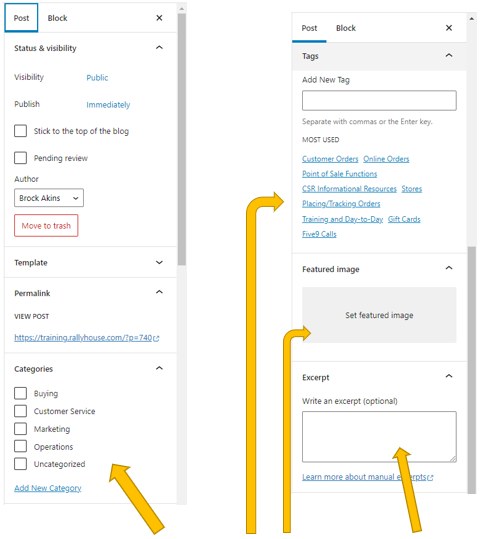
2. Edit: “Categories” “Tags” “Featured Image” “Excerpt”
- Categories: Choose the applicable department for this training document
- Tags: This is the “Chapter” or “Subcategory” within the department
– The Tag correlates to the “Chapter” within your Department
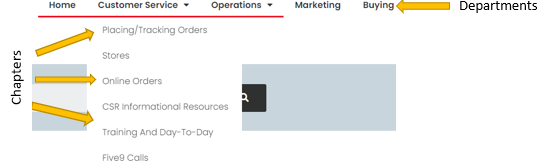
- Important to select correct Tag so that your post goes to the right Dept/Chapter
- Click tag currently active under “Most Used” or search for existing tag in “Add New Tag” field
– Type your department abbreviation into the “Add New Tag” field, find desired Chapter in the dropdown below, hit enter (ex: CS-Stores)
1. ACCT (Accounting
2. BUY (Buying)
3. CS (Customer Service)
4. IT (Information Technology)
5. MKTG (Marketing)
6. OPS (Operations)
7. MERCH (Merchandising)
– If you need to add a new Tag for a new “Chapter”, do so within the “Add New Tag” section using the format above (DEPT-Title), hit enter, and email Chris Esterline so that he can add section in dropdown menu - Featured Image: Choose your department image to associate with the Post by clicking on the “Set Featured Image” on the right side of the screen (pictured above)
- Excerpt: Write a short blurb that describes this training document. This snippet will show up as a preview for readers before clicking into the Post (pictured above)
Publish Post
To post the document, click “Publish” in the top right corner of the page
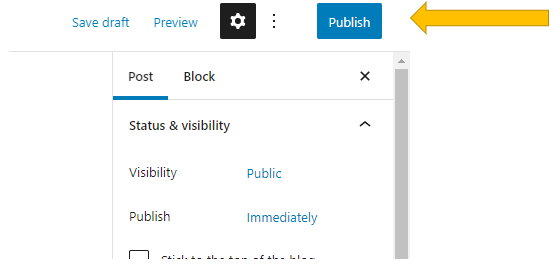
Click “Publish” second time to confirm and finish post
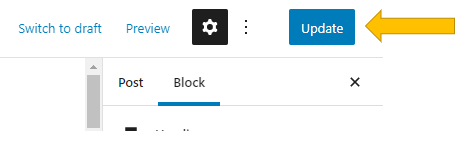
If you don’t see “Publish” in top right corner, your Post/Block options may be hidden. If so, click the Gear icon in top right to pop out the menu again, then click “Publish”
Editing Existing Post/Document
1. Log into the Rally House Training Dashboard as an admin/user
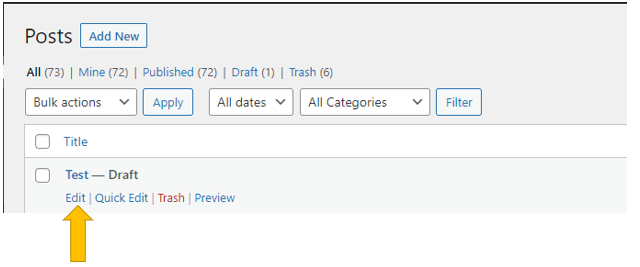
2. Click on “Posts” on the lefthand column
3. Hover near the title of the document you want to edit
– Click “Edit” underneath the title
4. Make the necessary adjustments to the document
5. Once finished, click “Update” in the top right corner of the page