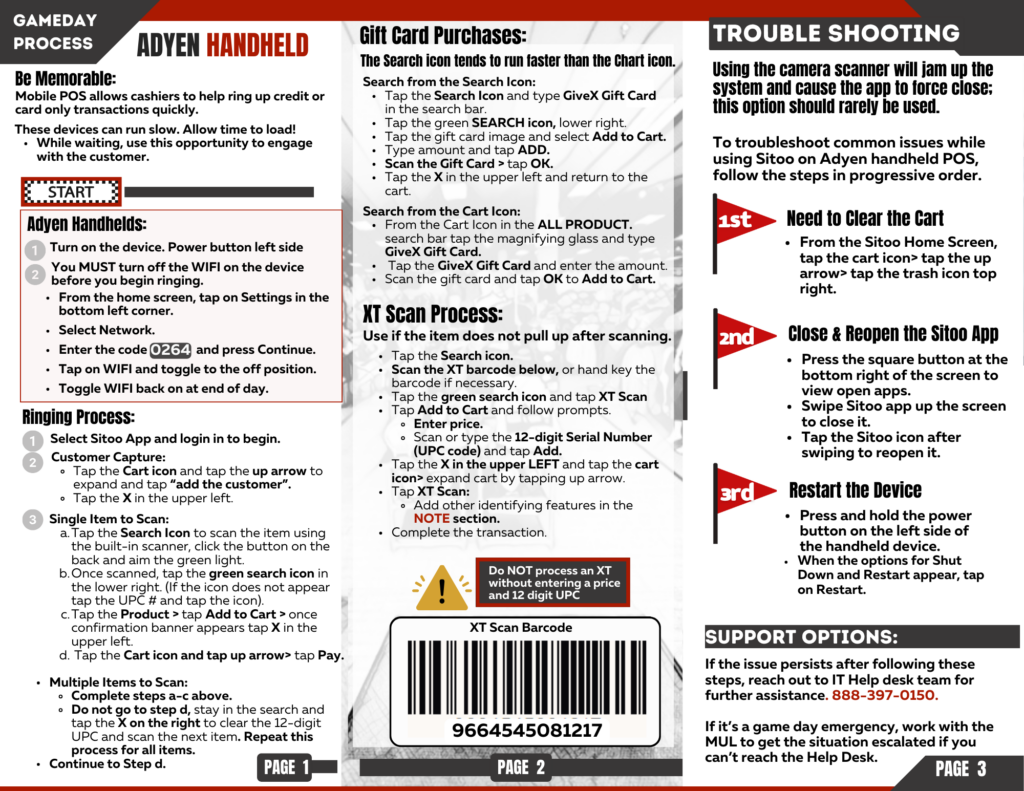
Gameday Adyen Handheld Process
Holiday
Line Control
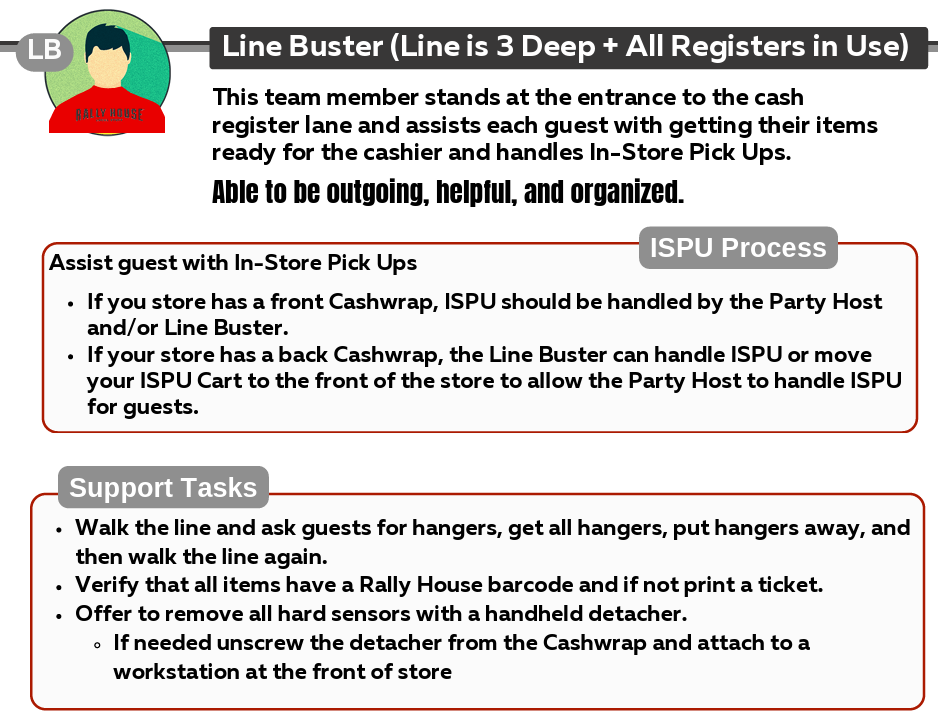
Line Buster Station
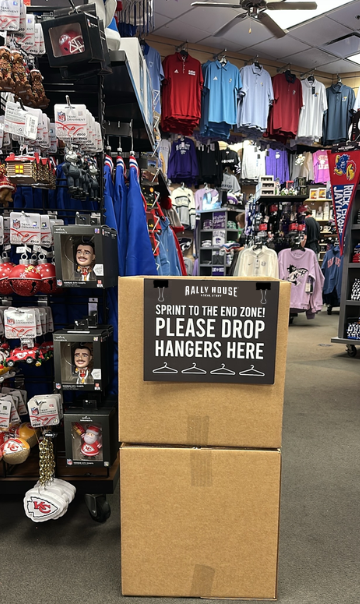
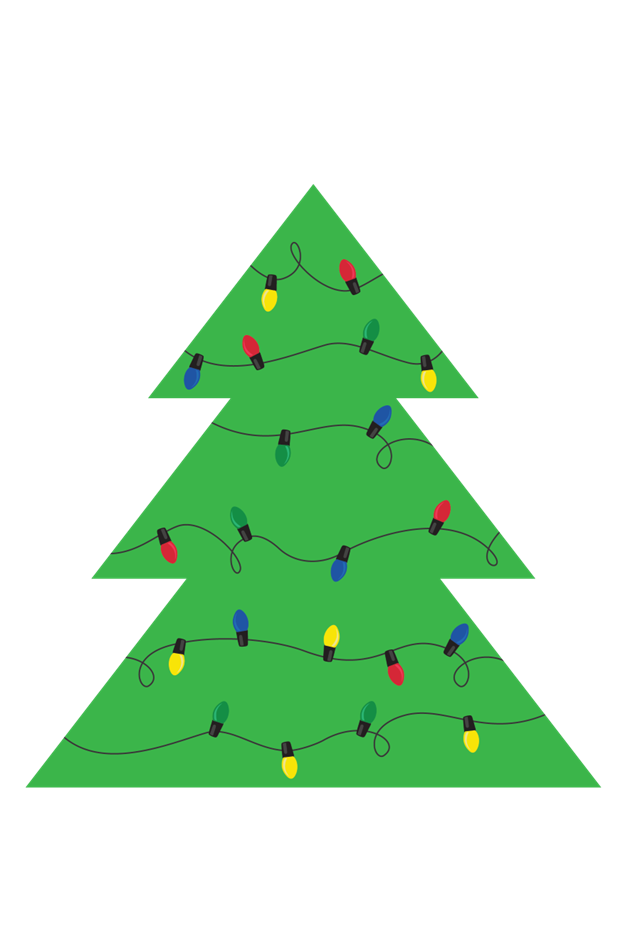
🔻Hanger Drop Box
- Build the boxes
- Build three 14x14x14 boxes. Tape the bottom only and fold the top flaps inward to leave the top open.
- Stack two boxes together bottom tape sided up and top tape side down; keep the third box nearby for swaps during the day.
- Do not use trash cans or trash bags for this setup.
- Set the box in place
- Place the open-top box at the register lane entrance.
- Ensure it does not create a trip hazard.
- Use a binder clip on each side of the logo to attach the “Sprint to the End Zone! Please Drop Hangers Here” sign.
- Inform the guest
- Use a quick, friendly line like: “You can drop your hangers right in the box!”
- Guest participation is optional, but we expect many guests will help.
- Maintain the box through the day
- When the top box gets full, swap it with the empty bottom box.
- Call the MOD to bring the third empty box and take the full one to be cleared.
- Based on how busy the store is:
- If busy: Keep collected hangers in the box until you can clear them.
- If slower: Move hangers to the Apparel Hanging Cart for shipment processing.
- Check the box regularly so it never overflows or looks messy.
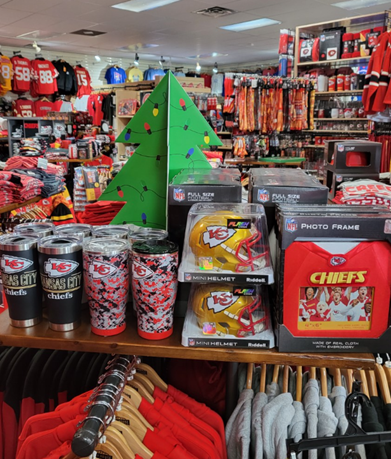
Example Photo
Post-Holiday
Elf Exchange Process Guide
Seasonal Hiring
Spinners

Holiday Decorations
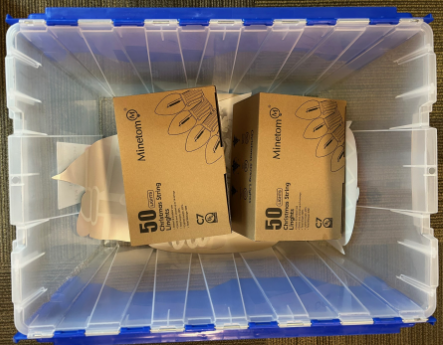
Christmas Ornaments
Ornaments are a festive, fan-favorite item. They’re perfect for gifting, display team pride on the tree, and let fans celebrate their favorite teams throughout the holiday season. Small, collectible, and full of personality, they help fans bring their passion and holiday spirit together.
Ornaments should start within the team section, once directed via Zipline, ornaments will be moved to a Seasonal Section at the register lane.
Peggable Ornaments🔽
Peggable Ornaments are ornaments not in a vendor provided box. These types of ornaments typically come with a string already attached- great for placing on Christmas trees (or store pegs) instantly.
- Peggable ornaments can be placed on the Team Christmas tree.
- Try not to keep all units of the same ornament on the tree.
- After the Team Christmas tree, peggable ornaments can be placed in the team Christmas display.
- These items can be featured alongside merchandise like team Christmas stockings, team tree skirts, and team boxed ornaments.
Boxed Ornaments🔽
Boxed ornaments come inside a vendor provided box. These can include breakable ornaments which should stay inside of it’s box.
- Boxed ornaments can be placed on shelves alongside other team Christmas merchandise.
- When the design is not shown on the outside of the box, if the ornament is not breakable, a display unit can be pulled from the box and placed as a display with the other boxed units when the design is not shown on the outside of the box.
Holiday Decoration Storage
Christmas Trees
- Remove all remaining product from the tree and return merchandise to its home location.
- Disassemble the tree starting with the top section, then middle, then bottom.
- Remove any screws holding the tree and stand together.
- Place screws in a plastic bag or polymailer.
- Fold branches upward to condense the tree and collapse the stand.
- Store all sections, the stand, and screws in the original tree box or a used shipping box if original box was not save.
- Label the box “Holiday Tree and Stand.”

Holiday Lights
- Remove the holiday lights from the command hooks in the store front windows.
- Command hooks can remain attached to the window for the next year.
- Fold the holiday lights into 2’ sections.
- Place in the Holiday Tote for the store (typically red or clear).
Holiday Rack Toppers
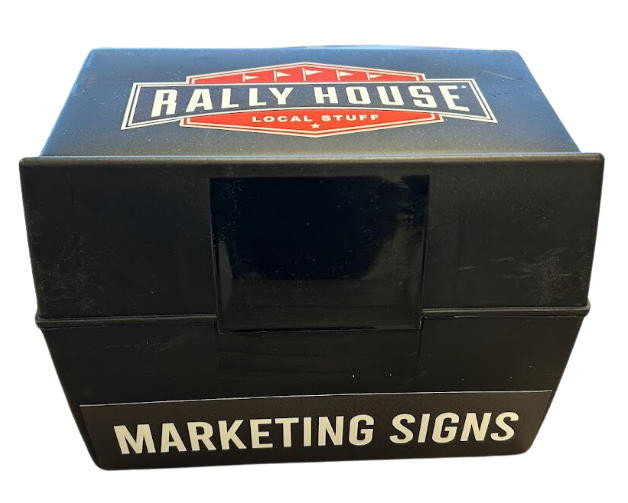
Walk the store and remove all holiday rack toppers from grid units.

Do not remove the black Rally House branded signs. These are permanent.
These holiday rack toppers are placed in the Marketing Signs box under the “Holiday” tab.

Ornament and Nutcracker Decals
Store front window holiday decals should be the first item removed and placed in the holiday storage tote. This allows the decals to lay as flat as possible in the bottom of the tote.
- Peel the decals off the store front window one by one.
- As one is peeled off, place the white liner backing back onto the decal.
- White liner backings should have been saved and placed in the holiday storage tote.
- If these were tossed, use wax paper.
- White liner backings should have been saved and placed in the holiday storage tote.
- Flat lay all decals into the Holiday Tote for the store (typically red or clear).
- It is OK if edges are bent upwards on the sides of the totes slightly.
Tabletop and Grid Green Trees (Fabric Storage Bag)
- For tabletop trees:
- Remove piece 1 from piece 2 so that the tree can be flat laid.
- For grid trees:
- Remove from the grid unit sign holder and place Rally House branded insert back into the grid unit sign holder.
- Place the tabletop green trees into fabric storage bag.
- 16 pieces fit per fabric storage bag.
- Add kraft paper to edges to fill out the bag.
- Zip up the bag.
- Store the tote(s) in the backroom alongside the holiday tote (red or clear).
- Label the outside of the box “Tabletop Green Trees”.
Lost storage bags will not be replaced.
Example Photo of Green Tabletop Trees in Bag With Kraft Paper 🔽
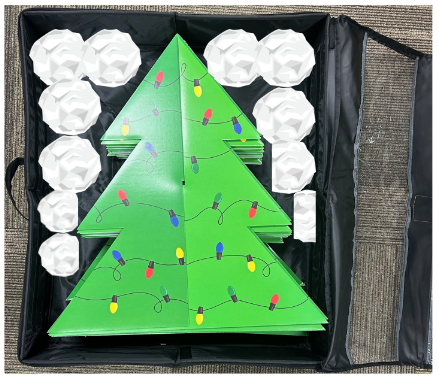
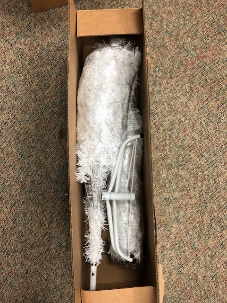
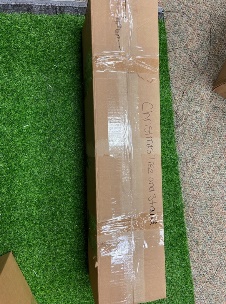
Tabletop Green Trees (Shipping Box)
- For tabletop trees:
- Remove piece 1 from piece 2 so that the tree can be flat laid.
- For grid trees:
- Remove from the grid unit sign holder and place Rally House branded insert back into the grid unit sign holder.
- Place the tabletop green trees into shipping box that store was to save.
- If boxes were tossed, store will need to open a case to operations to receive large cardboard boxes to store.
- Tape the box closed.
- Store the box(es) in the backroom alongside the holiday tote (red or clear).
- Ensure that the box has the “SAVE THIS BOX” label.
- Print the label on this resource on UPS printer if needed.
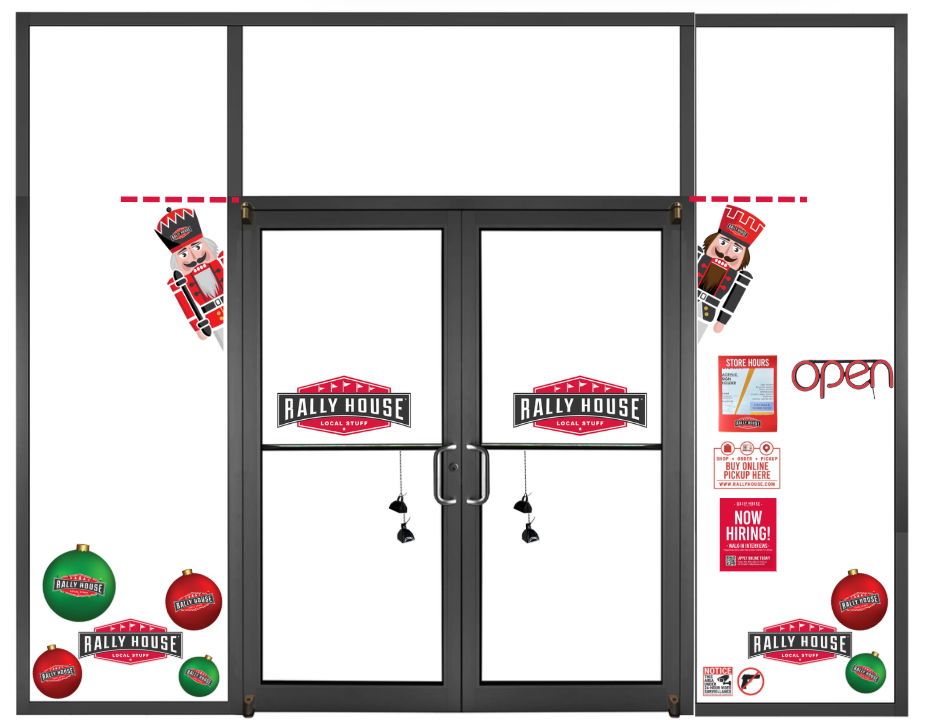
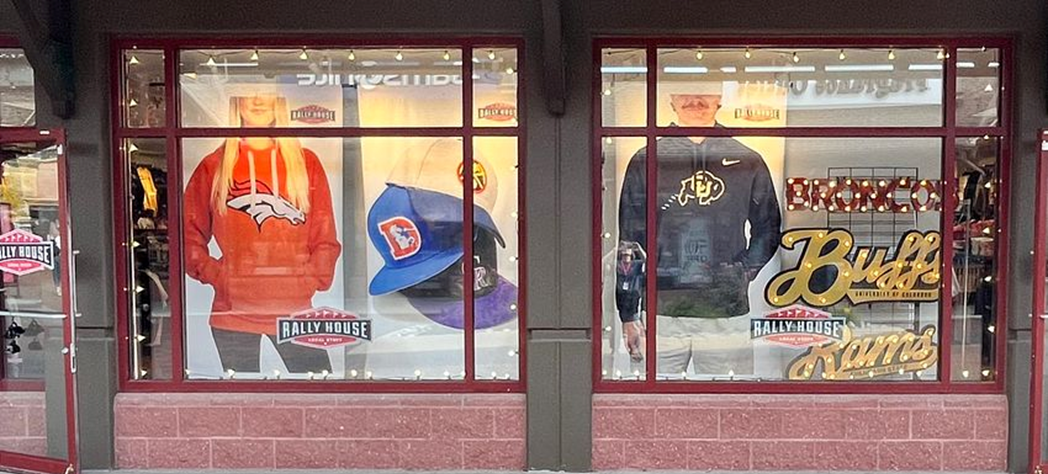
Step 1: Holiday Store Front Decals
Holiday window decals are placed before the Christmas lights have been hung in the windows. This ensures that the decals and lights do not interfere with each other.
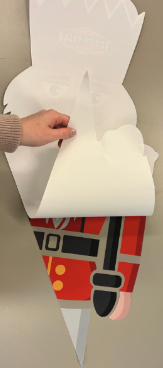
Nutcracker Decals 💂
Placement
- The top of the nutcracker’s hat should align with the top of the store door (shown with red dash line below).
- If the space beside the store’s front door is too small, use the next set of windows next to the front door.
Prepare the Window
- Clean the window where the decal will be placed with Windex and dry thoroughly.
Apply the Decal
- Spray the window again with Windex, but do not dry this time.
- Peel the cling from the white liner. Do not throw away the white liners.
- Place the decal on the wet window so it faces outward.
- If you make a mistake, gently remove the cling and reposition it.
Smooth Out
- Use a squeegee (or a gift card if needed) to smooth the decal and remove air bubbles.
After Installation
- Do not throw away the white liners. Collect them and store them in your store’s holiday storage tote.
- After the holiday season, place the decals back onto their white liners.
- If the decal covers the store hours sign, adjust the sign’s placement.
- If needed, reposition the “Now Hiring” sign in the window.
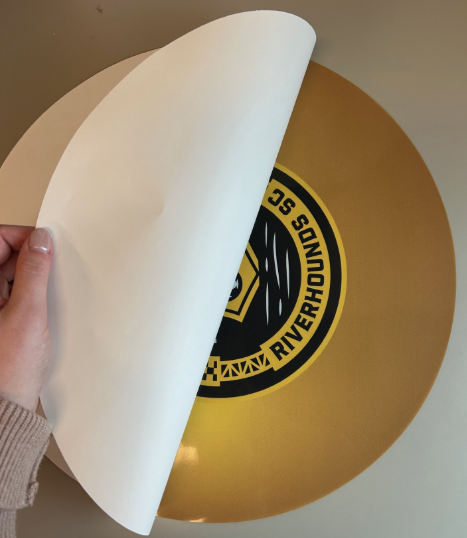
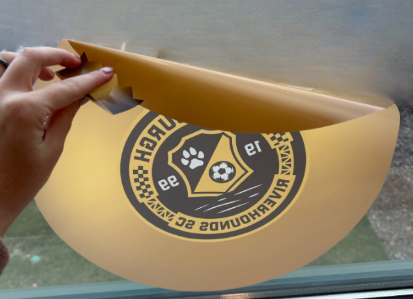
Ornament Decals 🔴🟢
Placement
- Ornament decals are placed on the bottom section of the window.
- Do not place decals higher than 24 inches from the ground.
- Be random with the decal placement.
- Be sure to give tilt and movement when applying the decals so that that visual is not stale.
- Do not block window banners or on-window graphics with decals.
Prepare the Window
- Clean the window area where decals will be placed with Windex and dry thoroughly.
Apply the Decals
- Spray the window again with Windex, but do not dry this time.
- Peel the decal from the white liner. Do not throw away the white liners.
- Ornament decals are placed on the inside of the window facing outwards towards the street/mall corridor.
- If you make a mistake, gently remove the cling and reposition it.
Smooth Out
- Use a squeegee (or a gift card if needed) to smooth the decal and remove air bubbles.
After Installation
- Do not throw away the white liners. Collect and store them in your store’s holiday tote.
- After the holiday season, place decals back onto the white liners.
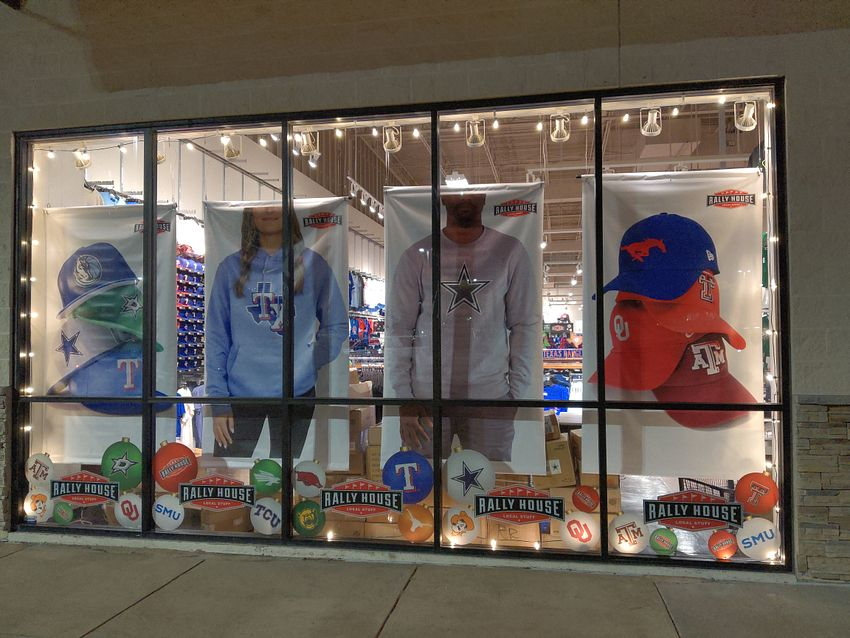
Step 2: Christmas Lights
Christmas Lights💡🎄
All stores are to have white C9 lights.
Stores opened prior to 2022 may have multi-colored icicle lights in addition to the C9 lights.
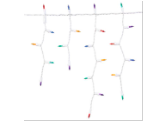
Where to Install 📍
- White C9 lights are installed around the perimeter of the stores window(s).
- Multi-colored icicle lights are placed along the top of the window only (applicable to stores opened prior to 2022 only)
- All lights are pulled tight and do not drape.
How to Install
- Stores will need command hooks to complete install. These can be found on the “Holiday 2025 Supplies” Amazon list.
- Stores will need a ladder.
- Stores will need to clean the interior of windows with Windex before hanging lights to allow the command strips to stick well.
- Remove the holiday lights from the holiday storage tote and plan the use of the extension cord based off of available outlets in the store front.
- Up to 10 strands of lights can run off one extension cord.
- Keep extension cords out of the path of the guest and tucked close to the wall.
- Plug the extension cord into the outlet and the lights into the extension cord.
- Begin hanging and place a command strip every 3′ to support the lights and keep them pulled tight.
- Complete hanging around the perimeter of the window(s).
- ✅Do put lights around the perimeter of the window(s)
- ❌Do not put lights around each mullion in the window(s)
- ✅Do put lights around the perimeter of the window(s)
Step 3: Christmas Trees
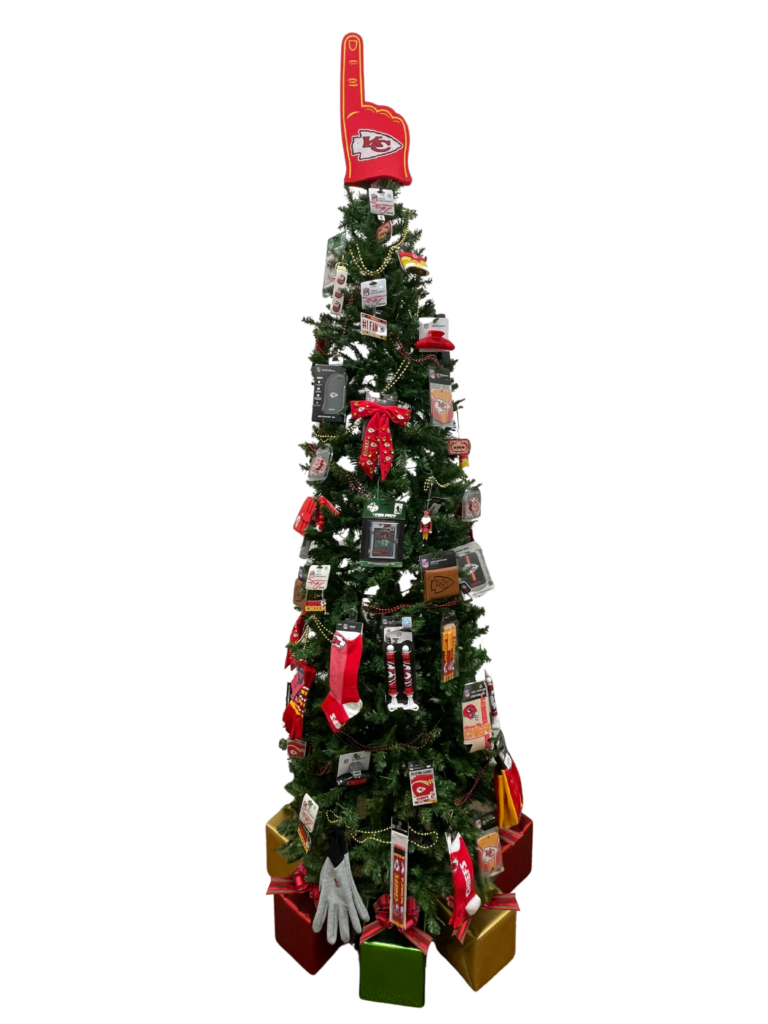
It wouldn’t be Holiday without a Christmas tree! Christmas trees are decorated at Rally House with merchandise that we sell. This is a great way to get into the festive mood while showcasing our product to the guest.
Placement
✅ Great placement options:
- Next to a 5G of Christmas items (preferably top team) at the front of the store
- Next to a 3-tier or 5-tier gift table at the front of the store
- Next to a column near the front of the store
❌ Not great placement options:
- In the fitting rooms
- Behind you when entering the store
- Anywhere the tree is hidden or not visible to guests
Team Representation
- Each tree should feature product from one dominant team.
- If your store has multiple trees, each tree can represent a different team.
Placing Product on Tree
✅ Great item options to place on Christmas Trees:
- Peggable and around 8–10 inches in size.
- Examples include (but are not limited to): hair bows, pens/pencils, playing cards, wallets, koozies, gloves.
- Items should have 6+ units available (try to steer away from Best Sellers with limited stock).
- Peggable ornaments.
- Beads can be used on trees in a horizontal orientation on the tree.
❌ Not great item options to place on Christmas Trees:
- Large items such as knit hats, pennants, license plate frames, or stadium seats on trees.
- Ornaments that come in a vendor specific box- these can be placed within the team section and register lane
- Tissue paper and pom-poms can create a crowded look on the tree, keep these items in the team sections
Having a full Christmas tree is a positive visual experience for the customer. Let’s help bring the Holiday spirit alive with our trees!
Presents Under Trees 🎁
- Stores are to order wrapping paper and bows from the “Holiday 2025 Supplies” Amazon list.
- Each store may order 1 (6)pack of bows and 2 colors of wrapping paper from the list.
- Stores can wrap 6x6x6 and 8x8x6 boxes and place them under the tree.
- Using six wrapped boxes under the tree keeps the tree area looking full and organized while allowing product on the tree to stand out. Using product or gift bags under the tree instead can look cluttered or uneven, taking away from a clean, polished display.
Star on Top 🌟
The “star” on top of the tree should be one of the following:
- A team knit hat
- A team hat
- A foam finger
Step 4: Tabletop and Grid Trees
Tabletop and grid unit trees are a simple yet impactful way to transform our salesfloor for the holiday season. While they are lightweight and easy to install, they create a warm, festive atmosphere that instantly signals Holiday to our guests. These trees are one of the key elements that make the shopping experience feel special, inviting, and memorable during this time of year.
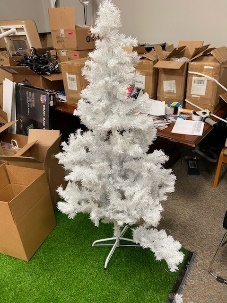
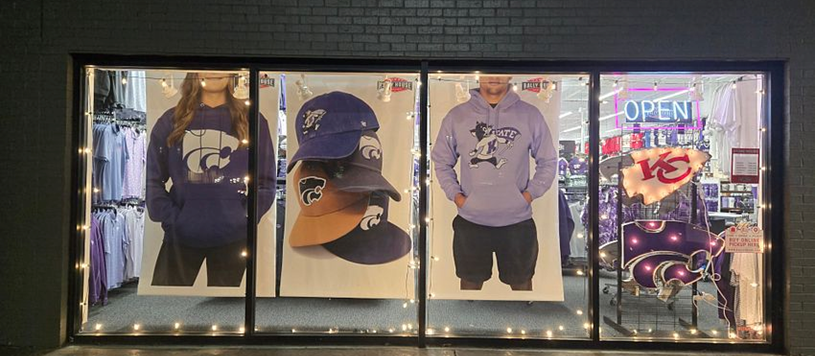
Tabletop Green Trees 🎄
Placement
- Place tabletop green trees on fixtures throughout the store.
- Position the tree between existing merchandise.
- Trees may be centered or slightly offset on the tabletop.
Assembly
- Take the two tree pieces.
- Slide piece 1 into piece 2.
- Push them together until fully secured.
Grid Unit Trees 🎄
Placement
- Place the Grid Unit Trees in your grid topper sign holders on 4G and 5Gs only.
- Stores will not be receiving enough trees for all sign holders.
- Stores opened prior to 2025 will only receive enough for their register lane.
- Stores will not be receiving enough trees for all sign holders.
- Grid unit trees will be placed in the register lane and the sales floor.
- The grid unit tree will not be used in the gifting section of your register lane.
- Be mindful of where your grid unit sign holders are. Stores should not have all grid unit trees in one section, spread and stagger!

Step 5: Holiday Marketing
Holiday grid rack toppers add a seasonal touch and guide guests to key services like gift cards, online shopping, and hiring info, helping them get everything done in one visit.
Placement🔻
Each grid unit that has a grid unit sign holder should have Holiday grid rack toppers.
- Grid Headers should have one decoration and one message topper.
- Decoration is considered un-informational marketing. (Nutcrackers, snowflakes, ralalala, etc.)
- Message is considered informational marketing. (Join our team, give the gift that always gives, etc.)
- Stores should still utilize any other gird unit inserts such as New Arrivals, Elevated Brands, Upcoming Events, etc.
- Rack toppers are placed on both the front and back of the sign holder.
- You need 4 rack toppers per grid sign holder.
- Mix & Match your grid unit inserts to create a personalized holiday look around your store!
Holiday Hours
This folder contains the store hour signs for November and December. Editable versions are in this folder for stores who are not following the template hours to create their own store hours sign.
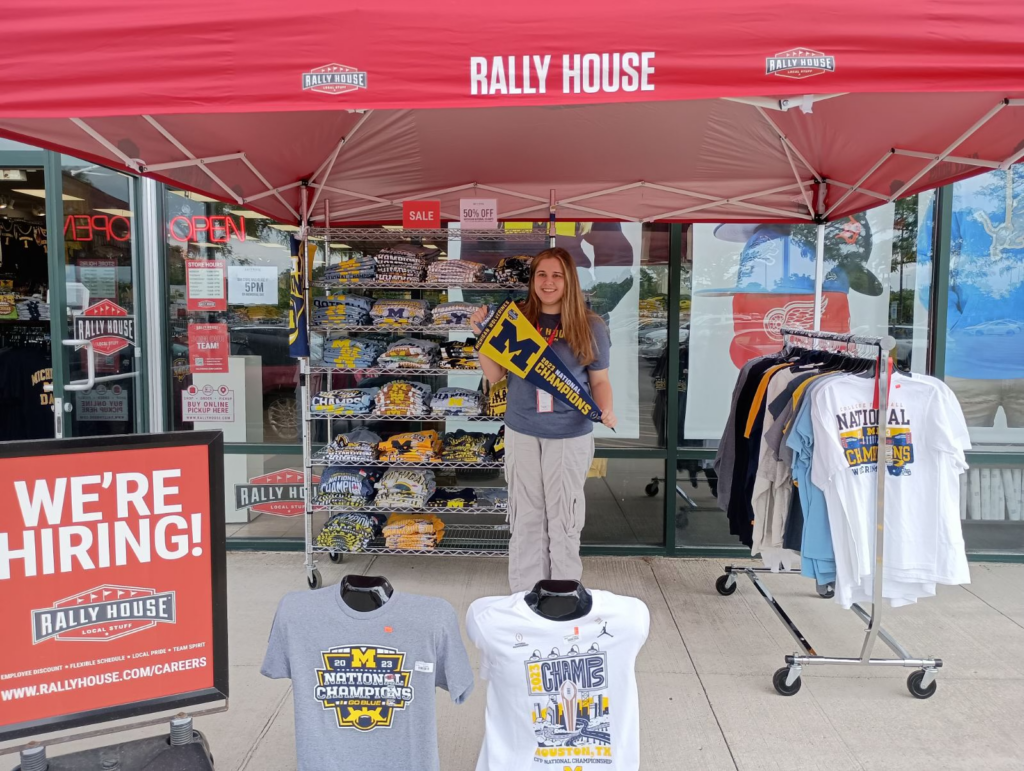
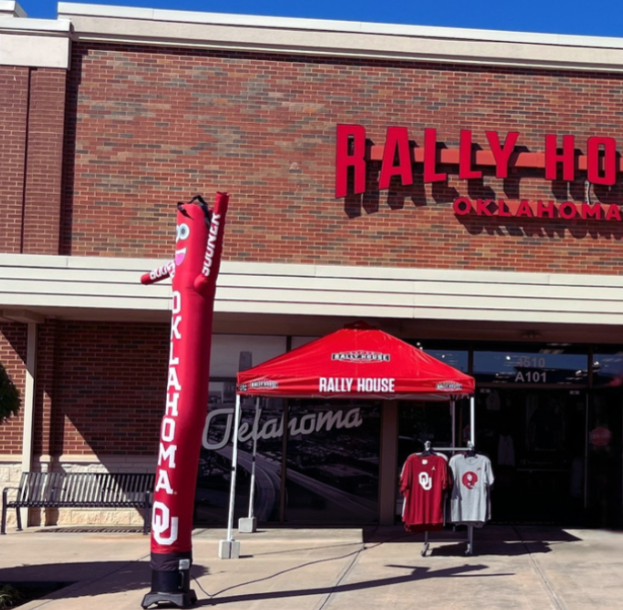
Outside Events and Tent Sale & Set-Up
Outdoor Events or a Tent Sale is a great way to drive traffic into the store and increase sales! 🎪 Not all stores may be able to have the tent. If you are unsure for your store, reach out to your District Manager.
Outdoor Event Overview
- Tents are most often placed outside on the weekend.
- The preferred product that is placed under the tent is SALE product.
- Event and campus stores may have product that is relevant to orientation, freshman move in, game day, etc.
- 1-3 racks of SALE merchandise are placed under the tent.
- Chrome fixtures are preferred for outdoor.
Securing Tent
There are 2 options for securing a tent. Tents should not be taken outside if there are high winds (5+ MPH) or severe weather.
Cinderblock Method
- 4 Single Hole Cinderblocks, paracord rope (with a 160-200 weight limit), and 4 S-hooks will need to be purchased to keep the tailgate tent in place and from blowing away.
- Complete a Paid In/Paid Out and attach receipts in NetSuite or it will not be approved.
- Place the leg of the tent into the center of the cinderblock for extra support.
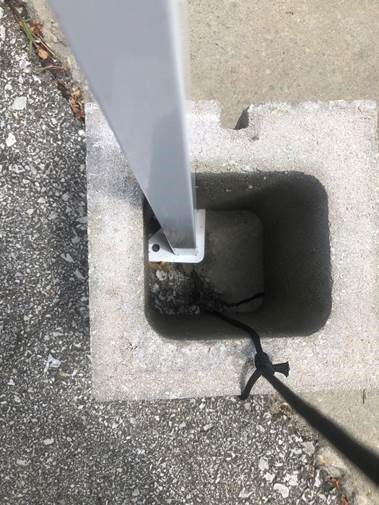
- Loop the rope around the cinder block once and then tie securely. Tie two loops in the other end of the rope so that the S-hook can be fastened around the canopy bars.
- This will allow you to unhook the rope from the tent each night easily.
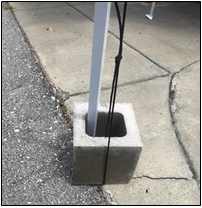
- Tailgate tent will need to be set up by store staff and taken down each night. Product that is brought out needs be placed back inside the store at nighttime.
- Cinderblocks can be left outside during the night but moved out of the way so they are not a hazard.
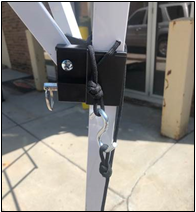
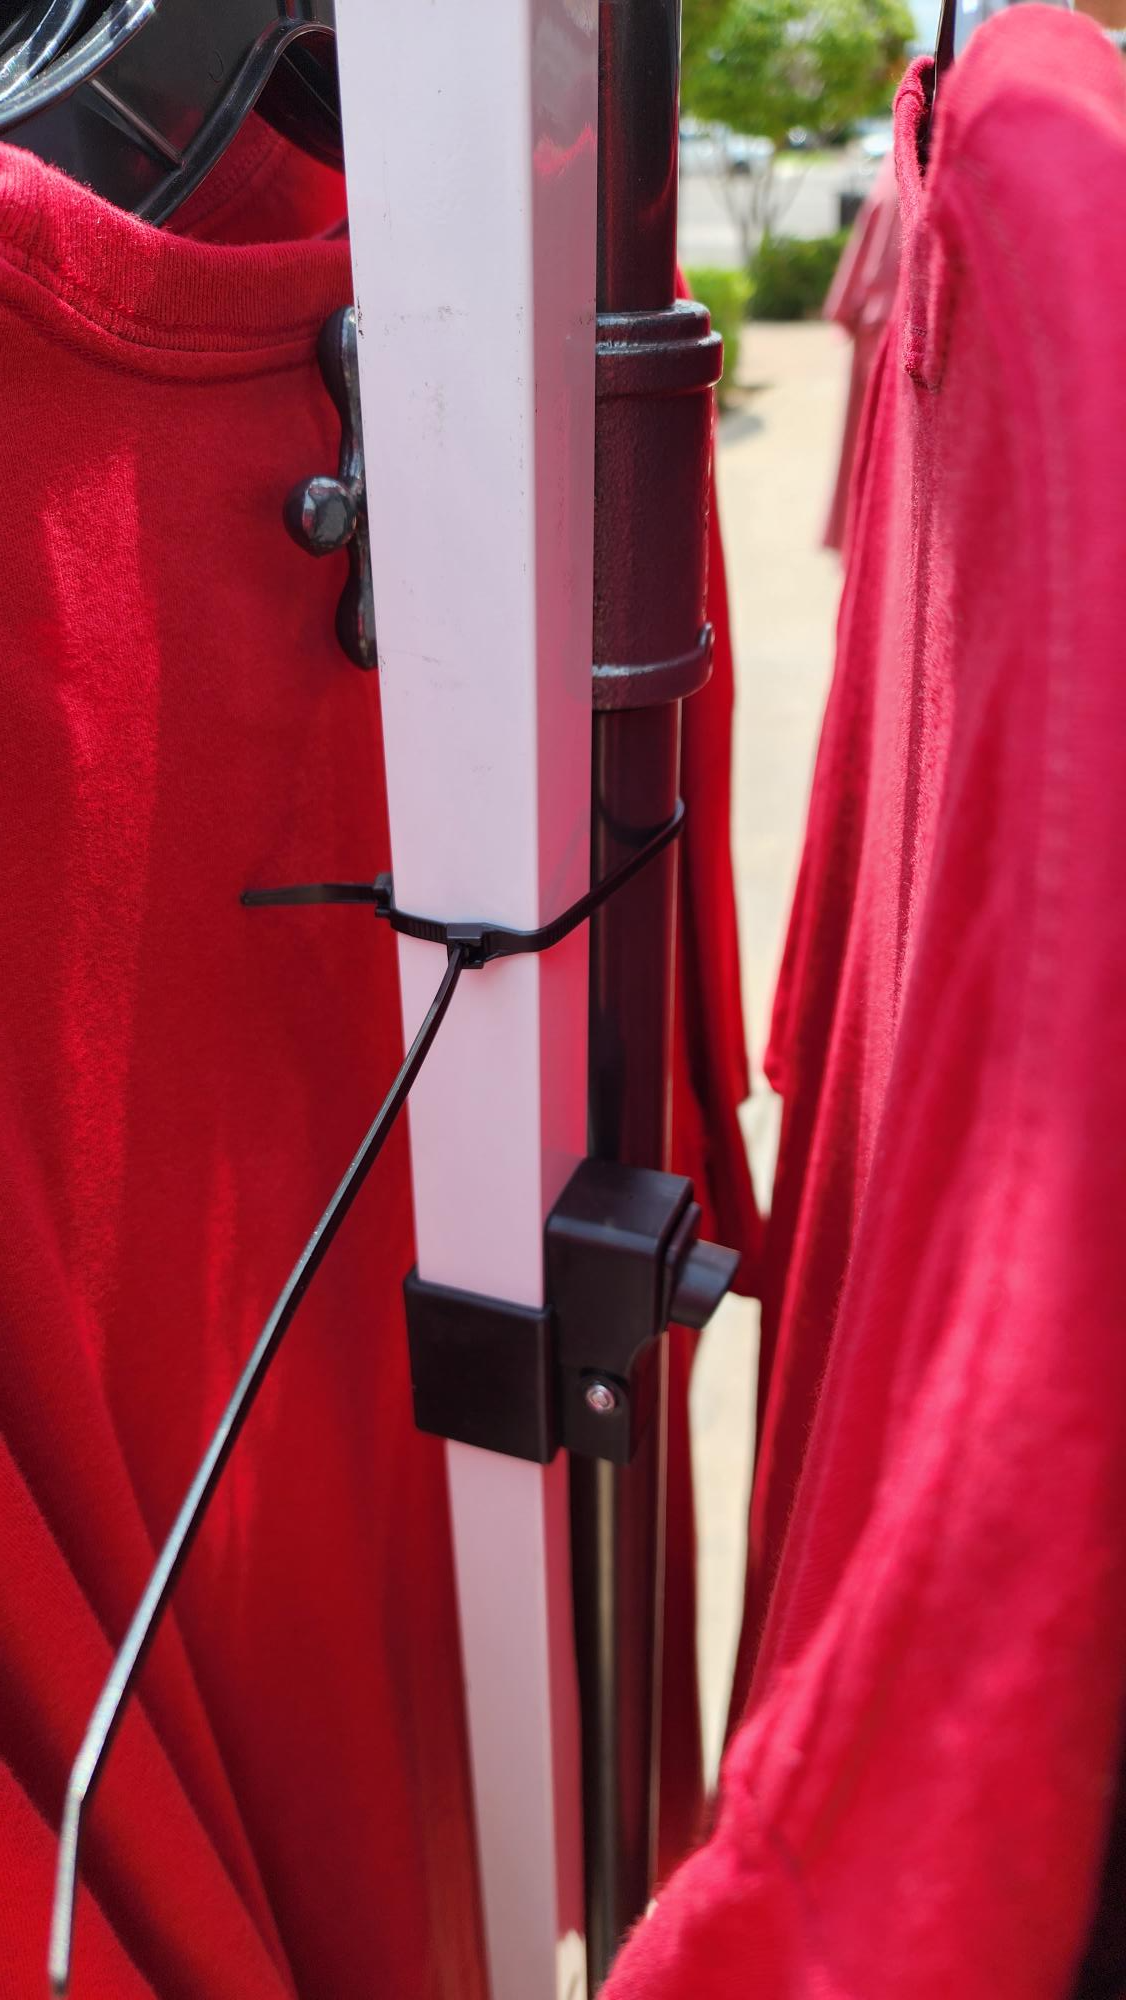
Fixture Method
- 4 Single Hole Cinderblocks and zip ties will need to be purchased to keep the tailgate tent in place and from blowing away.
- Complete a Paid In/Paid Out and attach receipts in NetSuite or it will not be approved.
- Place the leg of the tent into the center of the cinderblock for extra support.
- Place a rolling, 2 way, chrome 4-way, or baker’s rack in each corner. Ziptie the fixture to the tent pole.
- Tabletop fixtures and Z Racks are not permitted to be outside in the tent.
- Tailgate tent will need to be set up by store staff and taken down each night. Product that is brought out needs be placed back inside the store at nighttime.
- Cinderblocks can be left outside during the night but moved out of the way so they are not a hazard.

Happy Tenting!