How to Build a Style in NS
Building a style is the first step when ordering a new product from a vendor. Some of the most important things needed to build a new style are MPN(manufacturer product number), UPC(universal product code), Wholesale price and MSRP (manufacturer suggested retail price).
When building a smaller amount of new styles its best to use Netsuite.
- Open your web browser and visit https://system.netsuite.com/pages/customerlogin.jsp
- On your shortcut tab select Create New Matrix Item (For this example we’re building a 7ft Cincinnati Bearcat Inflatable Mascot by Logo Brands)
Primary Information
- Style Number / This is what we’ll identify this product as similar to MPN but for Rally House.
This is created on the Rally House Admin site.
Under Purchasing / Auto Numbering Tool / Vendor Number ex 123xxxxx
These numbers vary by vendor and the first three numbers are usually given to you by Buyer or you can use VLM to search for similar products from the vendor you’re working with. The last few numbers are created by our system once submitted.
- Create a POS Name ex: Cincinnati Bearcats Inflatable Mascot
- Team = NCAA-Ciny Bearcats (refer to your Rally House Team Master List for all team codes)
- League – NCAA
- Primary Color = Red (most team colors are on the Team Master List as well if not use google and your best judgement)
- Web Style / This is a short description of the product) = 7ft Mascot
- Web Description / this is where you describe the item without using the team’s name or subclass) = show your team pride with your favorite team mascot
- Season Code / this is usually different for the category you’re buying for) = C is for Core and is used majority in hardlines
- MPN / usually included with information about product from vendor = 121-100-M
- Origin / this is where the product was manufactured = Import
- Material ID / this varies be category for example a t-shirt could be Cotton but for this example it’ll = NA
- Cost / this is how much we’re paying for the item = 77.50
- Original Price / this is how much we’re selling the item for aka retail price = 160.00
- Item Type / This helps identify the type of tax applied to an item = Hardlines
- Silhouette / These are very important for customers when purchasing items from our webstore. This is a bullet point description of the item to give the customer a good idea of what’s being purchased.
Classification
- Class / This is where we select the category for product. Helps when sorting items and tracking sales. = HARDLINES : OUTDOOR : INFLATABLES
- Merch Dept = HARDLINES
- Merch Class = Outdoor
- Merch Subclass = Inflatables
Purchasing / Inventory
- On this section you’ll want to scroll down to where you see Locations. Vendors
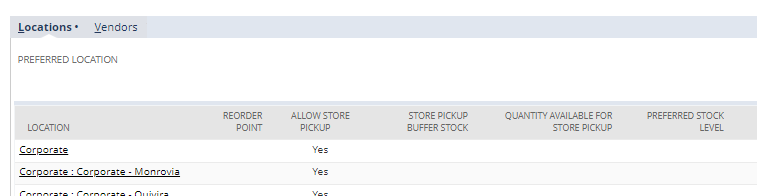
Click on vendors (add vendor) = Logo Brands
Sales / Pricing
- Enter Sales Description = University Of Cincinnati Inflatable Mascot
- Under price Levels in the first column of squares enter Base Price Original Price and Online Price = our retail price of 160.00 for all three
Size / Accounting
- Size List ID = NA for Hardlines but will be different for other categories
Matrix Item Name Template should automatically fill with something like {itemid}-{custitem_hardline_sizes}
- At the top of the webpage select Action – Create Matrix and follow the prompt.
- After the item is successfully created Add UPC’s to the Item Child
- Copy and Paste style number into the search bar of NetSuite
- Pull up the child of style this usually will have N/A associated with it ex: 1381057 : 1381057-NA
- Edit this style and paste UPC under UPC code and save.
If you ever run into a problem creating a style you can always find similar products under this category in Visual Line Manager to help you with filling out this form.
How to Build a Style with BOB
Building a style is the first step when ordering a new product from a vendor. Some of the most important things needed to build a new style are MPN(manufacturer product number), UPC(universal product code), Wholesale price and MSRP (manufacturer suggested retail price).
When building a larger amount of new styles it’s best to use the BOB method. This is an excel spreadsheet that can be uploaded into Rally House’s Admin site and will autofill everything that is entered using NetSuite when creating styles.
- Open the BOB Spreadsheet in Excel and click the Prebook Master tab
You’ll use some of the same steps as if you were building the style on NetSuite so refer back to the How To Build A Style in NetSuite instructions.
- Team = (refer to your Rally House Team Master List for all team codes)
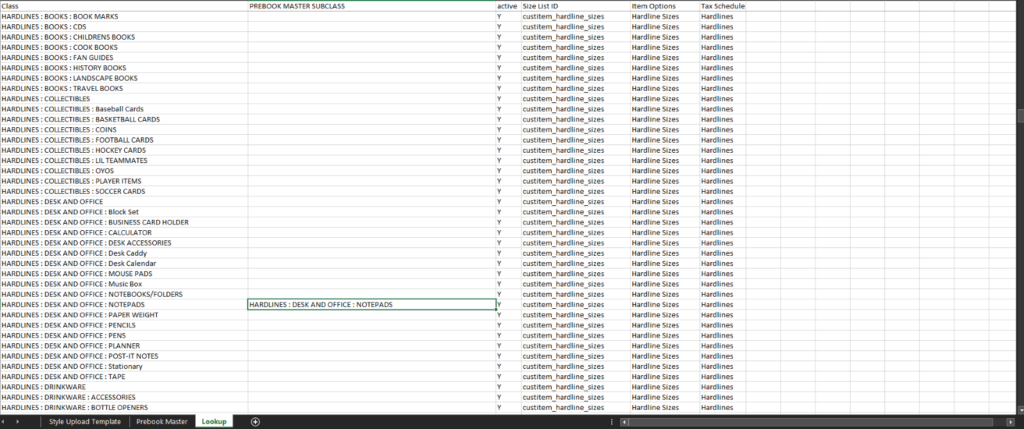
- Subclass – click on Lookup tab to find correct subclass.

Copy the class and paste into the Prebook Master Subclass Column.
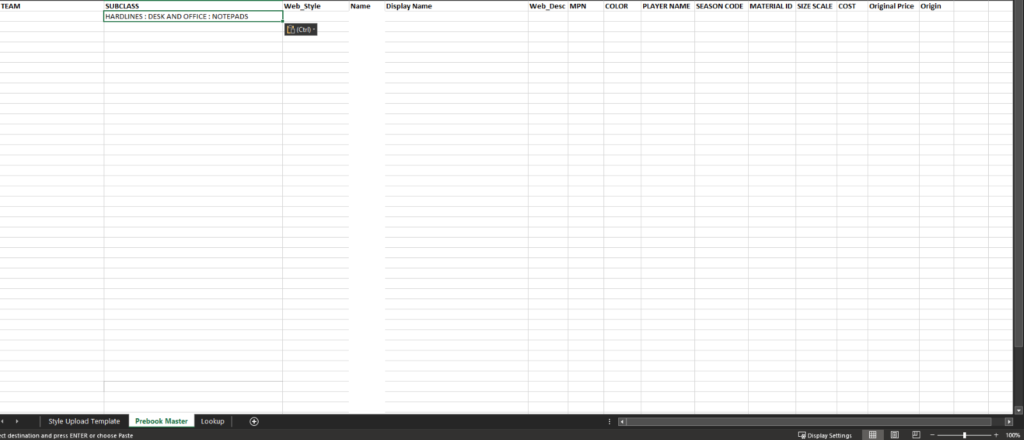
Then copy the info from the prebook master subclass column into the Prebook Master.
- Web Style / This is a short description of the product) ex: College Ruled or Wide Ruled
- Display Name / this is the team – web style – subclass ex: LA Rams College Ruled Notepad
- Web description / describe item without including team name and subclass ex: team logo and team colors
- MPN / usually included with information about product from vendor = 121-100-M
- Color / can usually be found on the team master list
- Player name / If provided usually for items like jerseys or specialties
- Season Code / this is usually different for the category you’re buying for) = C is for Core and is used majority in hardlines
- Material ID / this varies by category for example a t-shirt could be Cotton but for this example it’ll = NA
- Cost / this is how much we’re paying for the item
- Original Price / this is how much we’re selling the item for aka retail price
- Origin / this is where the product was manufactured = Import
- Name is similar to Style Number in NetSuite – / This is what we’ll identify this product as similar to MPN but for Rally House.
- This is created on the Rally House Admin site.
- Under Purchasing / Auto Numbering Tool / Vendor Number ex 123xxxxx
- These numbers vary by vendor and the first three numbers are usually given to you by Buyer or you can use VLM to search for similar products from the vendor you’re working with. The last few numbers are created by our system once submitted
- Once these numbers are entered under name everything will autofill on the tab title Style Upload Template
- On the Style Upload Template tab if everything was entered correctly it’ll copy over to here
- Focus on the columns that are highlighted orange. Vendor and Sizes
- Enter the vendor name exactly how it’s listed in NetSuite.
- Enter the size information under the specific category the item is being created under. If there are multiple sizes; The format is the size, comma, the next size. No spaces. (example: S,M,L,XL,2XL,3XL). *Note: Women’s and Men’s sizes should be placed in separate columns according to the header
- You’ll copy everything from this spreadsheet to a new spreadsheets that was created just for Rally House Admins site. It’s titled Item Upload Template
- Paste the information that was copied from the previous spreadsheet here and follow specific instructions given by the buyer. On this spreadsheet you’ll want to make sure everything is correct.
- Save this spreadsheet under something new ex vendor0906
- Open your web browser and visit https://admin.rallyhouse.net/ and log in
- Under the Purchasing tab select Item Creation Tool – Item Creation Import
- Upload the file you just saved. It can take up to 5 minutes for new style to upload.
- To check the status of the items that were just uploaded under the Purchasing tab go down to Item Creation Tool and select Item Creation Report.
- Change the submitted on / after date to today or when its was created if you’re looking for an old style you made.
- Keep the status on -Any-
- Check my uploads only to view your items specifically then press search.
- This screen will show you any style you created and the status.
- Working – still uploading
- Unsuccessful Submission / Failure – There was a problem uploading check your Excel spreadsheets to make sure everything is correct
- Success – Item was uploaded with no issues.
- If everything was successfully uploaded the next step is to add UPC’s to the Child item.
- In NetSuite on your shortcut tab you can select My Recent Item Creation
- Date created – ex: 08/13/2022
- Select the vendor you made these items, and the items should automatically pop up.
- Change Matrix Child Item from -All- to Yes this will bring up the child items of the product
- Click the Edit bar to which will change it to green with a check mark
- Under UPC Codes enter the UPC’s that were provided. Be sure to tab over after each UPC is entered to lock it in.
- Once done entering UPC’s click the edit bar and everything should be saved.
- Run Items through the Manual NS Import
- Send style upload sheet to the buyer that requested the builds